Configuration Using The Control Panel
35
Configuration Using The Control Panel
SMART
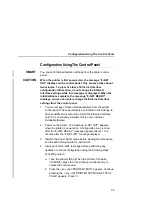
You can set Ethernet Interface settings from the printer control
panel.
CAUTION
When the printer is first powered on, the message “E-NET
INIT” displays on the control panel. This process takes about
two minutes. To prevent a loss of Ethernet Interface
configuration information, do not change the Ethernet
Interface settings while this message is displayed. When the
initialization is complete, the message “E-NET READY”
displays, and you can safely change the Ethernet Interface
settings from the control panel.
1.
You can set any of three listed parameters from the printer
control panel. These parameters are located in the Arrange to
have an IBM service technician install the Ethernet Interface
card if it is not already installed; this is not a customer
installable feature.
2.
Power on the printer. The message “E-NET INIT” appears
when the printer is powered on. Configuration can be done
after the “E-NET READY” message appears (about 1 to 2
minutes after the “E-NET INIT” message displays).
3.
Disable the Power Saver mode before starting this procedure,
see the 4400 Setup Guide for instructions.
4.
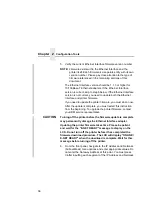
Always print an E-NET test page before performing any
updates or network configuration using the following steps:
For 4400 printers:
a.
Take the printer offline. When the printer LCD reads,
“OFFLINE,” press the
↓
and
↵
keys simultaneously to
unlock the control panel.
b.
Press the + key until “PRINTER TESTS” appears. Continue
pressing the + key until “PRINTER TESTS/E-NET TEST
PAGE” appears. Press
↵
.
Summary of Contents for 4400 Series
Page 2: ......
Page 3: ...G544 5769 03 User s Manual 4400 Series Thermal Printer Basic And Smart Ethernet Interface ...
Page 14: ...Table of Contents ...
Page 30: ...Chapter 1 Interfaces 30 ...
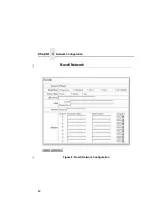
Page 48: ...Chapter 3 Network Configuration 48 Novell Network Figure 8 Novell Network Configuration ...
Page 72: ...Chapter 3 IBM Printing Systems 72 ...
Page 90: ...Chapter 4 Windows Host Configuration 90 8 Select Custom and click Settings ...
Page 92: ...Chapter 4 Windows Host Configuration 92 10 Click Next 11 Click Finish ...
Page 94: ...Chapter 4 Windows Host Configuration 94 14 Select Yes then click Next 15 Click Next ...
Page 108: ...Chapter 4 Windows Troubleshooting Tips 108 ...
Page 128: ...Chapter 5 Unix Troubleshooting Tips 128 ...
Page 184: ...Chapter 8 OS 2 Workstation Configuration 184 ...
Page 200: ...Chapter 9 AS 400 ASCII Troubleshooting 200 ...
Page 242: ...Chapter 11 Handling MVS Connectivity Problems 242 ...
Page 256: ...Chapter 13 Monitoring Tools 256 ...
Page 284: ...Chapter 15 Complete Command List 284 ...
Page 292: ...Chapter 16 Ethernet Interface Naming Schemes 292 ...
Page 304: ...Communication Statements 304 ...
Page 310: ...Chapter 310 ...
Page 322: ...Index 322 ...
Page 325: ......

