Chapter 11
Handling MVS Connectivity Problems
240
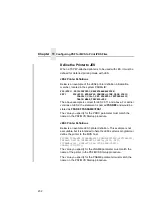
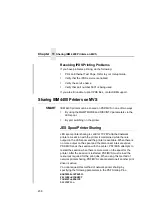
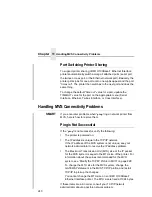
Port Switching Printer Sharing
To support printer sharing, IBM 10/100Base-T Ethernet Interface
printers automatically switch among all attached ports (serial port,
the twinax or coax port, or the Ethernet network port). Basically, the
printer prints jobs for one port until no new jobs appear and the port
“times out”. The printer then switches to the next port and does the
same thing.
To change the default “time out” value for a port, update the
TIMEOUT value for the port on the appropriate menu (Serial
Interface, Ethernet, Twinax Interface, or Coax Interface).
Handling MVS Connectivity Problems
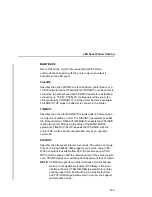
SMART
If you encounter problems when “
ping
”-ing a network printer from
MVS, here is how to resolve them.
Ping is Not Successful
If the “
ping
” is not successful, verify the following:
•
The printer is powered on.
•
The IP address is unique in the TCP/IP network.
If the IP address of the MVS system is not unique, see your
network administrator to resolve the IP address problem.
•
The Maximum Transmission Unit (MTU) size of the IP packet
for the MVS system is equal to the MTU size of the printer. For
information about the values recommended for the MVS
system, see “Modify the TCP/IP Profile in MVS” on page 228.
To change the MTU size for the MVS system, change the
GATEWAY statement in the MVS TCP/IP profile, and restart
TCP/IP to pick up the changes.
You cannot change the MTU size on an IBM 10/100Base-T
Ethernet Interface printer. The MTU size is fixed at 1024 bytes.
If these items are all in order, consult your TCP/IP network
administrator about a possible network problem.
Summary of Contents for 4400 Series
Page 2: ......
Page 3: ...G544 5769 03 User s Manual 4400 Series Thermal Printer Basic And Smart Ethernet Interface ...
Page 14: ...Table of Contents ...
Page 30: ...Chapter 1 Interfaces 30 ...
Page 48: ...Chapter 3 Network Configuration 48 Novell Network Figure 8 Novell Network Configuration ...
Page 72: ...Chapter 3 IBM Printing Systems 72 ...
Page 90: ...Chapter 4 Windows Host Configuration 90 8 Select Custom and click Settings ...
Page 92: ...Chapter 4 Windows Host Configuration 92 10 Click Next 11 Click Finish ...
Page 94: ...Chapter 4 Windows Host Configuration 94 14 Select Yes then click Next 15 Click Next ...
Page 108: ...Chapter 4 Windows Troubleshooting Tips 108 ...
Page 128: ...Chapter 5 Unix Troubleshooting Tips 128 ...
Page 184: ...Chapter 8 OS 2 Workstation Configuration 184 ...
Page 200: ...Chapter 9 AS 400 ASCII Troubleshooting 200 ...
Page 242: ...Chapter 11 Handling MVS Connectivity Problems 242 ...
Page 256: ...Chapter 13 Monitoring Tools 256 ...
Page 284: ...Chapter 15 Complete Command List 284 ...
Page 292: ...Chapter 16 Ethernet Interface Naming Schemes 292 ...
Page 304: ...Communication Statements 304 ...
Page 310: ...Chapter 310 ...
Page 322: ...Index 322 ...
Page 325: ......


