


A
A
u
u
t
t
o
o
S
S
c
c
a
a
l
l
e
e
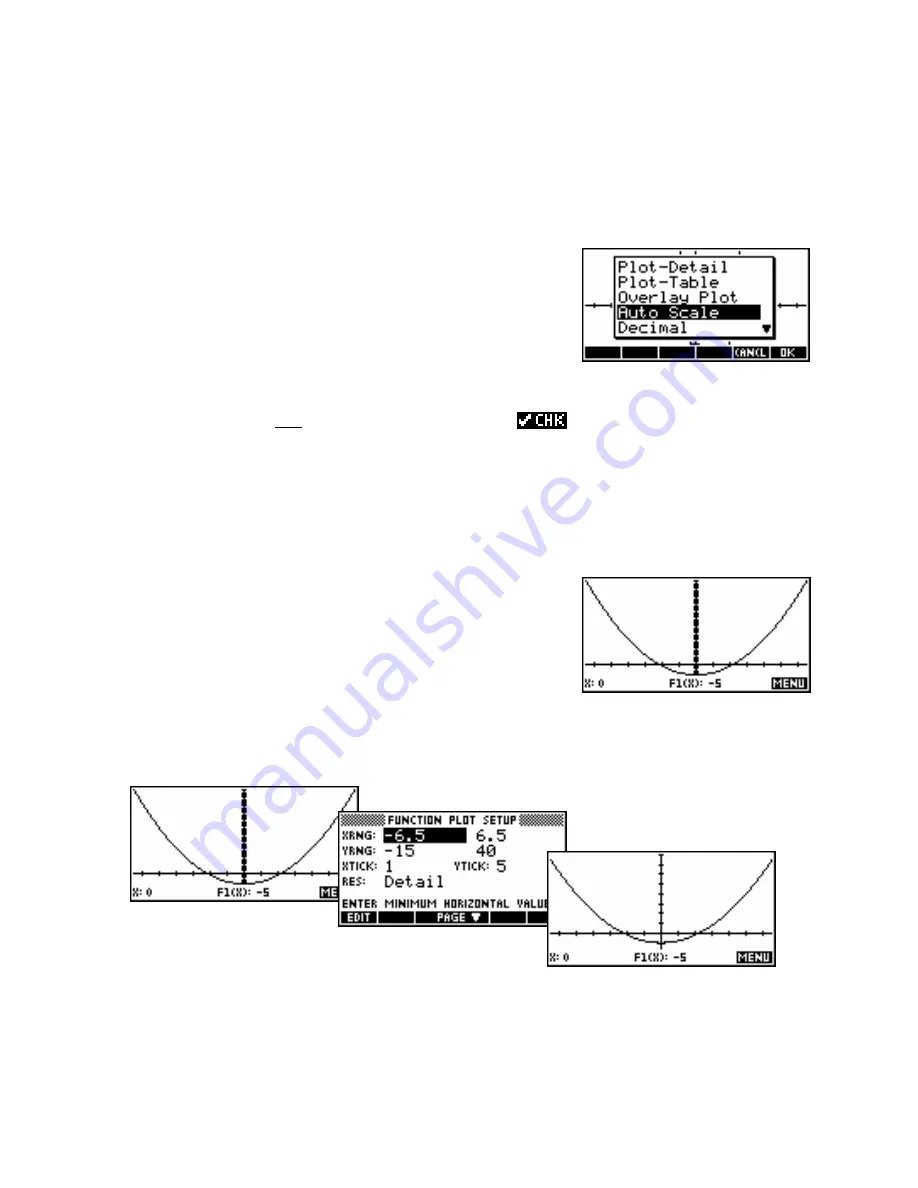
Auto Scale attempts to fit the best possible vertical scale to the horizontal scale you have chosen. It is not
always successful but will often give you a good starting point from which to refine the scale. In the example
which follows it is assumed that you have plotted the graph as shown on the previous page.
In the
PLOT
view, press the
VIEWS
key. Use the arrow keys to scroll
down to
Auto Scale
and press
ENTER
. The calculator will adjust the y
axis in an attempt to fit as much of the graph on to the screen as
possible.
Some points to bear in mind;
•
the y axis is scaled only on the first function which has a
.
•
the y axis is scaled for the current x axis (domain) you have chosen in
PLOT SETUP
. If you’ve not
chosen the domain wisely then your result may not be good.
•
it doesn’t choose ‘nice’ scales for the y axis such as we would choose (going up in 0.2’s or 5’s or
10’s etc.) so you will generally need to tidy up its choice a little.
If you look at the y axis of the graph you’ve just produced, you’ll see that
the axis tick marks are so close together that it looks like a solid line. To
tidy this up you must change to the
PLOT SETUP
view. If you look
above the
PLOT
,
SYMB
and
NUM
keys you will see the word
‘
SETUP
’. The
SETUP
view for each of these keys is obtained via the
SHIFT
key.
The values produced by the Auto Scale are shown below, along with a better set that produces a clearer
PLOT
view. Note particularly the
YTick
setting that removes the ‘thick’ effect on the y axis.
See “The Expert” chapter beginning on page 62 for more information on how to find good choices for axes.
The Auto Scale function is also covered on page 89.
49