


E
E
x
x
a
a
m
m
p
p
l
l
e
e
a
a
p
p
l
l
e
e
t
t
#
#
3
3
–
–
T
T
r
r
a
a
n
n
s
s
f
f
o
o
r
r
m
m
e
e
r
r
r
r
e
e
v
v
i
i
s
s
i
i
t
t
e
e
d
d
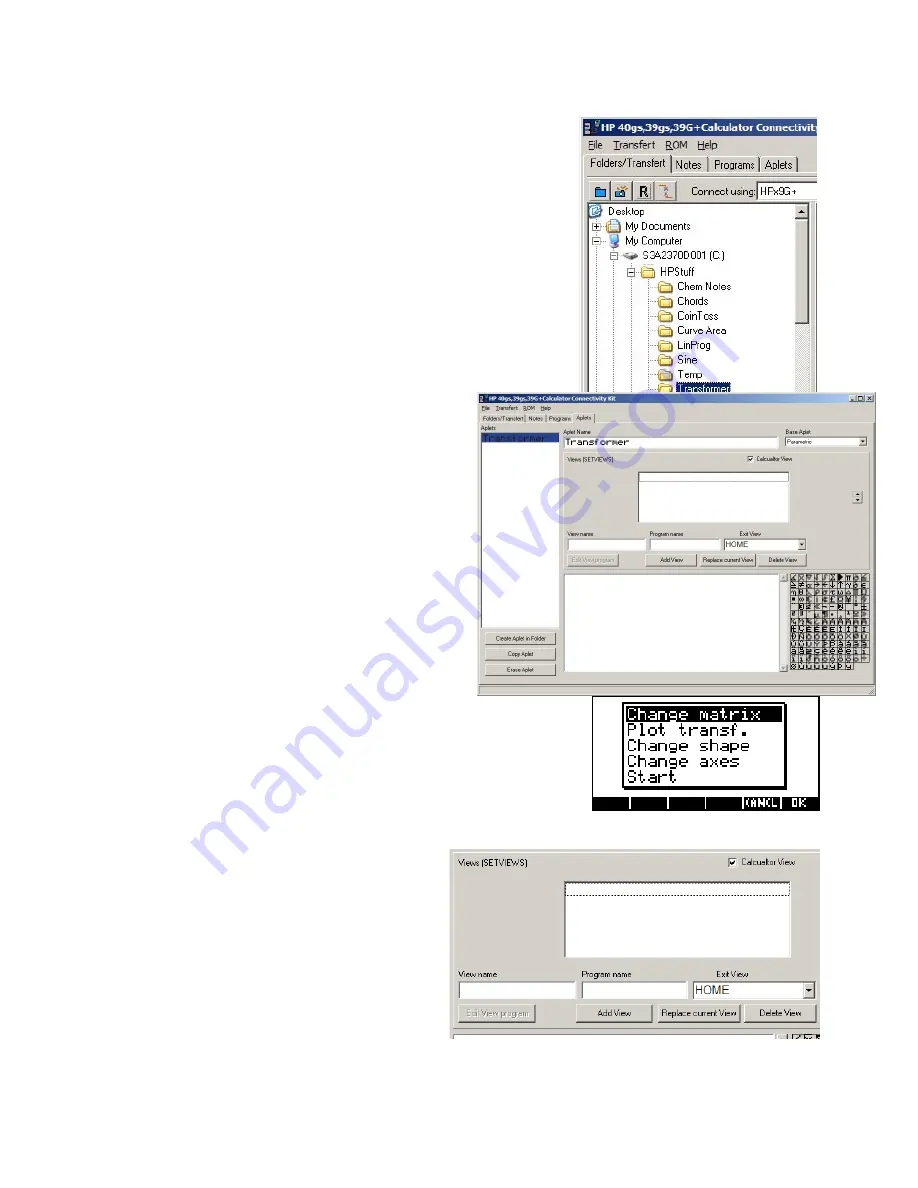
Run the Connectivity Kit and use the File menu to create a new folder
called “Transformer”, and highlight that folder to hold your aplet. In my
experience it is a very good idea to store each aplet in a separate
folder but this is not strictly necessary.
Change to the Aplet tab view to see the view shown
right. Create a new Aplet, selecting a Base Aplet of
“Parametric” and using the appropriate button. Change
the name of the aplet to “Transformer” as shown.
The aim now is to create the
Views
menu, adding code to each view as
we go. If you are not sure what the
Views
menu is then you should go
back and read the information starting on page 255 before proceeding.
This is done using the portion of the screen shown to the right. As was
explained on page 259, the
SETVIEWS
command works using triplets of information and this screen simply
automates this process. For each entry you supply a
View Name
(the text that is to appear in the menu),
a
Program Name
(this program runs when they
choose this option) and an
Exit View
(the view that
you are placed in when the program finishes
running).
As you enter each triplet of information you should press the
Add View
button to add it to the menu. Other
buttons are provided to delete an entry or to edit it by replacing the currently highlighted one with yours.
272