2-26
888-2517-001
1/3/05
WARNING: Disconnect primary power prior to servicing.
eCDi ™
Section 2 Installation & Setup
2.8
eCDi™ Configuration
Now that the eCDi™ unit is turned on, connect an external computer with a 10 base T
network connection directly to the ethernet port on the front of the eCDi™ using the
provided ethernet cable labeled “Configure.” This port
must
be used for the initial
configuration of the unit.
As of eCDi™ software Rev 2.6.K, the configuration port has a
fixed IP address of
192.168.217.254
or a name of ecdi-local on all units
.
STEP 1
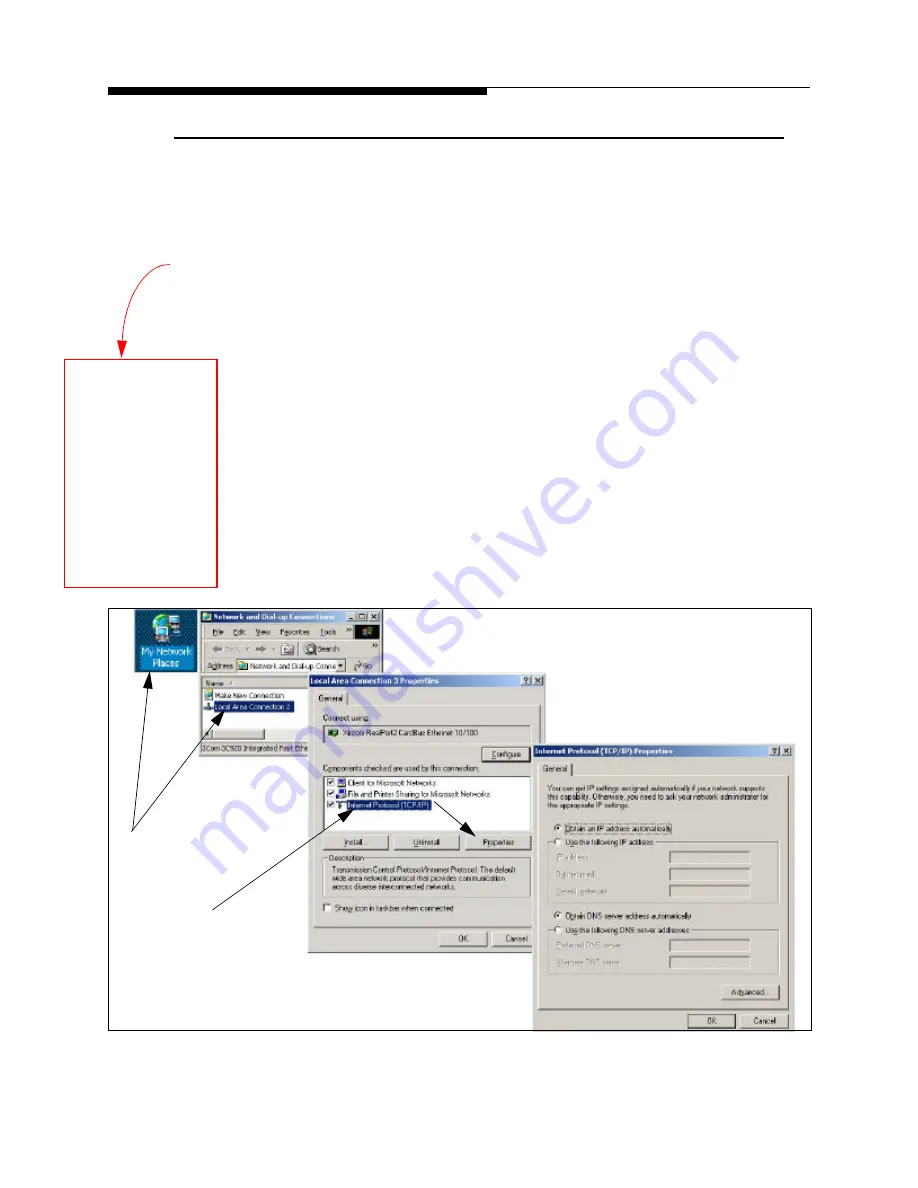
The eCDi™ supports DHCP which means the computer to be connected
for configuration can be set to “Obtain an IP Address Automatically” as
shown in Figure 2-17. In this mode eCDi™ will assign the remote
computer an IP address when it connects.
•
Right-click on Network Neighborhood and select Properties. This can
also be accessed by selecting “Network and Dialup Connections” in
the Control Panel.
•
Next, right-click on the LAN connection and select Properties again.
•
Click on Internet Protocol (TCP\IP) and click on Properties again.
•
This brings up the IP address screen. Select “Obtain an IP address auto-
matically” as shown. Click OK and close all windows and re-boot.
Figure 2-17 Changing the Remote Computer IP Address
NOTE: The
Configuration port
IP address for any
software revision
before 2.6.K is
192.168.0.254 and
the computer must
be set to:
192.168.0.1
255.255.255.0
?
?
Right Click
and select
Properties
Click on Internet Protocol
and then click Properties
IMPORTANT!
Make a note of the computer
settings before making any
changes, so it can be easily reset
after configuring the eCDi™ .
?
Note: If the computer is
changed to DHCP mode from a fixed IP address, the
computer may have to be re-started
Summary of Contents for eCDi
Page 4: ...MRH 2 888 2517 001 1 3 05 WARNING Disconnect primary power prior to servicing...
Page 6: ...vi 888 2517 001 1 3 05 WARNING Disconnect primary power prior to servicing...
Page 8: ...viii 888 2517 001 1 3 05 WARNING Disconnect primary power prior to servicing...
Page 12: ...xii 888 2517 001 1 3 05 WARNING Disconnect primary power prior to servicing...


