


176
Zodiak User Manual
Section 4 — Menus Overview
To choose a different Linked bus source for same source mapping, touch
the Linked Bus Source data pad to go to the Bus Linking menu selection
menu. Select the desired Linked Bus source from the scrolling list, then
touch
Display Shortcut Menu
to return to the Shortcut menu. The Linked Bus
source you selected is now displayed in the data pad and can be mapped
to all the Controlling bus sources with the
Set
button.
Copy Link Mapping Table
The Link Mapping table of one bus can be copied to another bus. Touching
the From This Bus and To This Bus data pads brings up the bus picker. Once
the desired buses have been selected, touch the
Copy
button.
Note
Link Mapping tables are active on Controlling buses only. If a list is copied to
a Linked bus, the data is transferred but the table is ignored as long as that
bus is not a Controlling bus. The Link Mapping table will become active on
that bus should it later become a Controlling bus.
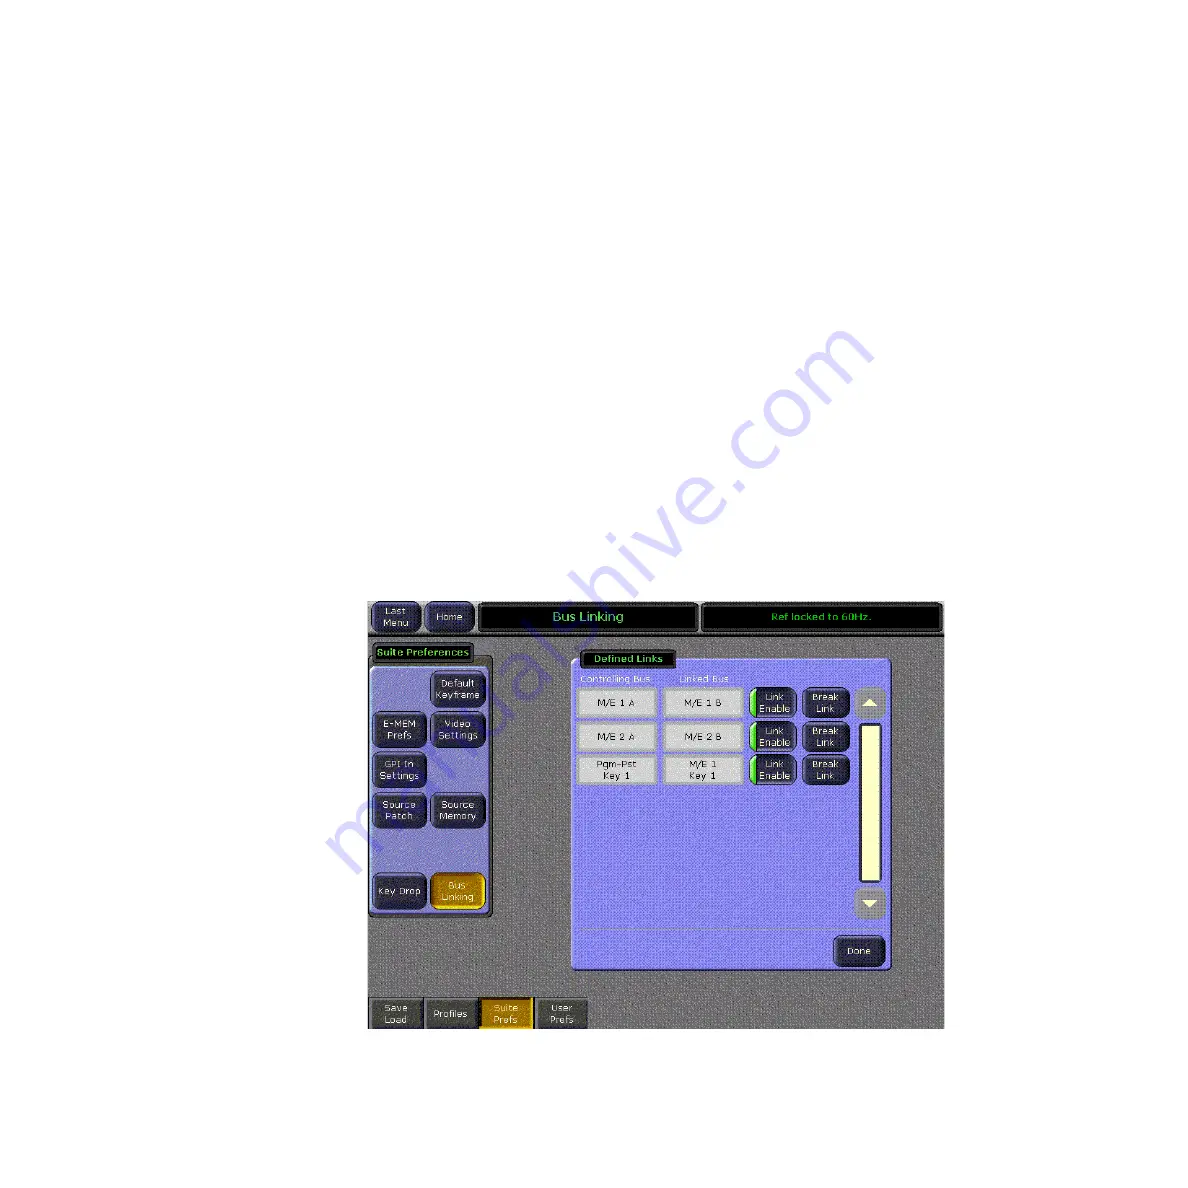
Display All Links Menu
Touching the
Display All Links
button on the Bus Linking menu brings up a
scrolling list of all the defined bus links (
help manage the links. Buses that are not linked are not shown.
Figure 116. Bus Link Status
Summary of Contents for zodiak
Page 1: ...Zodiak DIGITAL PRODUCTION SWITCHER User Manual SOFTWARE VERSION 5 0 071812607 APRIL 2005 ...
Page 16: ...16 Zodiak User Manual Preface ...
Page 91: ...Zodiak User Manual 91 3 D Digital Effects Concepts ...
Page 92: ...92 Zodiak User Manual Section 2 Concepts ...
Page 325: ...Zodiak User Manual 325 Wipe Menus Figure 225 Pattern Selection Menu ...
Page 442: ...442 Zodiak User Manual Glossary ...


