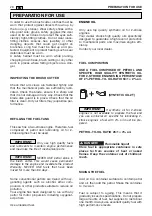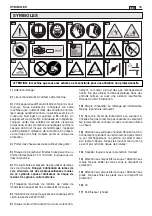
Before filling, shake the can well to help to mix
the oil and petrol.
Take care over pressure
that forms inside the container.
REFILLING THE FUEL TANK
Pressure may increase in
recipients containing petrol due to ambient
temperature.
Open the cap carefully to avoid it flying off.
Store the fuel in a cool place; never leave it in
the sun.
– Place the brush cutter in a stable position with
the tank aperture facing upwards. (fig. 8).
– Clean the tank cap and the surrounding area to
prevent foreign bodies entering the tank.
– Fill the tank, using a suitable container that
prevents accidental fuel spillage.
– Petrol is highly flammable and in certain
conditions explosive.
– Refill the tank in a well ventilated area with
the engine switched off. Do not smoke, do
not light flames or make sparks in the filling
area and in the fuel storage area.
– Do not overfill the tank. After filling make
sure the tank cap is properly and securely
closed.
– Take care not to spill any fuel while filling
the tank. Spilt fuel and its vapours may
catch fire. If any fuel has been spilt, make
sure the area is dry before starting up the
engine.
– Avoid prolonged skin contact with the fuel
and breathing its vapours.
– Keep fuel out of children’s reach.
START UP
Before starting up the
engine, ensure that the range of action of the
brush cutter is free of people or objects that
could be exposed to danger.
Start the engine with the brush cutter in a flat
and stable position.
To prevent the throttle starting accidentally, the
throttle lever is provided with a safety switch: the
!
WARNING!
!
DANGER!
!
WARNING!
!
WARNING!
throttle lever will not work unless the safety lever
on the opposite side of the handgrip is pressed.
Before starting the brush cutter, always ensure
that that safety lever works.
STARTING UP (WITH ENGINE COLD)
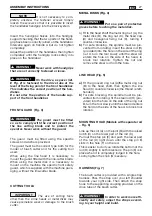
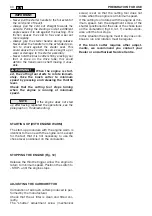
– Set the start/stop switch, located on the hand-
grip housing the throttle lever to «START» (fig.
9).
– Pressing both the safety lever (ref.1) and the
accelerator (ref.2) simultaneously, press the
ACCELERATOR STOP button (ref.3) Keep
pressing the accelerator stop button and
release the accelerator lever until it locks. This
operation allows pre-acceleration of the carbu-
rettor (fig.9) .
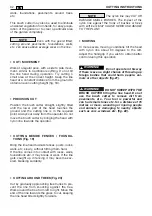
– Turn the choke lever (ref. 4) on the carburettor
(rotate towards the engine body). (fig.10).
Do not touch the accelerator
lever. By accelerating in fact the accelerator stop
will be enabled.
– Press the plastic primer (ref. 5) located on the
lower part of the carburettor 6-7 times. This
operation brings fresh fuel to the carburettor to
aid starting.
– Your machine has 2 position indications for the
choke: CLOSE “--”and RUN "I". Move the
choke to the CLOSE position fig. 10).
– Hold the engine firmly in place with your left
hand. With your right hand grip the starter han-
dle (fig.11).
– Firmly pull the starter handle until the engine
shows signs of starting.
– Then move the choke to the RUN “I” position.
Pull the starter handle again to start the engine.
(fig.10).
Always pull the handle firm-
ly when starting up the brush cutter.
When the engine starts, the
trimmer tool starts rotating immediately. Press
then release the accelerator lever. The accelera-
tor stop button will be released and the engine
will start ticking over at minimum power.
– The engine runs at minimum speed. Allow it to
idle for a few moments to gradually warm up
the engine.
NOTE
NOTE
NOTE
PREPARATION FOR USE
29
EN
Summary of Contents for BJ 250
Page 2: ......
Page 5: ...3 19 21 22 24 25 28 29 17 23 18 20 26 A 27 E...
Page 6: ...4...
Page 119: ...EL 117...
Page 122: ...1 2 3 4 15 5 6 B 1 2 3 120 EL...
Page 123: ...3 4 5 STOP 6 7 C 1 2 3 4 5 6 7 8 3 4 9 10 15 11 15 12 13 14 121 EL...
Page 124: ...15 16 D 1 2 3 4 5 6 7 8 9 10 11 122 EL MONO 1 barrier DUPLEX 2 2...
Page 125: ...A E 2 3 2 4 a C D b H A 5 a C b H A 6 A B C D E D E F D E G 7 123 EL...
Page 126: ...60 2 50 1 2 2 di olio SYNTETIC OIL 2T 4 25 1 4 124 EL...
Page 127: ...8 stop START 9 1 2 3 9 4 10 6 7 5 10 2 CLOSE RUN I CLOSE 10 11 RUN I 10 125 EL...
Page 128: ...12 STOP 13 T 126 EL...
Page 129: ...OFF STOP 15 30 4 60 90 14 3 2 cm 15 Tap Go 16 17 127 EL...
Page 130: ...18 19 20 30 21 15 22 128 EL...
Page 131: ...3 4 23 24 25 A B C 3 4 26 1 A 2 3 4 27 1 0 6 mm 025 2 3 12 15 Nm 28 STOP 1 E 29 2 129 EL...
Page 132: ...1 2 3 4 5 5 6 7 1 8 1 2 3 4 5 130 EL...
Page 133: ...EL 131...
Page 263: ...RU 261...
Page 266: ...A A 1 1 2 2 3 3 4 4 15 5 5 6 6 1 1 2 2 3 3 264 RU...
Page 269: ...A E E 2 2 3 3 4 4 a a A B C D E A 5 5 a a A B C A 6 6 D D F D E G 7 7 267 RU...
Page 271: ...8 START 9 1 2 K K K 3 9 4 10 6 7 5 10 2 K I K 10 K 11 I 10 K 269 RU...
Page 272: ...1 12 2 STOP 13 270 RU...
Page 273: ...S ST TO OP P 1 15 5 3 30 0 4 60 90 14 2 15 Tap Go 16 17 271 RU...
Page 274: ...18 1 19 9 2 20 0 30 2 21 1 1 15 5 2 22 2 272 RU...
Page 275: ...3 3 4 4 23 24 25 3 4 2 26 6 1 A 2 3 4 2 27 7 1 0 6 2 3 12 15 Nm 2 28 8 STOP 1 29 2 273 RU...
Page 276: ...1 2 3 4 5 5 6 7 1 8 1 2 3 4 5 274 RU...
Page 295: ......


