Field replaceable units:
Replace main unit parts
2000966-542D
Dash 3000/4000/5000
7-49
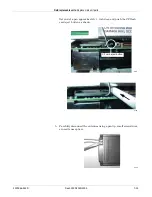
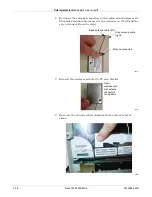
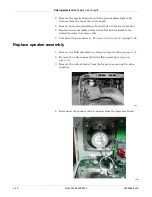
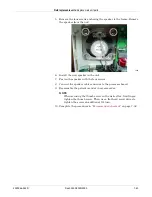
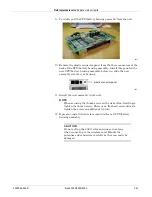
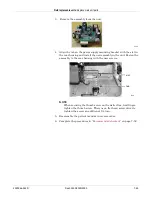
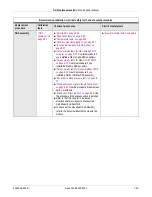
3. Remove the assembly from the unit.
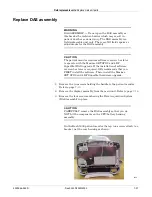
4. Align the tab on the power supply mounting bracket with the slot in
the rear housing and install the new assembly in the unit. Fasten the
assembly to the rear housing with the new screws.
NOTE
When securing the thumb screw on the writer flex, first finger-
tighten the thumb screw. Then, use a flat-head screw driver to
tighten the screw an additional 1/4 turn.
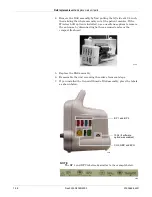
5. Reassemble the patient monitor in reverse order.
6. Complete the procedures in
569A
slot
tab
576A
Summary of Contents for 001C 051D 003A
Page 10: ...viii Dash 3000 4000 5000 2000966 542D ...
Page 11: ...2000966 542D Dash 3000 4000 5000 1 1 1 Introduction ...
Page 20: ...Introduction Service information 1 10 Dash 3000 4000 5000 2000966 542D ...
Page 21: ...2000966 542D Dash 3000 4000 5000 2 1 2 Equipment overview ...
Page 64: ...Equipment overview Theory of operation 2 44 Dash 3000 4000 5000 2000966 542D ...
Page 65: ...2000966 542D Dash 3000 4000 5000 3 1 3 Installation ...
Page 73: ...2000966 542D Dash 3000 4000 5000 4 1 4 Configuration ...
Page 99: ...2000966 542D Dash 3000 4000 5000 5 1 5 Preventive maintenance ...
Page 117: ...2000966 542D Dash 3000 4000 5000 6 1 6 Troubleshooting ...
Page 146: ...Troubleshooting Wireless LAN 6 30 Dash 3000 4000 5000 2000966 542D ...
Page 147: ...2000966 542D Dash 3000 4000 5000 7 1 7 Field replaceable units ...
Page 201: ...2000966 542D Dash 3000 4000 5000 8 1 8 Functional and electrical safety checks ...
Page 257: ...2000966 542D Dash 3000 4000 5000 A 1 A Electromagnetic compatibility EMC ...
Page 267: ...2000966 542D Dash 3000 4000 5000 B 1 B Network troubleshooting ...
Page 279: ...2000966 542D Dash 3000 4000 5000 D 1 D Checklist ...
Page 281: ......

