Field replaceable units:
Remove or replace handle assembly
7-14
Dash 3000/4000/5000
2000966-542D
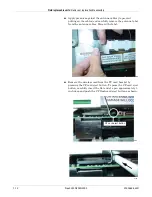
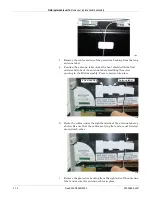
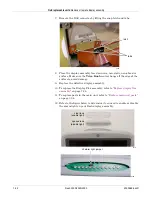
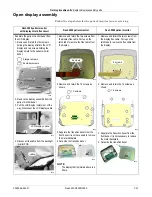
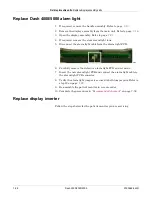
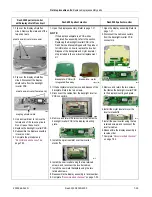
f. Remove the center section of the protective backing from the long
antenna label.
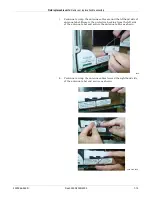
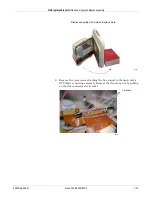
g. Position the antenna label under the heat shield with the first
and second tabs of the antenna label straddling the screw
opening in the DAS assembly. Press to secure into place.
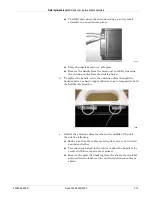
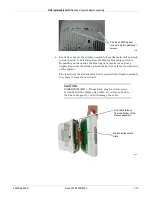
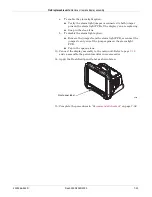
h. Route the cables under the righthand side of the antenna label as
shown. Be sure that the cables are lying flat and are not twisted
around each other.
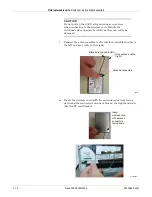
i.
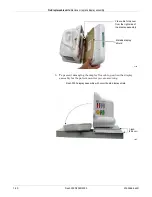
Remove the protective backing from the right side of the antenna
label and secure the antenna cables in place.
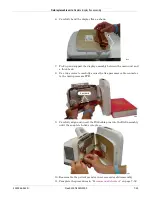
979A
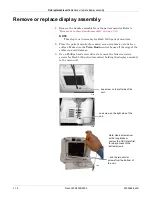
screw opening
Antenna label
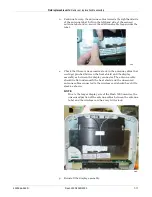
955B
955B
Summary of Contents for 001C 051D 003A
Page 10: ...viii Dash 3000 4000 5000 2000966 542D ...
Page 11: ...2000966 542D Dash 3000 4000 5000 1 1 1 Introduction ...
Page 20: ...Introduction Service information 1 10 Dash 3000 4000 5000 2000966 542D ...
Page 21: ...2000966 542D Dash 3000 4000 5000 2 1 2 Equipment overview ...
Page 64: ...Equipment overview Theory of operation 2 44 Dash 3000 4000 5000 2000966 542D ...
Page 65: ...2000966 542D Dash 3000 4000 5000 3 1 3 Installation ...
Page 73: ...2000966 542D Dash 3000 4000 5000 4 1 4 Configuration ...
Page 99: ...2000966 542D Dash 3000 4000 5000 5 1 5 Preventive maintenance ...
Page 117: ...2000966 542D Dash 3000 4000 5000 6 1 6 Troubleshooting ...
Page 146: ...Troubleshooting Wireless LAN 6 30 Dash 3000 4000 5000 2000966 542D ...
Page 147: ...2000966 542D Dash 3000 4000 5000 7 1 7 Field replaceable units ...
Page 201: ...2000966 542D Dash 3000 4000 5000 8 1 8 Functional and electrical safety checks ...
Page 257: ...2000966 542D Dash 3000 4000 5000 A 1 A Electromagnetic compatibility EMC ...
Page 267: ...2000966 542D Dash 3000 4000 5000 B 1 B Network troubleshooting ...
Page 279: ...2000966 542D Dash 3000 4000 5000 D 1 D Checklist ...
Page 281: ......


