Preventive maintenance:
Battery maintenance
2000966-542D
Dash 3000/4000/5000
5-13
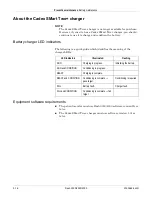
Waking up the battery with a Cadex SMart Two+ charger
NOTE
A deep discharged battery will require you to repeat the following
steps more than once before the battery will “wake up.”
1. Insert the battery into the battery charger and wait for the
RUN
LED light to illuminate (approximately three minutes).
2. If the
RUN
LED light does NOT illuminate, complete the following
steps:
a. Remove the battery from the battery charger.
b. Re-insert the battery into the battery charger and let the battery
trickle charge for two to three minutes while the
FAIL
LED
flashes. (If the
RUN
LED light lights, ignore it.)
c. Watch the battery charger LEDs and immediately remove the
battery from the battery charger when the
FAIL
LED stops
flashing
and
remains illuminated,
or
when both the
RUN
and
CONDITION
LEDs flash.
d. Wait for one to two seconds, then re-insert the battery into the
battery charger. The
RUN
and
CONDITION
LEDs will flash for
five to ten seconds while the charger initializes the battery. If the
FAIL
LED lights, remove the battery and re-insert it into the
battery charger.
e. Watch the battery charger LEDs. The
RUN
LED should stop
flashing and remain illuminated for approximately one minute
later the
CONDITION
LED should stop flashing. At this time,
the battery is awake and being charged.
Waking up the battery with a patient monitor
NOTE
Non-recommended (incompatible) batteries will
not
wake up the
Dash patient monitor.
1. Connect the patient monitor to an AC power source.
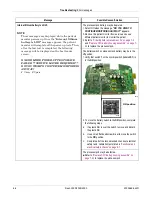
2. Activate the Boot Loader program.
a. Hold down
NBP Go/Stop
(or
NBP Auto
on Dash 5000)
and
ZERO ALL
(
FUNCTION
).
b. Press and release the
Trim Knob
control.
c.
Keep holding
NBP Go/Stop
(or
NBP Auto
)
and
ZERO ALL
(
FUNCTION
) until the Boot Code information appears on the
display.
3. Select
Wake Up Battery
from the Service Menu.
4. Insert the “sleeping” battery into slot
A
of the patient monitor.
NOTE
In some languages, slot
A
is identified as slot
1
and slot
B
is
identified as slot
2
.
Summary of Contents for 001C 051D 003A
Page 10: ...viii Dash 3000 4000 5000 2000966 542D ...
Page 11: ...2000966 542D Dash 3000 4000 5000 1 1 1 Introduction ...
Page 20: ...Introduction Service information 1 10 Dash 3000 4000 5000 2000966 542D ...
Page 21: ...2000966 542D Dash 3000 4000 5000 2 1 2 Equipment overview ...
Page 64: ...Equipment overview Theory of operation 2 44 Dash 3000 4000 5000 2000966 542D ...
Page 65: ...2000966 542D Dash 3000 4000 5000 3 1 3 Installation ...
Page 73: ...2000966 542D Dash 3000 4000 5000 4 1 4 Configuration ...
Page 99: ...2000966 542D Dash 3000 4000 5000 5 1 5 Preventive maintenance ...
Page 117: ...2000966 542D Dash 3000 4000 5000 6 1 6 Troubleshooting ...
Page 146: ...Troubleshooting Wireless LAN 6 30 Dash 3000 4000 5000 2000966 542D ...
Page 147: ...2000966 542D Dash 3000 4000 5000 7 1 7 Field replaceable units ...
Page 201: ...2000966 542D Dash 3000 4000 5000 8 1 8 Functional and electrical safety checks ...
Page 257: ...2000966 542D Dash 3000 4000 5000 A 1 A Electromagnetic compatibility EMC ...
Page 267: ...2000966 542D Dash 3000 4000 5000 B 1 B Network troubleshooting ...
Page 279: ...2000966 542D Dash 3000 4000 5000 D 1 D Checklist ...
Page 281: ......

