4.8 Setting the Scan Options
Network Scanner fi-6000NS Operator's Guide
231
Regular User Operations
4
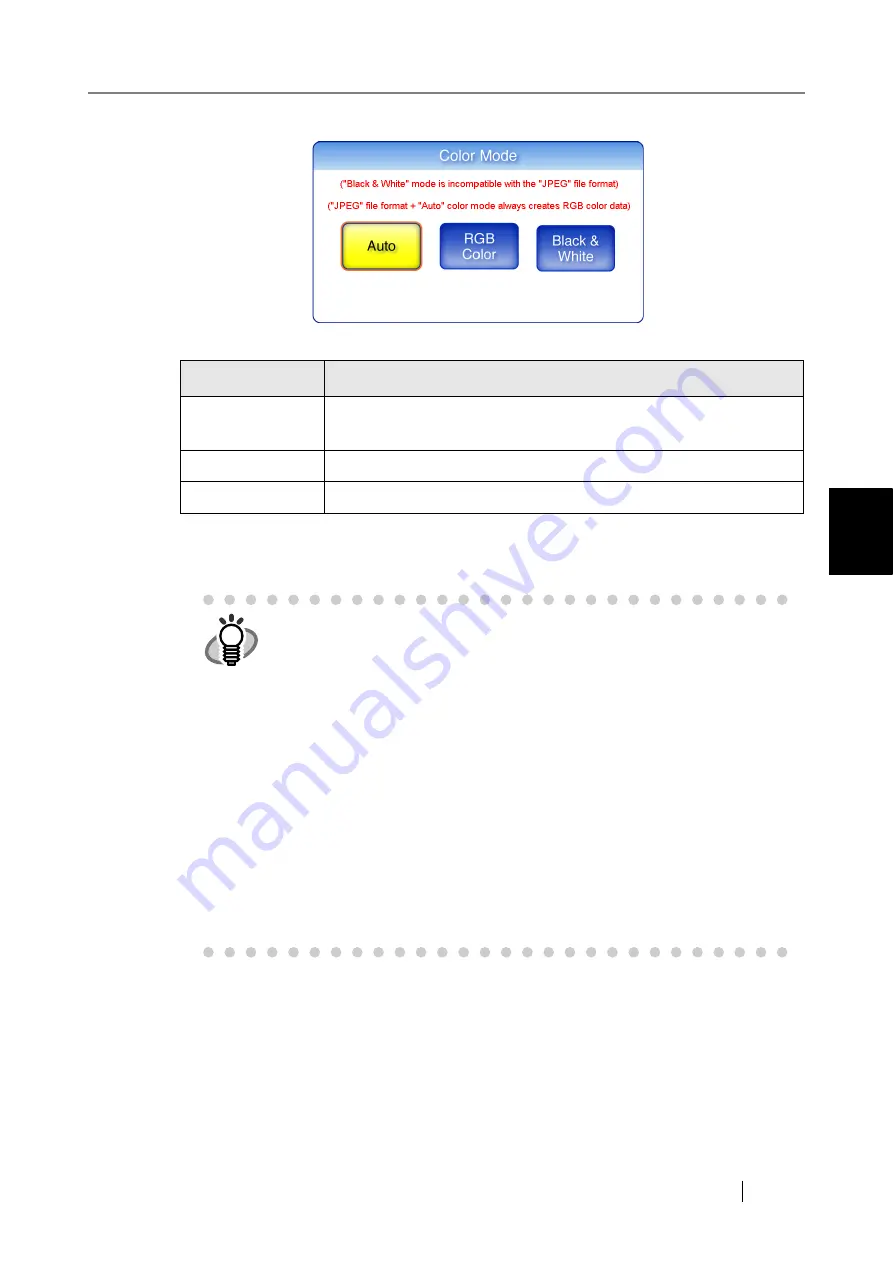
3. Select the color mode.
⇒
Selecting a brightness level returns you to the "Scan Settings" screen.
The selected mode is displayed to the right of the [Color Mode] button.
Color Mode
Description
Auto
Automatically decides whether to scan in color or in black and white
based on document contents.
RGB Color
Scans documents in color.
Black & White
Scans documents in black and white.
HINT
•
Usually, the color mode should be set as [Auto].
If this setting is specified, there is no need to change the color mode each
time you scan a document.
Note that black and white mode may be automatically selected for the fol-
lowing kinds of documents:
•
Faintly toned nonwhite papers
•
Documents with only a minor amount of color
•
Documents printed in gray or other close-to-black colors.
To ensure such documents are scanned in color mode, press the [RGB
Color] button on the "Color Mode" screen.
•
If the [Auto] paper size is selected, the [Custom] paper size Long Page
mode cannot be used.
•
If the [Black & White] color mode is selected, the following options cannot
be used:
•
[JPEG] File Format
•
Compression
Summary of Contents for FI-6000NS
Page 1: ...P3PC 1852 06ENZ0 ...
Page 2: ......
Page 10: ...x ...
Page 28: ...xxviii ...
Page 70: ...42 3 Press the Connect button The Login screen appears ...
Page 78: ...50 5 Press the Now button The system is restarted ...
Page 122: ...94 4 Press the Add button The screen for adding a network printer is displayed ...
Page 202: ...174 ...
Page 296: ...268 ...
Page 316: ...288 6 Press the OK button The Maintenance screen is shown again ...
Page 348: ...320 ...
Page 358: ...330 ...
Page 362: ...334 ...
Page 426: ...398 ...
Page 427: ...Network Scanner fi 6000NS Operator s Guide 399 D Appendix D Glossary ...
Page 432: ...404 ...


