192
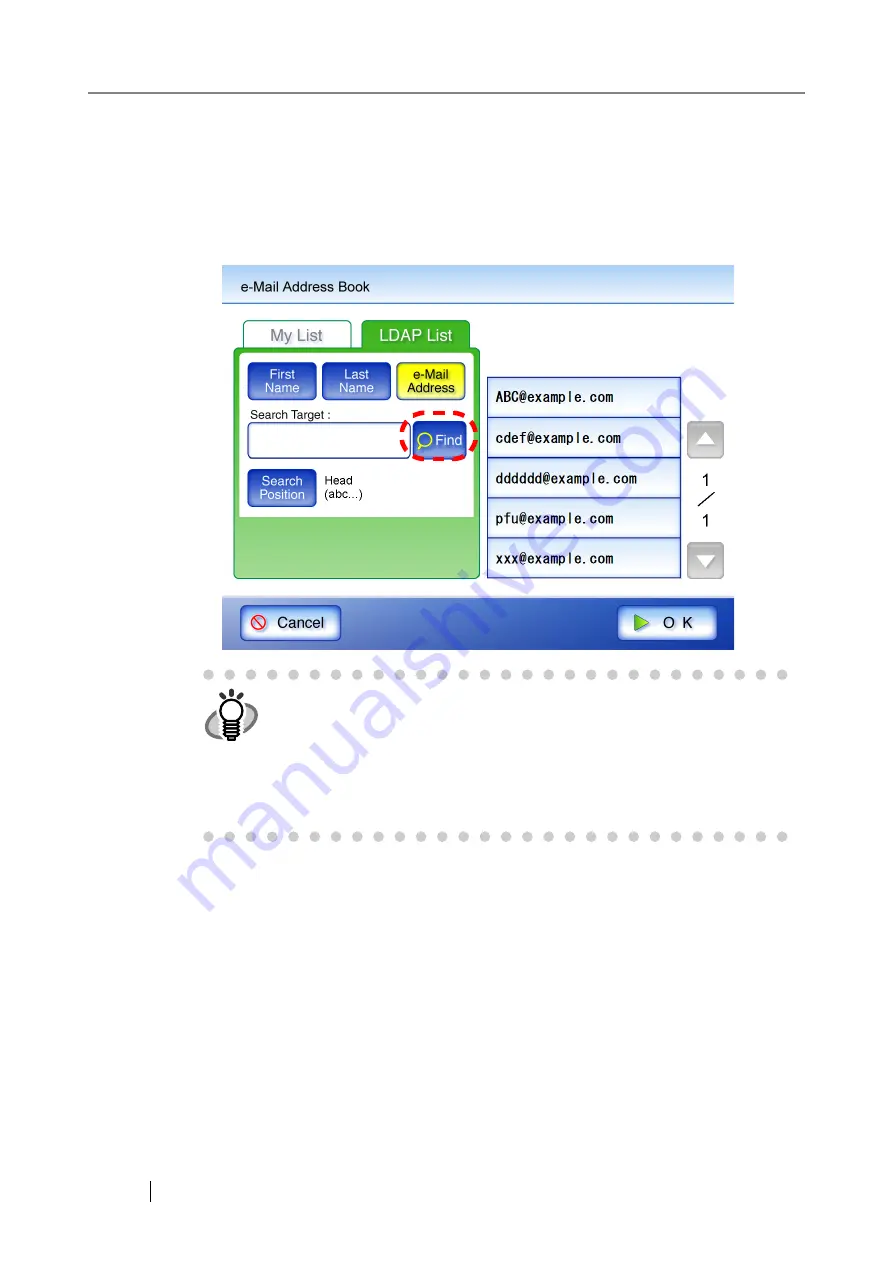
5. Enter a search string.
Contacts can be searched for individually, or all at the same time. Search strings may be up
to 255 characters long.
Wild card characters cannot be used. The actual characters * ? [ ] will be searched for.
6. Press the [Find] button.
⇒
The search results are displayed on the right side. Five results are displayed at a time.
7. Select the desired e-mail address from the search results.
8. Press the [OK] button.
⇒
The address is added to the field in the "Send e-Mail" screen.
Only one e-mail address at a time can be added from the e-Mail Address Book. To add
multiple e-mail addresses from the e-Mail Address Book, it must be opened again each
time an address is to be added.
When multiple e-mail addresses are entered using the e-mail address book, a ";" is auto-
matically entered in between each address.
Up to 30 e-mail addresses can be entered at one time.
HINT
•
The number of LDAP search results displayed can be specified. LDAP
server settings can be changed by the administrator.
For details, refer to
"3.6.5 Setting the LDAP Server" (page 77)
•
If a [Last Name] match is found with no first name, hyphens are shown in
place of the nonexistant first name:
LastName
----
•
If a [First Name] match is found with no last name, hyphens are shown in
place of the nonexistant last name:
FirstName
----
Summary of Contents for FI-6000NS
Page 1: ...P3PC 1852 06ENZ0 ...
Page 2: ......
Page 10: ...x ...
Page 28: ...xxviii ...
Page 70: ...42 3 Press the Connect button The Login screen appears ...
Page 78: ...50 5 Press the Now button The system is restarted ...
Page 122: ...94 4 Press the Add button The screen for adding a network printer is displayed ...
Page 202: ...174 ...
Page 296: ...268 ...
Page 316: ...288 6 Press the OK button The Maintenance screen is shown again ...
Page 348: ...320 ...
Page 358: ...330 ...
Page 362: ...334 ...
Page 426: ...398 ...
Page 427: ...Network Scanner fi 6000NS Operator s Guide 399 D Appendix D Glossary ...
Page 432: ...404 ...


