


Printing Basics
164
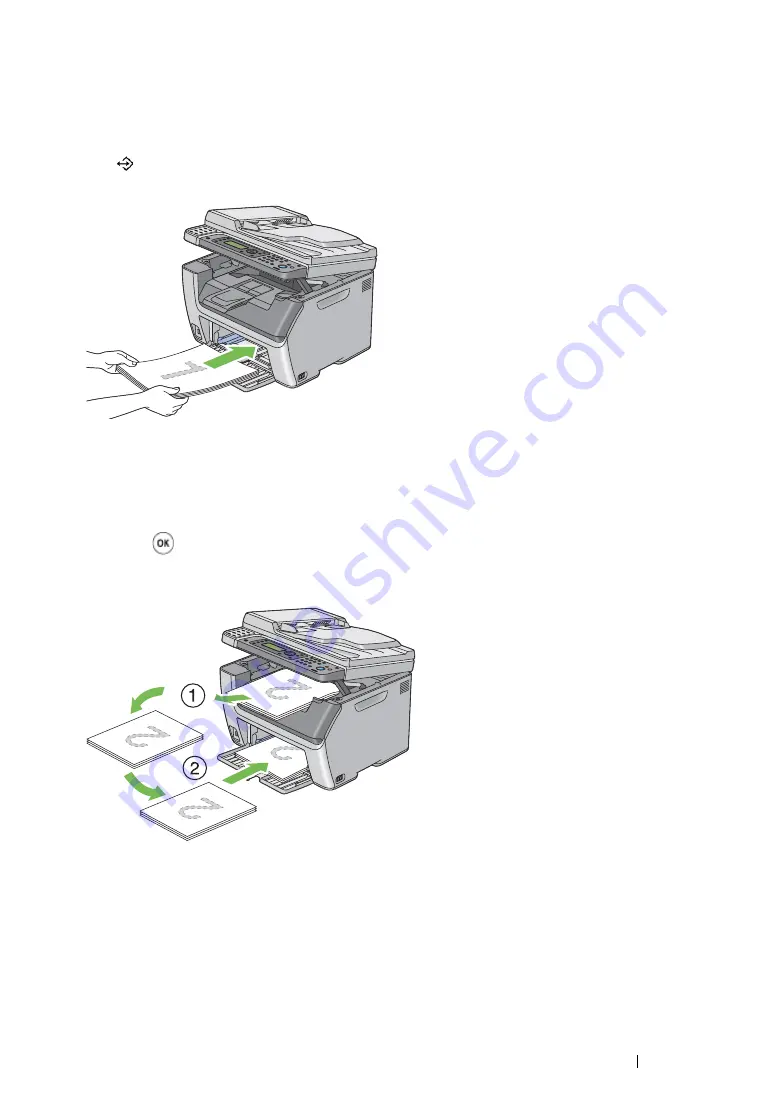
Loading Print Media in the Multipurpose Feeder (MPF)
1
First print the even pages (rear sides).
For a six page document, rear sides are printed in the order of page 6, page 4, then page 2.
The
(
Data
) LED blinks and the
Insert Output to Tray
message appears on the LCD
panel when the even pages finish printing.
2
After the even pages are printed, remove the paper stack from the center output tray.
NOTE:
•
Warped or curled prints can cause paper jams. Straighten them before setting them.
3
Stack the prints and set them as they are (with the blank side facing up) into the MPF, and then
press the
button.
Pages are printed in the order of page 1 (rear of page 2), page 3 (rear of page 4), and then page
5 (rear of page 6).
NOTE:
•
Printing on both sides of the paper is not possible if the document consists of various sizes of paper.
Summary of Contents for DocuPrint CM205 b
Page 1: ...User Guide DocuPrint CM205 f CM205 fw CM205 b ...
Page 9: ...Contents 8 ...
Page 31: ...Product Features 30 ...
Page 41: ...Specifications 40 ...
Page 57: ...Basic Operation 56 ...
Page 69: ...Printer Management Software 68 ...
Page 189: ...Printing Basics 188 ...
Page 217: ...Copying 216 ...
Page 259: ...Scanning 258 ...
Page 319: ...Faxing DocuPrint CM205 f CM205 fw Only 318 ...
Page 369: ...Using the Operator Panel Menus and Keypad 368 ...
Page 377: ...Troubleshooting 376 ...
Page 380: ...379 Troubleshooting 4 Lower the levers to their original position 5 Close the rear cover ...
Page 383: ...Troubleshooting 382 8 Close the rear cover ...
Page 439: ...Maintenance 438 5 Close the document cover ...
Page 467: ...Contacting Fuji Xerox 466 ...


