5.23 Inserting Transparency Separators
139
M
a
k
ing Cop
ies
B
asi
c
Fe
a
ture
s
Output
For
m
a
t
Adde
d
F
e
atu
res
Ima
g
e Q
u
a
lit
y
St
ore
d
Job T
e
mpl
a
tes
6
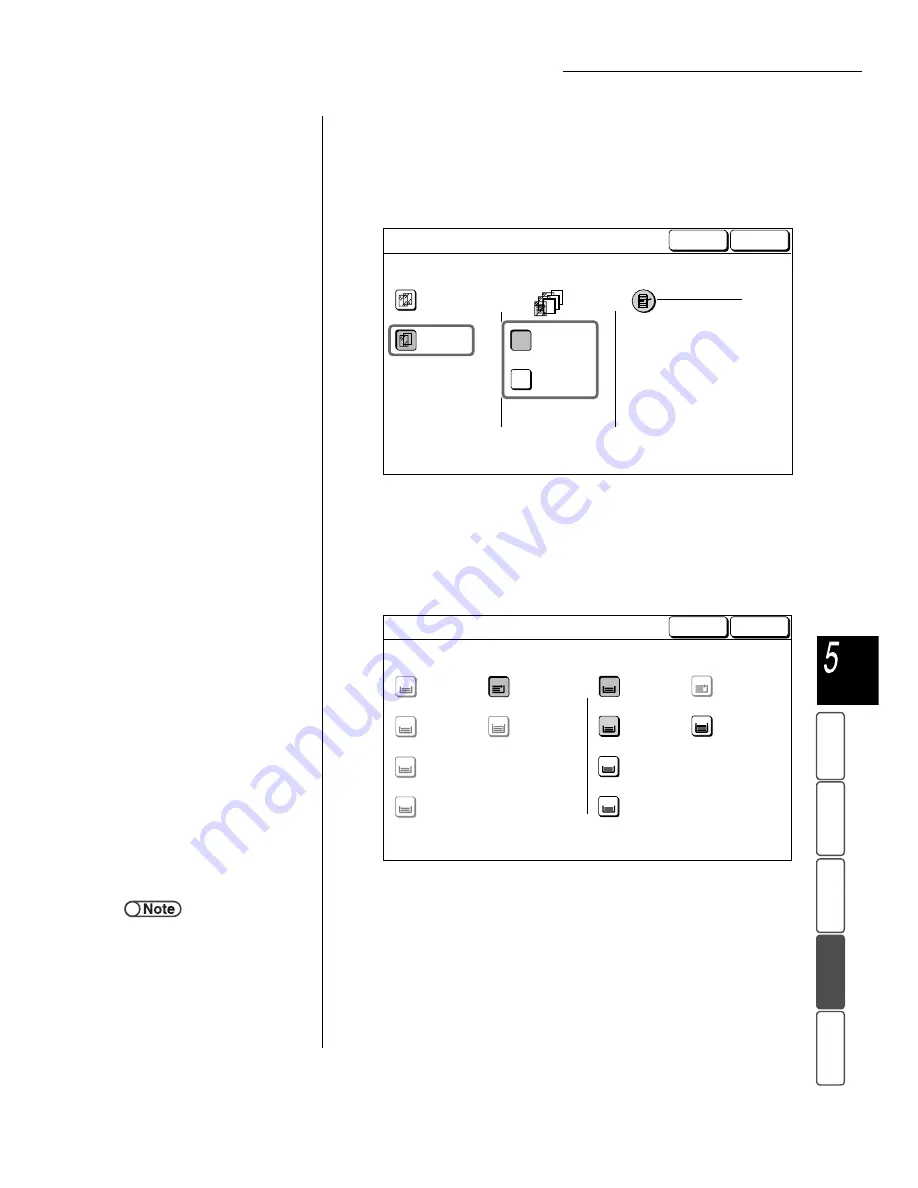
Select On, and Blank Separators or Printed Separators.
When you select On, options to specify whether to copy on the separators as
well as the option of Paper Tray Settings will be displayed on the right of the
screen.
7
Select Paper Tray Settings.
The Paper Tray Settings screen is displayed.
8
From Separators Tray, select the tray that you have loaded
paper as separators in Step 4.
9
Select Save to specify settings for other features if necessary.
10
Press Start.
Copies will be made.
●
Off
On
Blank
Separators
Printed
Separators
Paper Tray Settings
Transp: Tray 5 Bypass
A4 P
Transp
Sep:
Tray 6
A4 P
Plain
Cancel
Transparency Separators
Save
Separators Tray
A4 P
Plain
A4
Plain
B4
Plain
A3
Plain
Bypass...
A4 P
A4 P
Plain
Transparency Tray
1
2
3
4
5
6
A4 P
Plain
A4
Plain
B4
Plain
A3
Plain
Bypass...
A4 P
A4 P
Plain
1
3
4
5
6
2
Cancel
Paper Tray Settings
Save
●
To cancel any setting, select Cancel.
●
When paper selection is made from
the Basic Features screen after
selecting the Transp Separators
function, a screen is displayed to
confirm whether the Transp
Separators function is to be
canceled. Perform operations as
directed by the displayed screens.


