Scan/Monitor, Record, and Data
Introduction
4
4-3
Introduction
This chapter supplies information on the Scan, Monitor, and Record functions along with
procedures and instructions.
Scan
Scan is a function of the Product that sequentially measures each channel and either
temporarily shows the data on the display or records it to file if the recording feature is
enabled (see “Record” on page 4-16). Scans are started manually by the user or by an
internal or external trigger. To scan a channel, the Product sequentially cycles through the
channels that are active and makes measurements as directed by the Test Setup file (see
“Configure a Scan” on page 4-6).
Note
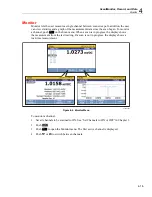
Monitor is a function to see the measurement data from a single channel
while a scan is in progress (see “Monitor” on page 4-15). Use of the
monitor function does not interrupt the active scan and only shows the
measurement data from the last scan cycle completed.
In order for the Product to scan, the applicable channels need to be active and the unit
under test (UUT) must be connected and ready. After these steps are complete, a scan can
be started from the Scan/Monitor menu. If “Auto Recording” in the Test Setup menu is
set to ON, the Product automatically records the scan data when the scan is started. If set
to OFF, the user must manually push the Record key (
) to record the measurement
data to file. The scan data is stored to memory where it can be transferred to a PC to be
viewed with Microsoft Excel (see “Open and View Measurement Data on a PC” on
page 4-20).
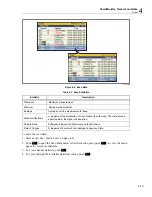
While a scan is in progress, the measurements and statistics for all channels can be
viewed in a chart or in a graph without interruption to the scan (see Figure 4-4). After a
scan is stopped, this scan data stays in temporary memory and remains available until a
new scan is started.
Summary of Contents for 1586A
Page 6: ...1586A Users Manual iv Error Messages 7 3 Troubleshooting 7 20...
Page 8: ...1586A Users Manual vi...
Page 10: ...1586A Users Manual viii...
Page 34: ...1586A Users Manual 2 2...
Page 42: ...1586A Users Manual 2 10 2 3 4 1 hcn018 eps Figure 2 6 Relay Card Installation...
Page 44: ...1586A Users Manual 2 12 hcn032 eps Figure 2 7 DAQ STAQ Multiplexer Installation...
Page 46: ...1586A Users Manual 2 14...
Page 48: ...1586A Users Manual 3 2...
Page 82: ...1586A Users Manual 3 36...
Page 84: ...1586A Users Manual 4 2...
Page 108: ...1586A Users Manual 5 2...
Page 114: ...1586A Users Manual 6 2...
Page 118: ...1586A Users Manual 6 6...
Page 120: ...1586A Users Manual 7 2...


