Product Overview and Specifications
Screen Capture Feature
1
1-11
•
Consider all accessible channels to be hazardous live and an
electric shock hazard if any channel is connected to a
hazardous voltage source.
•
Do not remove, touch, or change the internal wiring of
hazardous inputs until the input source is turned off.
•
Remove inputs from hazardous voltage sources before an
input module is opened.
•
Use the correct terminals, function, and range for
measurements.
•
Use this Product indoors only.
•
Do not use the Product around explosive gas, vapor, or in
damp or wet environments.
Screen Capture Feature
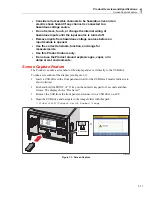
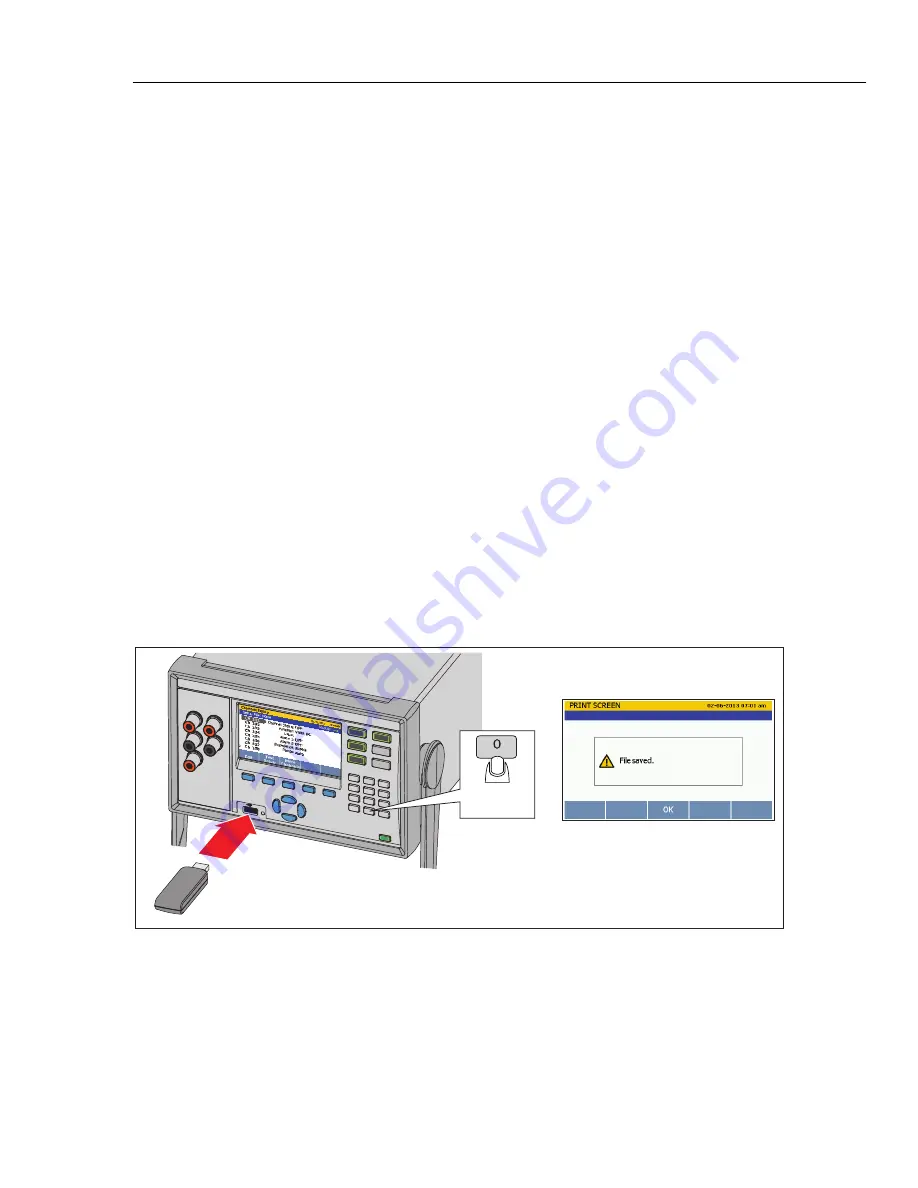
The Product can take a screenshot of the display and save it directly to the USB drive.
To take a screenshot of the display (see Figure 1-1):
1.
Insert a USB drive in the front panel and wait for the USB Data Transfer Indicator to
show solid red.
2.
Push and hold the PRINT or “0” key on the numeric keypad for 3 seconds and then
release. The display shows “File Saved”.
3.
Remove the USB from the front panel and connect it to a USB drive on a PC.
4.
Open the USB drive and navigate to the image folder with this path:
\\fluke\1586A\[Product Serial Number]\Image
3 seconds
=
hcn024.eps
Figure 1-1. Screen Capture
Summary of Contents for 1586A
Page 6: ...1586A Users Manual iv Error Messages 7 3 Troubleshooting 7 20...
Page 8: ...1586A Users Manual vi...
Page 10: ...1586A Users Manual viii...
Page 34: ...1586A Users Manual 2 2...
Page 42: ...1586A Users Manual 2 10 2 3 4 1 hcn018 eps Figure 2 6 Relay Card Installation...
Page 44: ...1586A Users Manual 2 12 hcn032 eps Figure 2 7 DAQ STAQ Multiplexer Installation...
Page 46: ...1586A Users Manual 2 14...
Page 48: ...1586A Users Manual 3 2...
Page 82: ...1586A Users Manual 3 36...
Page 84: ...1586A Users Manual 4 2...
Page 108: ...1586A Users Manual 5 2...
Page 114: ...1586A Users Manual 6 2...
Page 118: ...1586A Users Manual 6 6...
Page 120: ...1586A Users Manual 7 2...


