Input and Channel Configuration
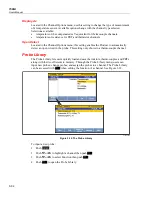
Probe Library
3
3-35
5.
Push
to input a new probe.
6.
Select Label and push
to set a custom label or push
to read the label from
the channel.
7.
Select Function and push
to change. Use the on-screen options to configure the
probe.
8.
After the function and label is set, push
to save.
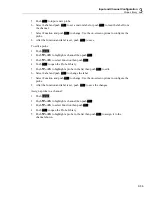
To edit a probe:
1.
Push
.
2.
Push
or
to highlight a channel then push
.
3.
Push
or
to select Function then push
.
4.
Push
to open the Probe Library.
5.
Push
or
to highlight a probe in the list then push
to edit.
6.
Select Label and push
to change the label.
7.
Select Function and push
to change. Use the on-screen options to configure the
probe.
8.
After the function and label is set, push
to save the changes.
Assign a probe to a channel:
1.
Push
.
2.
Push
or
to highlight a channel then push
.
3.
Push
or
to select Function then push
.
4.
Push
to open the Probe Library.
5.
Push
or
to highlight a probe in the list then push
to assign it to the
channel shown.
Summary of Contents for 1586A
Page 6: ...1586A Users Manual iv Error Messages 7 3 Troubleshooting 7 20...
Page 8: ...1586A Users Manual vi...
Page 10: ...1586A Users Manual viii...
Page 34: ...1586A Users Manual 2 2...
Page 42: ...1586A Users Manual 2 10 2 3 4 1 hcn018 eps Figure 2 6 Relay Card Installation...
Page 44: ...1586A Users Manual 2 12 hcn032 eps Figure 2 7 DAQ STAQ Multiplexer Installation...
Page 46: ...1586A Users Manual 2 14...
Page 48: ...1586A Users Manual 3 2...
Page 82: ...1586A Users Manual 3 36...
Page 84: ...1586A Users Manual 4 2...
Page 108: ...1586A Users Manual 5 2...
Page 114: ...1586A Users Manual 6 2...
Page 118: ...1586A Users Manual 6 6...
Page 120: ...1586A Users Manual 7 2...


