Input and Channel Configuration
Channel Configuration
3
3-25
3.
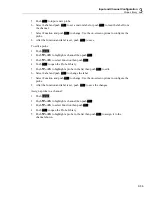
Set channel 401 to ON (see “Set Channels to ON or OFF” on page 3-13).
4.
Assign a label to the channel if desired.
5.
To measure the DIO, monitor channel Ch401 in the Scan/Monitor menu. The
8-bit TTL value is shown on the display and the decimal equivalent will be recorded
to the data file.
Totalizer Channel Configuration (Ch402)
The Product is equipped with a unidirectional, resettable totalizer with an input count
capability of 0 to 1048575 (20 bits). When a digital input is connected to the TOT input
on the rear panel and Ch402 is set to on, the Product counts each time the dc voltage of
the signal transitions from high to low or a contact closes to the ground (GND). When a
scan is started, the TOT counter is reset to 0. The totalizer count can be manually reset at
any time with
in the Scan menu.
Read Mode
The totalizer function has two read modes: read and read/reset. The mode can be set in
Channel Setup or by remote command. The default totalizer mode is read.
In read mode, the count is not effected when read during the scan sweep or read by
remote command.
In read/reset mode, the totalizer count is automatically reset to 0 when it is read during a
scan sweep or read by remote command. It is not effected by pause scan. The totalizer
count is not reset when it is viewed with the Monitor function.
Debounce
In some applications, contacts can “bounce” when they close that results in multiple
signals on one line. Without a filter the Product detects multiple closures that can cause
duplicate counts for one closure. To filter the signal, the Product has a debounce feature
that can detect bounce on the signal and ignore it. Debounce (600 Hz) can be turned on
with the Edit channel function of the Totalizer channel (Ch402). If the debounce feature
is disabled, 10 kHz is the maximum frequency the Totalizer input can support.
Terminal
TOT
1
2
3
4
5
6
7
8
G
N
D
Function
Totalizer Inp
u
t
Inp
u
t/O
u
tp
u
t Line 1
Inp
u
t/O
u
tp
u
t Line 2
Inp
u
t/O
u
tp
u
t Line 3
Inp
u
t/O
u
tp
u
t Line 4
Inp
u
t/O
u
tp
u
t Line 5
Inp
u
t/O
u
tp
u
t Line 6
Inp
u
t/O
u
tp
u
t Line 7
Inp
u
t/O
u
tp
u
t Line
8
Gro
u
nd Terminal
hcn019.eps
Figure 3-9. Totalizer Input (TOT)
Summary of Contents for 1586A
Page 6: ...1586A Users Manual iv Error Messages 7 3 Troubleshooting 7 20...
Page 8: ...1586A Users Manual vi...
Page 10: ...1586A Users Manual viii...
Page 34: ...1586A Users Manual 2 2...
Page 42: ...1586A Users Manual 2 10 2 3 4 1 hcn018 eps Figure 2 6 Relay Card Installation...
Page 44: ...1586A Users Manual 2 12 hcn032 eps Figure 2 7 DAQ STAQ Multiplexer Installation...
Page 46: ...1586A Users Manual 2 14...
Page 48: ...1586A Users Manual 3 2...
Page 82: ...1586A Users Manual 3 36...
Page 84: ...1586A Users Manual 4 2...
Page 108: ...1586A Users Manual 5 2...
Page 114: ...1586A Users Manual 6 2...
Page 118: ...1586A Users Manual 6 6...
Page 120: ...1586A Users Manual 7 2...


