Pro Tools Reference Guide
812
Spotting Regions to SMPTE
Frame Locations
(Pro Tools HD and Pro Tools LE with
DV Toolkit 2 Only)
Spotting
is the process of assigning music and
sound cues to specific SMPTE frame locations in
a film or video. This function can be used to
spot:
◆
Entire regions, selected with the Time Grabber
tool. Multiple regions can also be selected, and
Pro Tools will reference the first region in your
selection.
◆
A specific location within a region, by clicking
with the Selector tool at that location, and
choosing Region > Identify Sync Point.
◆
Sessions or tracks, dragged from a browser to
the session Timeline or Region List.
Spot Mode
In Spot mode, a region in a track can be quickly
spotted by simply clicking it with the Time
Grabber tool.
You can also drag a region from a DigiBase
browser, or from the Region List, to a track while
in Spot mode.
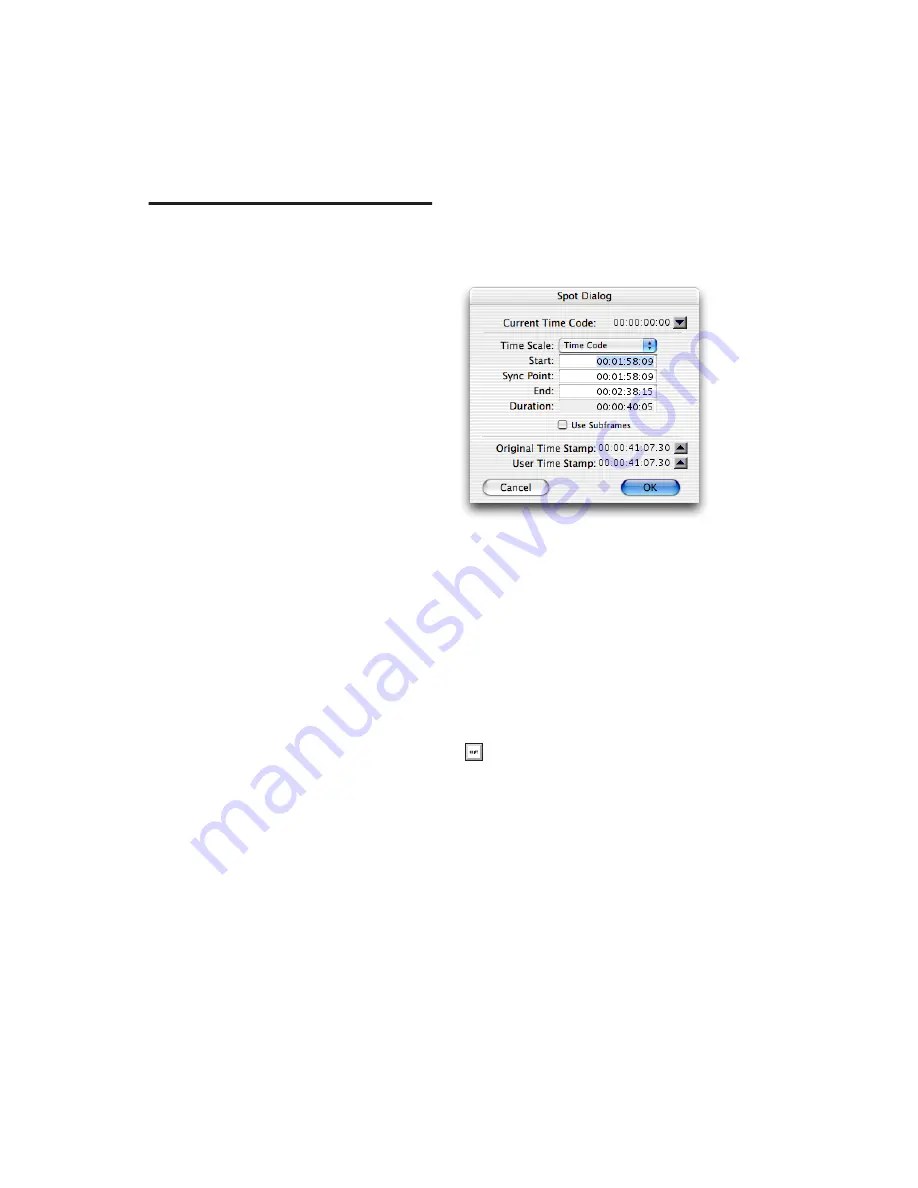
The Spot Dialog
The Spot Dialog appears when you drag a region
to a track or click a region with the Time Grab-
ber tool in Spot mode. The numeric fields func-
tion as both data displays and editing controls
for the currently selected regions.
Information in these fields is displayed in
SMPTE Time Code, Minutes:Seconds,
Feet.Frames, Samples, or Bars & Beats, depend-
ing on which Time Scale format is selected.
A highlighted numeric field indicates the cur-
rent active field for numeric entry editing. En-
tering a value in a field allows you to move a se-
lected element to the time location that you
enter. The Start, Sync Point, and End fields are
accessible when the Time Grabber tool is active.
Only the Start or End (depending on where you
click the mouse) and Duration fields are active
when one of the Trim tools is active (see “Using
the Trim Tools in Spot Mode” on page 814).
Use Subframes Option
A subframe is 1/100th of a frame. The Use Sub-
frames option enables you to use these smaller
units for greater accuracy. This command adds
an additional time field in the SMPTE
Spot dialog
To increase or decrease SMPTE values in
the Spot dialog by a specific number of
frames, press Plus (+) or Minus (–) on the
numeric keypad, enter a number, and press
the Enter key.
Summary of Contents for Pro Tools
Page 1: ...Pro Tools Reference Guide Version 7 3 ...
Page 15: ...1 Part I Introduction ...
Page 16: ...2 ...
Page 33: ...19 Part II System Configuration ...
Page 34: ...20 ...
Page 44: ...Pro Tools Reference Guide 30 ...
Page 94: ...Pro Tools Reference Guide 80 ...
Page 95: ...81 Part III Sessions Tracks ...
Page 96: ...82 ...
Page 108: ...Pro Tools Reference Guide 94 ...
Page 130: ...Pro Tools Reference Guide 116 ...
Page 269: ...255 Part IV Recording ...
Page 270: ...256 ...
Page 310: ...Pro Tools Reference Guide 296 ...
Page 345: ...331 Part V Editing ...
Page 346: ...332 ...
Page 402: ...Pro Tools Reference Guide 388 ...
Page 496: ...Pro Tools Reference Guide 482 ...
Page 548: ...Pro Tools Reference Guide 534 ...
Page 571: ...557 Part VI MIDI Editing ...
Page 572: ...558 ...
Page 596: ...Pro Tools Reference Guide 582 ...
Page 637: ...623 Part VII Mixing ...
Page 638: ...624 ...
Page 702: ...Pro Tools Reference Guide 688 ...
Page 771: ...757 Part VIII Video Sync Surround ...
Page 772: ...758 ...
Page 792: ...Pro Tools Reference Guide 778 ...
Page 806: ...Pro Tools Reference Guide 792 ...
Page 856: ...Pro Tools Reference Guide 842 ...


