


Chapter 23: Conductor Tracks and Memory Locations
509
Stretch To End
Specifies a new end point for the
region to which you want to apply the selected
tempo events. Changing the end point causes
the Stretch percentage to change.
Stretch To Start (Advanced Option)
Specifies a
new start point for the region to which you
want to apply the selected tempo events.
Changing the end point causes the Stretch per-
centage to change.
Stretch
Specifies the percentage of time for the
the selected tempo events to cover.
Preserve Tempo after Selection
If selected, the
previous tempo setting that was in effect at the
selection end point is preserved after the selec-
tion. If unselected, the last tempo event created
by the tempo operation continues to the end of
the session, or until the next tempo event be-
yond the selected range.
Identify Beat Command
The Identify Beat command lets you establish a
tempo/meter map for audio that was recorded
without a click, or for imported audio with un-
known tempos.
The Identify Beat command analyzes a selection
range (usually with a distinct number of beats or
measures) and calculates its tempo based on the
specified meter. In doing this, Bar|Beat Markers
for the calculated tempo are inserted and appear
in the Tempo ruler at the beginning and end of
the selection; in addition, meter events are in-
serted into the Meter ruler.
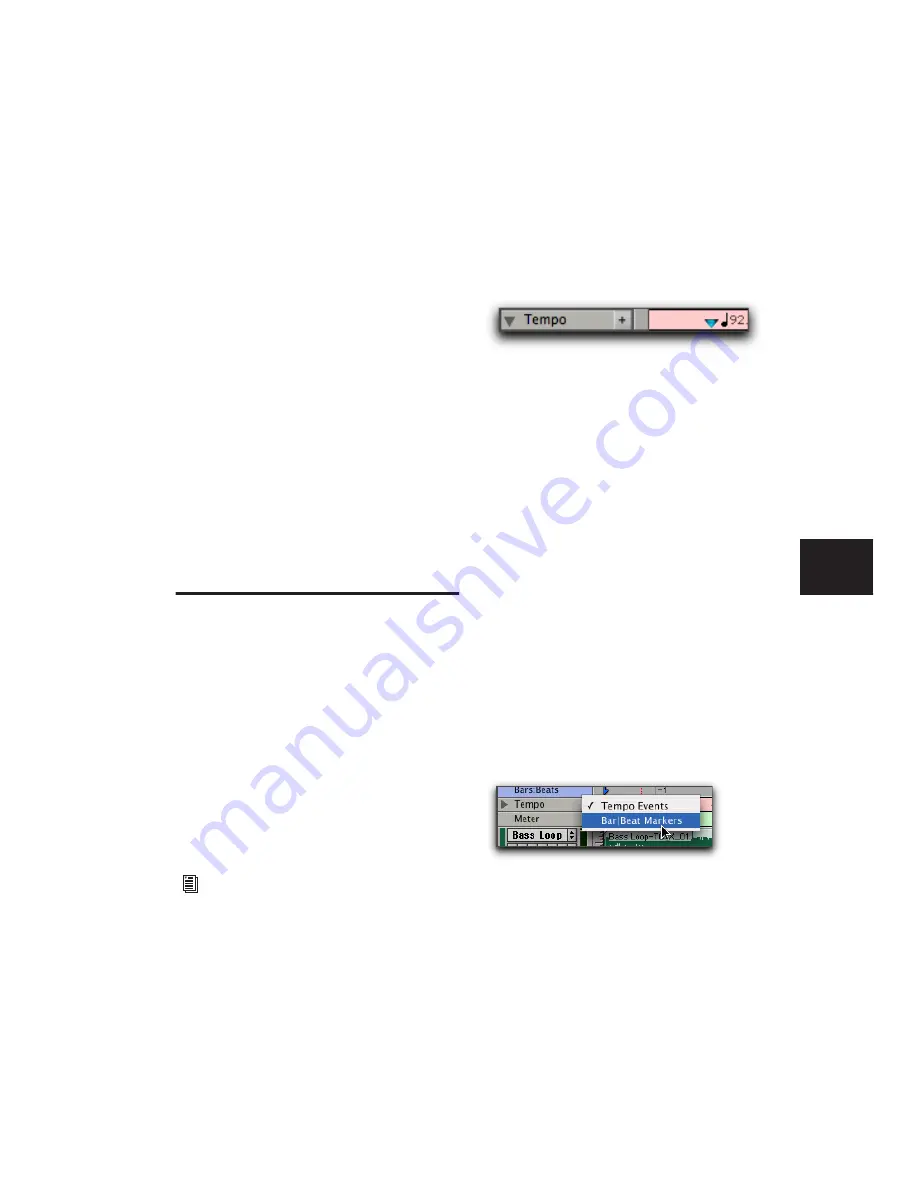
Bar|Beat Markers
Bar|Beat Markers look similar to tempo events,
but instead have small blue triangles to indicate
their location.
Choosing Bar|Beat Markers or Tempo
Events
Because tempo events are tick-based, and
Bar|Beat Markers are sample-based, they cannot
be mixed. If a session contains tempo events
and you attempt to insert Bar|Beat Markers, ex-
isting tempo events are converted to Bar|Beat
Markers (and vice versa).
Tempo events can also be manually converted
to Bar|Beat Markers and vice versa. When con-
verting between Tempo events and Bar|Beat
Markers, some amount of sample rounding may
occur.
To use either tempo events or Bar|Beat Markers:
1
Press Control (Windows) or Command (Mac)
and click the Add Tempo Change button.
2
Select either Tempo Events or Bar|Beat Mark-
ers from the pop-up menu.
Use Beat Detective to generate Bar|Beat
Markers within a selection that includes
rhythmic changes on beats or sub-beats. For
more information, see Chapter 24, “Beat
Detective.”
Bar|Beat Marker
Tempo ruler pop-up menu
Summary of Contents for Pro Tools
Page 1: ...Pro Tools Reference Guide Version 7 3 ...
Page 15: ...1 Part I Introduction ...
Page 16: ...2 ...
Page 33: ...19 Part II System Configuration ...
Page 34: ...20 ...
Page 44: ...Pro Tools Reference Guide 30 ...
Page 94: ...Pro Tools Reference Guide 80 ...
Page 95: ...81 Part III Sessions Tracks ...
Page 96: ...82 ...
Page 108: ...Pro Tools Reference Guide 94 ...
Page 130: ...Pro Tools Reference Guide 116 ...
Page 269: ...255 Part IV Recording ...
Page 270: ...256 ...
Page 310: ...Pro Tools Reference Guide 296 ...
Page 345: ...331 Part V Editing ...
Page 346: ...332 ...
Page 402: ...Pro Tools Reference Guide 388 ...
Page 496: ...Pro Tools Reference Guide 482 ...
Page 548: ...Pro Tools Reference Guide 534 ...
Page 571: ...557 Part VI MIDI Editing ...
Page 572: ...558 ...
Page 596: ...Pro Tools Reference Guide 582 ...
Page 637: ...623 Part VII Mixing ...
Page 638: ...624 ...
Page 702: ...Pro Tools Reference Guide 688 ...
Page 771: ...757 Part VIII Video Sync Surround ...
Page 772: ...758 ...
Page 792: ...Pro Tools Reference Guide 778 ...
Page 806: ...Pro Tools Reference Guide 792 ...
Page 856: ...Pro Tools Reference Guide 842 ...


