Chapter 17: Advanced Punch Recording
327
To DestructivePunch-enable all audio tracks:
■
Alt-Start-click (Windows) or Option-Control-
click (Mac) a track’s Record Enable button to
toggle all Record Enable buttons to solid blue.
To DestructivePunch-enable all selected audio
tracks:
■
Alt-Start-Shift-click (Windows) or Control-
Option-Shift-click (Mac) a track’s Record Enable
button to toggle the Record Enable buttons for
the selected audio tracks solid blue.
DestructivePunch-Enabling and Record-
Enabling Tracks Simultaneously
You can simultaneously DestructivePunch en-
able tracks and record enable them. This starts
recording as soon as the transport is record-
armed and playback begins.
To simultaneously DestructivePunch enable and
record enable an audio track:
■
Click the track’s Record Enable button. The
track’s Record Enable button flashes blue and
red.
To simultaneously DestructivePunch enable and
record enable all audio tracks:
■
Alt-click (Windows) or Option-click (Mac) a
track’s Record Enable button. All tracks’ Record
Enable buttons flash blue and red.
To simultaneously DestructivePunch enable and
record enable all selected audio tracks:
■
Alt-Shift-click (Windows) or Option-Shift-
click (Mac) a track’s Record Enable button. The
Record Enable buttons for the selected audio
tracks flash blue and red.
Display of DestructivePunch
Status
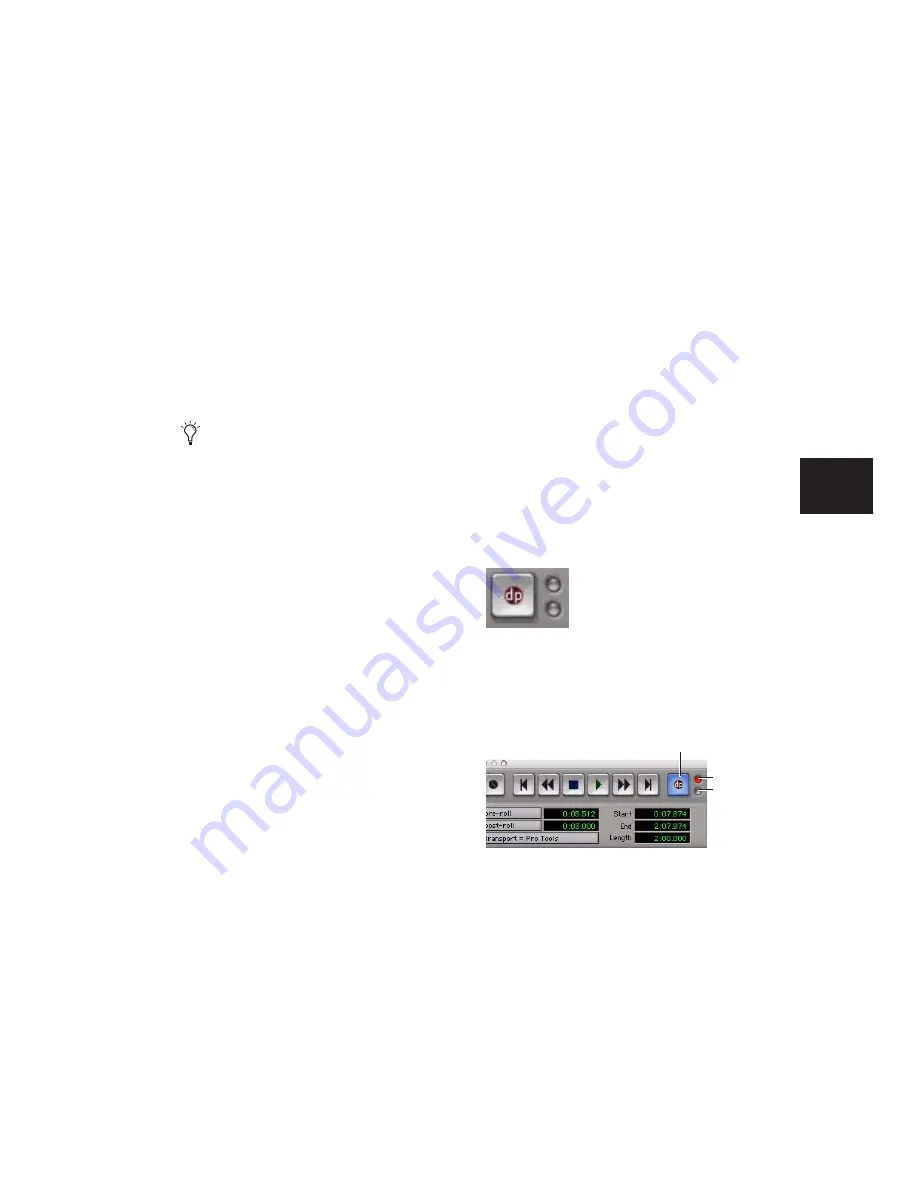
Transport Record Enable Button
The Transport Record Enable button indicates
DestructivePunch mode and Record status as
follows:
When DestructivePunch mode is enabled:
◆
The letters “dp” appears in the Record button
in the Transport.
◆
If at least one track is DestructivePunch-en-
abled, the Record button in the Transport lights
solid blue.
Create a VCA group for each stem or set of
tracks on which you plan to punch, and use
the VCA Record Enable button to arm all
tracks in the group for DestructivePunch.
For more information, see “VCA Master
Tracks” on page 630.
Transport Record Enable button with DestructivePunch
mode enabled
DestructivePunch status in the Transport window
Record LED
Input Status
LED
DestructivePunch Enabled
Summary of Contents for Pro Tools
Page 1: ...Pro Tools Reference Guide Version 7 3 ...
Page 15: ...1 Part I Introduction ...
Page 16: ...2 ...
Page 33: ...19 Part II System Configuration ...
Page 34: ...20 ...
Page 44: ...Pro Tools Reference Guide 30 ...
Page 94: ...Pro Tools Reference Guide 80 ...
Page 95: ...81 Part III Sessions Tracks ...
Page 96: ...82 ...
Page 108: ...Pro Tools Reference Guide 94 ...
Page 130: ...Pro Tools Reference Guide 116 ...
Page 269: ...255 Part IV Recording ...
Page 270: ...256 ...
Page 310: ...Pro Tools Reference Guide 296 ...
Page 345: ...331 Part V Editing ...
Page 346: ...332 ...
Page 402: ...Pro Tools Reference Guide 388 ...
Page 496: ...Pro Tools Reference Guide 482 ...
Page 548: ...Pro Tools Reference Guide 534 ...
Page 571: ...557 Part VI MIDI Editing ...
Page 572: ...558 ...
Page 596: ...Pro Tools Reference Guide 582 ...
Page 637: ...623 Part VII Mixing ...
Page 638: ...624 ...
Page 702: ...Pro Tools Reference Guide 688 ...
Page 771: ...757 Part VIII Video Sync Surround ...
Page 772: ...758 ...
Page 792: ...Pro Tools Reference Guide 778 ...
Page 806: ...Pro Tools Reference Guide 792 ...
Page 856: ...Pro Tools Reference Guide 842 ...


