32
D. Design Requirements Unique to Split Vent Systems
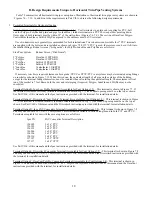
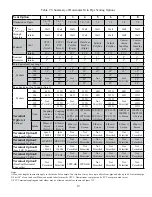
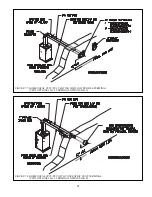
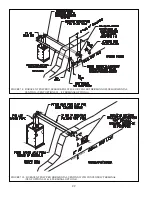
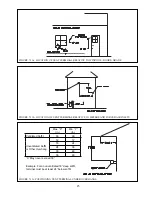
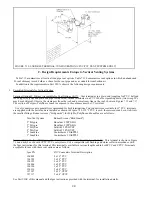
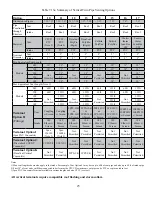
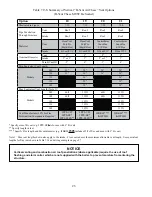
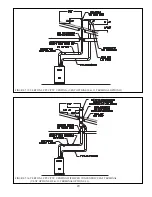
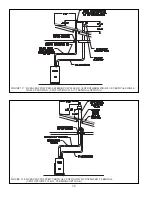
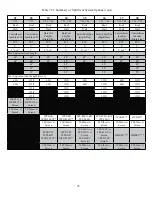
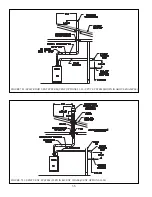
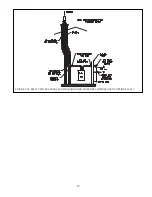
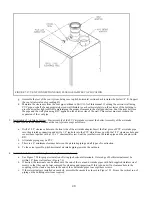
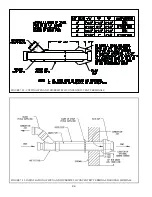
Table 7.21 summarizes all split vent options. Illustrations of split vent systems are shown in Figures 7.22, 7.23, and 7.24. In
addition to the requirements in Part VII-A, observe the following design requirements:
1. Permitted Terminals for Split Venting:
Rigid Vent Systems (Vent Options 25-32) &_ %"\&\\
and plain end pipe for InnoFlue). Intake terminates in a PVC 90 sweep elbow pointing down. The section of Polypro,
^*&#&
Use of a rodent screen is generally recommended for the vent termination. A rodent screen suitable for 3” PVC terminals
is supplied with the boiler and is installed under the termination coupling as shown in Figure 7.28. If 2” CPVC is used, this
# %&_ &%&`\&^
follows:
Size/Vent System
Rodent Screen (“Bird Guard”)
2” Polypro
DuraVent # 2PPS-BG
3” Polypro
DuraVent # 3PPS-BG
+
+^!$
+^!$
2” InnoFlue
Centrotherm # IASPP02
3” InnoFlue
Centrotherm # IASPP03
Flex Vent Terminals (Options 33-38)$#*) #' &) #
& &' ##)| &&)
chimney
chases.
Air Intake Terminals (Vent Options 25-38) - All split venting options shown in Tables 7.21 terminate in a PVC 90 sweep
elbow pointing down. Use of a rodent screen is generally recommended for the intake termination. A rodent screen suitable
for 3” PVC terminals is supplied with the boiler and is installed under the intake termination elbow coupling as shown in
^ %++"" &\# # %
2. Vent Terminal Location – Observe the following clearances from roof mounted vent terminals (also see Figures 7.22, 7.23, or
7.24):
Q
+)#' &#
Q
*# %+) #&' # # {' #
3. Horizontal Air Intake Terminal Location - Observe the following limitations on the intake terminal location (also see Figures
7.22, 7.23, or 7.24):
Q
$# +)#' #&##+
above grade level.
Q
\ # ''#) %' & #
be guaranteed if the intake terminal is subjected to winds in excess of 40 mph.
Q
# %# \#' %
pools. See WARNING on page 12.
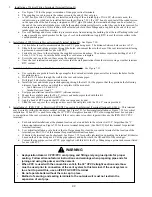
4. Use of abandoned chimneys as a vent chase (Options 33-38) * ) %
to be routed to the roof using an abandoned masonry or B- vent chimney. In these applications combustion air is drawn
horizontally from a wall terminal. See Figure 7.23 or 7.24. When using one of these vent options, observe the following
requirements:
Q
]## % &#\}}&&_^ %+`
Q
)# &#&
Q
* &)# &'&#)
manufacturer and permitted by local codes.
Q
) % &#)#' $+$# # ) %' #
#)# *
Q
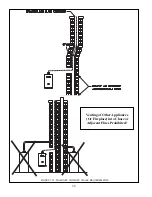
* &) '_&`& #) *
Bends used to make these offsets may not exceed 45 degrees (Figure 7.25).
Q
#* %&\ ## %#&## % & &'# #)
( )%#*) %#' $&#* ')%##'
$+# ( )%##* &\'#' && #$#
'& &_& &)`\#( )%##&
in these offsets can also be ignored.
Summary of Contents for PHNTM080
Page 2: ......
Page 9: ...7 Figure 4 1 Minimum Clearances To Combustible Construction...
Page 11: ...9 Figure 5 1 Wall Layout Mounting Hole Location...
Page 12: ...10 Figure 5 2 Boiler Mounting Bracket Installation Boiler Wall Mounting...
Page 39: ...37 FIGURE 7 24 SPLIT VENT SYSTEM FLEX IN ABANDONED MASONRY CHIMNEY VENT OPTIONS 33 38...
Page 63: ...61 This page is intentionally left blank...
Page 68: ...66 FIGURE 9 2 PIPING METHOD 1 NEAR BOILER PIPING HEATING ONLY...
Page 72: ...70 FIGURE 9 6 PIPING METHOD 1 NEAR BOILER PIPING SHADED BOILER LOOP...
Page 82: ...80 FIGURE 10 4 PROPER INSTALLATION OF HEADER SENSOR...
Page 84: ...82 FIGURE 10 6 INTERNAL WIRING CONNECTIONS DIAGRAM...
Page 85: ...83...
Page 92: ...90 Lighting and Operating Instructions...
Page 101: ...99 FIGURE 12 5 SETTINGS MENU SEE PART C FOR ADDITIONAL INFORMATION...
Page 113: ...111 FIGURE 13 2 IGNITION ELECTRODE GAP FIGURE 13 3 CONDENSATE TRAP EXPLODED PARTS VIEW...
Page 125: ...123...
Page 127: ...125 40 33 31 27 28 34 35 37 38 32 39 36 29 30 48 Blower Gas Valve Assembly for 80 100 120...
Page 129: ...127...
Page 131: ...129...
Page 132: ...130...
Page 133: ...131...
Page 135: ...133...
Page 137: ...135 140 141 142 143 144 145...

