8
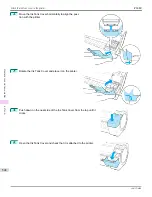
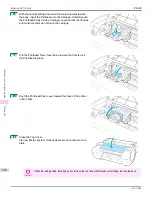
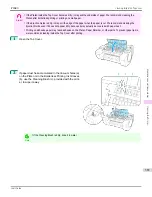
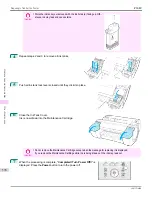
With the nozzles facing down and the metal contacts toward
the back, insert the Printhead into the Carriage. Carefully push
the printhead firmly into the Carriage, ensuring that the nozzles
and metal contacts do not touch the carriage.
9
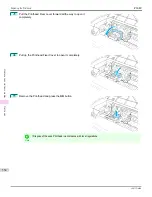
Pull the Printhead Fixer Cover down toward the front to lock
the Printhead in place.
10
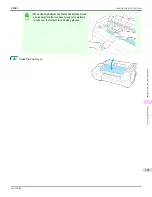
Push the Printhead Fixer Lever toward the back of the printer
until it clicks.
11
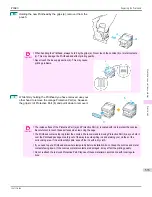
Close the Top Cover.
Ink now fills the system. It takes about seven minutes to com-
plete.
Important
•
While ink is being filled, definitely do not remove the Ink Tank or Maintenance Cartridge. Ink may leak out.
Replacing the Printhead
iPF680
Maintenance and Consumables
Printheads
556
Summary of Contents for imagePROGRAF iPF680
Page 14: ...14 ...
Page 30: ...iPF680 User s Guide 30 ...
Page 156: ...iPF680 User s Guide 156 ...
Page 358: ...iPF680 User s Guide 358 ...
Page 434: ...iPF680 User s Guide 434 ...
Page 472: ...iPF680 User s Guide 472 ...
Page 482: ...iPF680 User s Guide 482 ...
Page 522: ...iPF680 User s Guide 522 ...
Page 576: ...iPF680 User s Guide 576 ...
Page 628: ...iPF680 User s Guide 628 ...

