MY DESIGN CENTER WITH SCAN
352
→
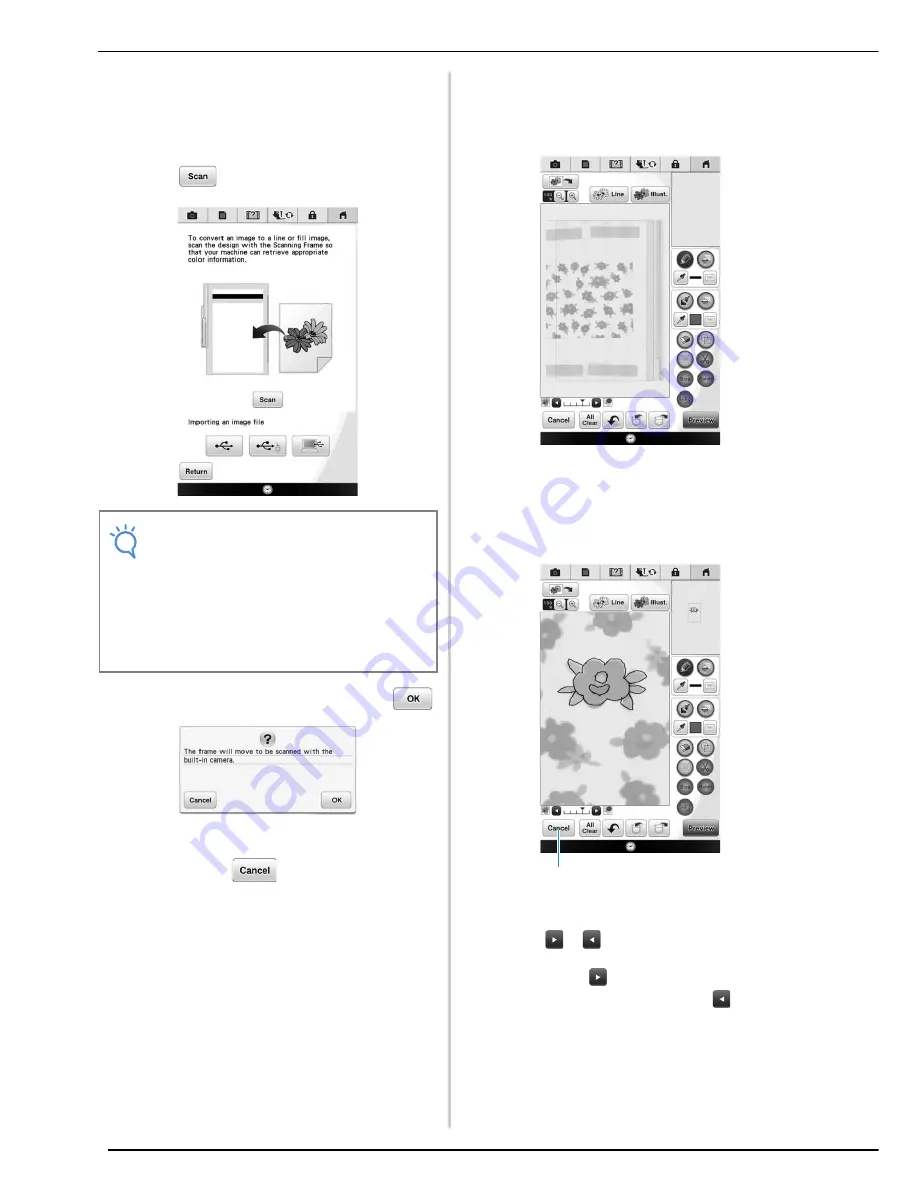
The image display screen appears.
b
Set a picture to the scanning frame and
attach to the machine. Refer to “Using the
Scan Frame” on page 350.
c
Press .
→
When the following message appears, press
.
→
Scanning begins.
*
To stop scanning and return to the screen in
step
c
, press
.
d
When scanning is finished, scanned image is
displayed in dim in the pattern drawing
area.
e
Trace the background image. Refer to
“PATTERN DRAWING SCREEN” on
page 340 about creating your pattern.
a
Transparency adjustment
*
Press
or
to adjust the transparency of the
background.
Each press of
lightens the background, making
the line pattern darker. Each press of
darkens the
background, making the line pattern lighter.
f
After editing the pattern, follow the
procedure from “After Editing the Design”
on page 346.
Note
• When scanning starts, some of the machine
lights will turn off in a certain
circumstances, in order to increase the
scan quality. The machine lights will return
to their original brightness when scanning
ends.
• You can import an image of 5 MB or smaller
from USB media or a computer.
a
Summary of Contents for 82-W20
Page 2: ......
Page 30: ...NAMES OF MACHINE PARTS AND THEIR FUNCTIONS 28 ...
Page 82: ...NEEDLE CALIBRATION USING THE BUILT IN CAMERA 80 ...
Page 170: ...SEWING THE STITCHES 168 ...
Page 190: ...COMBINING STITCH PATTERNS 188 Press Press ...
Page 198: ...USING THE MEMORY FUNCTION 196 ...
Page 210: ...USING STORED CUSTOM STITCHES 208 ...
Page 264: ...ATTACHING THE EMBROIDERY FRAME 262 b Pull the embroidery frame toward you ...
Page 286: ...ADJUSTMENTS DURING THE EMBROIDERY PROCESS 284 ...
Page 338: ...RESUME FEATURE 336 ...
Page 362: ...ILLUSTRATION SCAN 360 ...
Page 418: ......
Page 419: ......


