EDITING PATTERNS
Bas
ic Em
b
ro
ide
ry
239
6
e
Repeat the previous steps until all desired
thread colors are specified.
*
To delete a specified color from the palette, press
.
*
To delete all the specified color from the palette,
press .
f
Press .
■
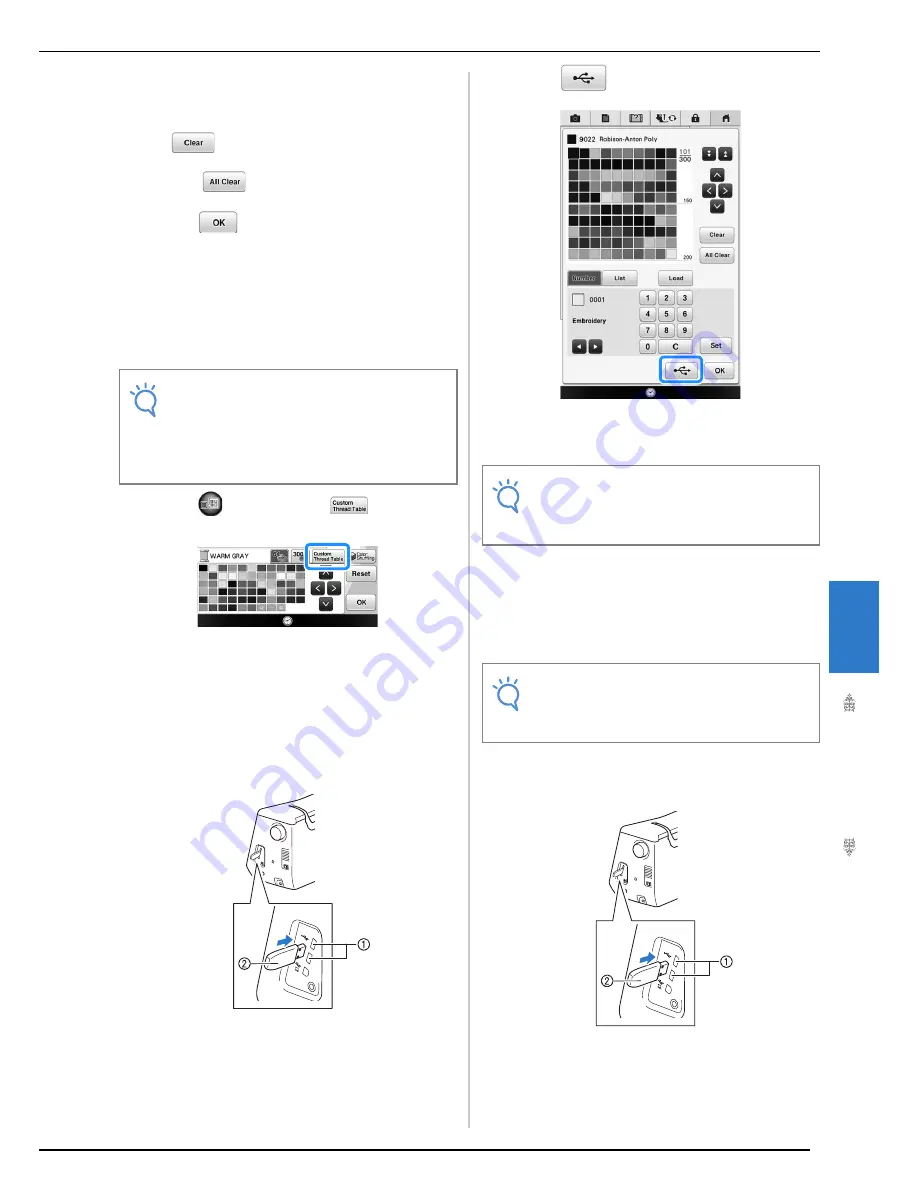
Saving the Custom Thread Table to
USB media
You can save a custom thread table data file to USB
media.
a
Press
and then press
.
b
Set your desired colors in the custom thread
table according to the procedure in
“Creating a Custom Thread Table” on
page 237.
c
Insert the USB media into the USB port on
the machine.
a
USB port
b
USB media
d
Press .
→
Select the USB port, and then the “Saving” screen is
displayed. When the data is saved, the display
returns to the original screen automatically.
■
Recalling the Custom Thread Table
data from USB media
You can recall a custom thread table data from USB
media.
a
Insert the USB media containing the custom
thread table data into the USB port.
a
USB port
b
USB media
Note
• Custom thread table data can only be saved
to USB media. You cannot save the data in
the machine’s memory or to your computer.
• Custom thread table data is saved as “.pcp”
data file.
Note
• Do not insert or remove USB media while
“Saving” screen is displayed. You will lose
some or all of the data you are saving.
Note
• Do not store two or more “.pcp” data file in
USB media. You can only recall one custom
thread table data at a time.
Summary of Contents for 82-W20
Page 2: ......
Page 30: ...NAMES OF MACHINE PARTS AND THEIR FUNCTIONS 28 ...
Page 82: ...NEEDLE CALIBRATION USING THE BUILT IN CAMERA 80 ...
Page 170: ...SEWING THE STITCHES 168 ...
Page 190: ...COMBINING STITCH PATTERNS 188 Press Press ...
Page 198: ...USING THE MEMORY FUNCTION 196 ...
Page 210: ...USING STORED CUSTOM STITCHES 208 ...
Page 264: ...ATTACHING THE EMBROIDERY FRAME 262 b Pull the embroidery frame toward you ...
Page 286: ...ADJUSTMENTS DURING THE EMBROIDERY PROCESS 284 ...
Page 338: ...RESUME FEATURE 336 ...
Page 362: ...ILLUSTRATION SCAN 360 ...
Page 418: ......
Page 419: ......


