SELECTING UTILITY STITCHES
U
tili
ty
S
tit
ch
es
113
3
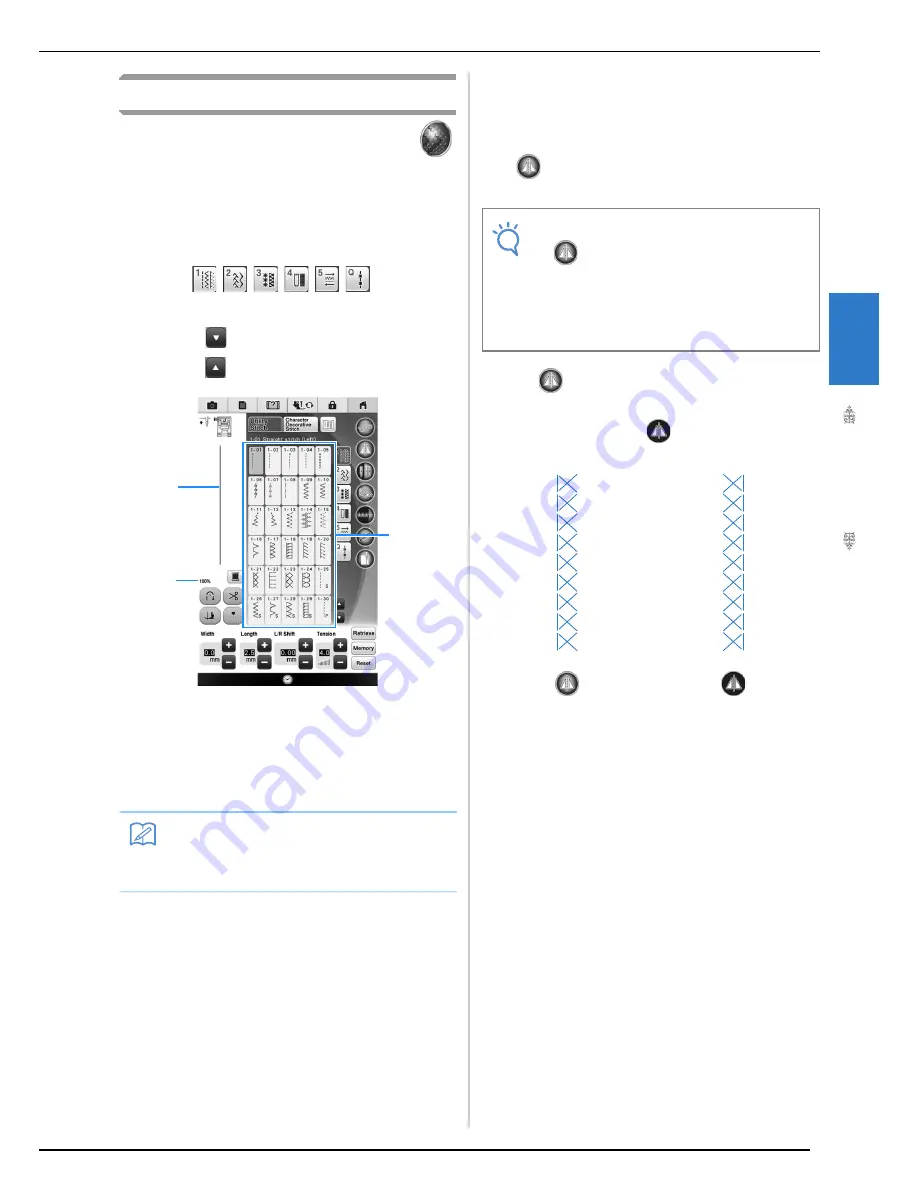
Selecting a Stitch
a
Turn the main power to ON and press
to display the utility stitches.
→
Either “1-01 Straight stitch (Left)” or “1-03 Straight
stitch (Middle)” is selected, depending on the setting
selected in the settings screen.
b
Use
to
select
the category you want.
*
Press
to view the next page.
*
Press
to view previous page.
a
Preview of the selected stitch
b
Stitch selection screen
c
Percentage size of view
c
Press the key of the stitch you want to sew.
■
Using the Mirror Image Key
Depending on the type of utility stitch you select,
you may be able to sew a horizontal mirror image of
the stitch.
If
is lit when you select a stitch, it will be
possible to make a mirror image of the stitch.
Press
to create a horizontal mirror image of the
selected stitch.
The key will display as
.
Memo
• For details on each stitch, refer to the
“STITCH SETTING CHART” at the end of
this manual.
a
b
c
Note
• If
is light gray after you select a stitch,
you cannot create a horizontal mirror image
of the selected stitch due to the type of
stitch or type of presser foot recommended
(this is true of buttonholes, multi-directional
sewing, and others).
Summary of Contents for 82-W20
Page 2: ......
Page 30: ...NAMES OF MACHINE PARTS AND THEIR FUNCTIONS 28 ...
Page 82: ...NEEDLE CALIBRATION USING THE BUILT IN CAMERA 80 ...
Page 170: ...SEWING THE STITCHES 168 ...
Page 190: ...COMBINING STITCH PATTERNS 188 Press Press ...
Page 198: ...USING THE MEMORY FUNCTION 196 ...
Page 210: ...USING STORED CUSTOM STITCHES 208 ...
Page 264: ...ATTACHING THE EMBROIDERY FRAME 262 b Pull the embroidery frame toward you ...
Page 286: ...ADJUSTMENTS DURING THE EMBROIDERY PROCESS 284 ...
Page 338: ...RESUME FEATURE 336 ...
Page 362: ...ILLUSTRATION SCAN 360 ...
Page 418: ......
Page 419: ......


