USEFUL FUNCTIONS
98
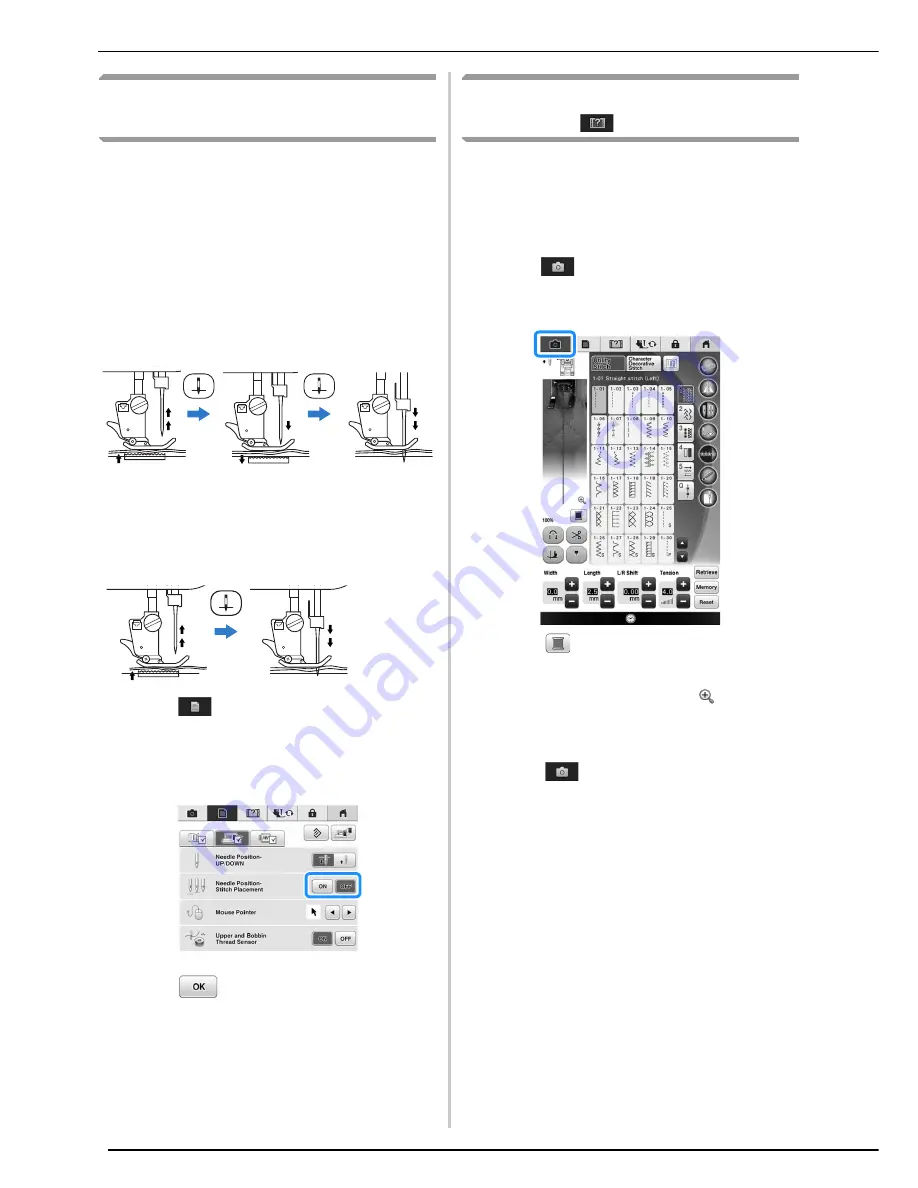
Needle Position - Stitch
Placement
When the “Needle Position - Stitch Placement” is
“ON”, the needle will be partially lowered for
precise stitch placement and then press the
“Needle Position” button to lower the needle
completely. Each press of the “Needle Position”
button changes the needle to the next position.
When the “Needle Position - Stitch Placement” is
“OFF”, each press of the “Needle Position” button
simply raises and then lowers the needle.
“Needle Position - Stitch Placement” is “ON”
*
When the needle is nearly lowered by pressing the
“Needle Position” button, the feed dogs are
lowered. At this time, the fabric can be shifted to
finely adjust the needle drop position.
“Needle Position - Stitch Placement” is “OFF”
a
Press .
b
Set “Needle Position - Stitch Placement” to
“ON” or “OFF”.
c
Press
to return to the original screen.
Checking the Needle Location in
the Screen
You can check the stitch image with actual fabric
image on the screen.
a
Select a stitch.
b
Press .
→
An image of the selected stitch and the actual fabric
image are displayed.
*
Press
to change the thread color displayed on
the screen. You can select from four different colors.
c
Press on the fabric image or
on the
screen.
→
The camera view window appears.
→
Press
again to turn off the camera view.
Summary of Contents for 82-W20
Page 2: ......
Page 30: ...NAMES OF MACHINE PARTS AND THEIR FUNCTIONS 28 ...
Page 82: ...NEEDLE CALIBRATION USING THE BUILT IN CAMERA 80 ...
Page 170: ...SEWING THE STITCHES 168 ...
Page 190: ...COMBINING STITCH PATTERNS 188 Press Press ...
Page 198: ...USING THE MEMORY FUNCTION 196 ...
Page 210: ...USING STORED CUSTOM STITCHES 208 ...
Page 264: ...ATTACHING THE EMBROIDERY FRAME 262 b Pull the embroidery frame toward you ...
Page 286: ...ADJUSTMENTS DURING THE EMBROIDERY PROCESS 284 ...
Page 338: ...RESUME FEATURE 336 ...
Page 362: ...ILLUSTRATION SCAN 360 ...
Page 418: ......
Page 419: ......


