Using transparency and mattes
To the top
To the top
About transparent and matted web images
Preserve background transparency in a GIF or PNG image
Create a matted GIF or PNG image
Create hard-edged transparency in a GIF or PNG
-
8 file
Create a matted JPEG image
About transparent and matted web images
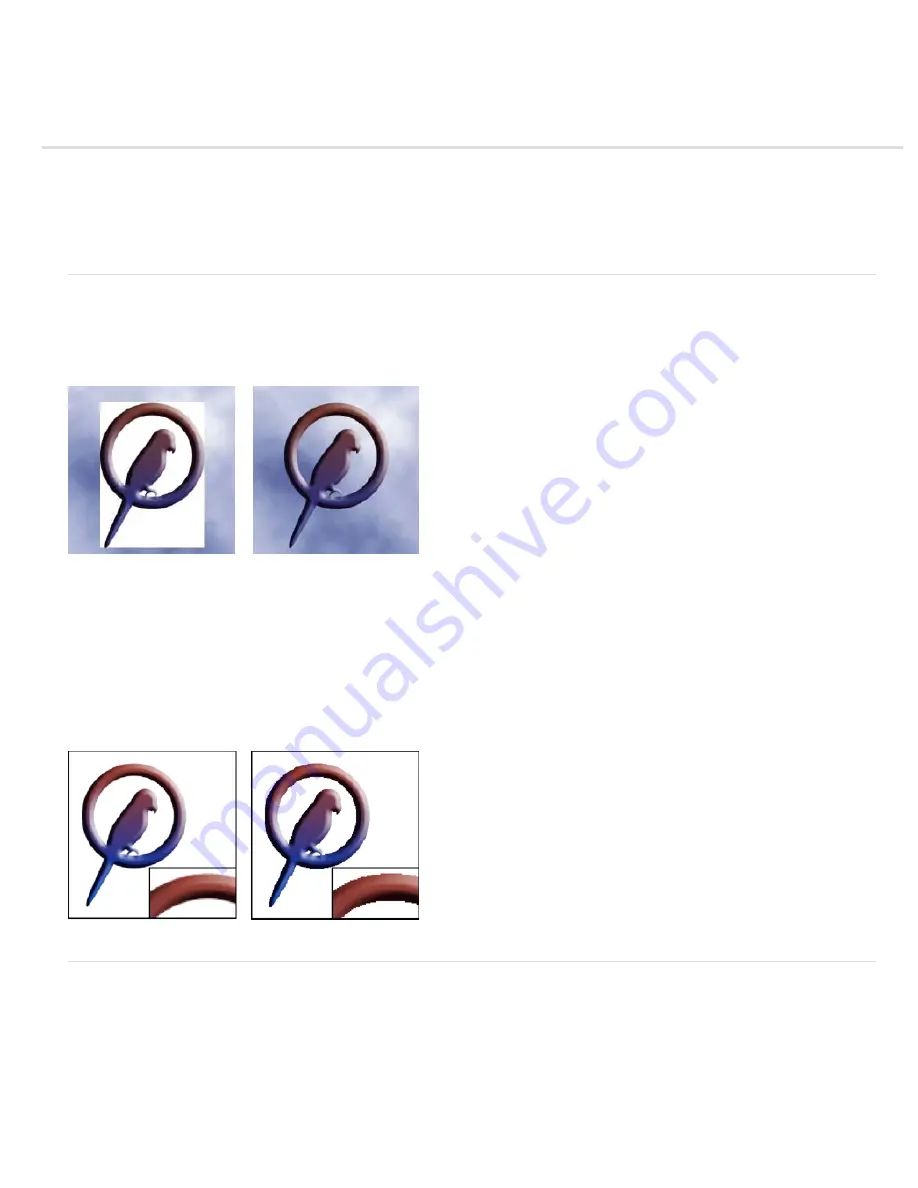
Transparency makes it possible to create nonrectangular images for the web. Background transparency, supported by the GIF and PNG formats,
preserves transparent pixels in the image and allows the background of the web page to show through the transparent areas of your image.
(Although the JPEG format does not support transparency, you can specify a matte color to simulate the appearance of transparency in the original
image.)
Web button without transparency (left), and with transparency (right)
Background matting, supported by the GIF, PNG, and JPEG formats, simulates transparency by filling or blending transparent pixels with a matte
color that matches the web page background. Background matting works best if the web page background is a solid color and if you know what
that color is.
To create background transparency or background matting in the optimized image, you must start with an image that contains transparency. You
can create transparency when you create a new layer or use the Background Eraser, Magic Eraser, or Magic Extractor tools.
When working with GIF or PNG
-
8 files, you can create hard-edged transparency: all pixels that are more than 50% transparent in the original
image are fully transparent in the optimized image, and all pixels that are more than 50% opaque in the original image are fully opaque in the
optimized image. Use hard-edged transparency when you don’t know the background color of a web page, or when the web page background
contains a texture or pattern. However, keep in mind that hard-edged transparency can cause jagged edges in the image.
GIF without hard-edges transparency (left), and with hard-edged transparency (right)
Preserve background transparency in a GIF or PNG image
GIF and PNG
-
8 formats support one level of transparency—pixels can be fully transparent or fully opaque, but not partially transparent. (By
contrast, PNG
-
24 format supports multilevel transparency; that is, you can have up to 256 degrees of transparency in an image, ranging from
opaque to completely transparent.)
1. Open or create an image that contains transparency, and choose File > Save For Web.
2. In the Save For Web dialog box, select GIF, PNG
-
8, or PNG
-
24 as the optimization format.
3. Select Transparency.
4. For the GIF and PNG
-
8 formats, specify how to treat partially transparent pixels in the original image. You can blend these
Summary of Contents for 29180155 - Photoshop Elements 4.0
Page 1: ...ADOBE PHOTOSHOP ELEMENTS Help and tutorials...
Page 2: ...Getting started tutorials...
Page 6: ...What s new...
Page 13: ...Workspace and workflows...
Page 25: ...Legal Notices Online Privacy Policy...
Page 53: ...Importing...
Page 56: ...File management...
Page 69: ...Image adjustments...
Page 105: ...Legal Notices Online Privacy Policy...
Page 154: ...Legal Notices Online Privacy Policy...
Page 159: ...Selecting...
Page 175: ...Legal Notices Online Privacy Policy...
Page 181: ...Color...
Page 213: ...More Help topics Legal Notices Online Privacy Policy...
Page 220: ...Drawing and painting...
Page 229: ...More Help topics Legal Notices Online Privacy Policy...
Page 244: ...More Help topics Legal Notices Online Privacy Policy...
Page 258: ...Effects and filters...
Page 311: ...Legal Notices Online Privacy Policy...
Page 325: ...Text and shapes...
Page 340: ...More Help topics Legal Notices Online Privacy Policy...
Page 341: ...Layers...
Page 363: ...Printing and exporting...
Page 366: ...Legal Notices Online Privacy Policy...
Page 374: ...Photo projects...
Page 392: ...Web graphics...


