To the top
To the top
To the top
Pattern
Creates a layer filled with a pattern. Click the pattern, and choose a pattern from the pop
-
up panel. You can scale the
pattern and choose Snap To Origin to position the origin of the pattern with that of the document window. To specify that the
pattern moves with the Fill layer as it is relocated, select Link With Layer. When this option is selected, you can drag within the
image to position the pattern while the Pattern Fill dialog box is open. To create a new preset pattern after editing pattern
settings, click the New Preset button.
Edit an adjustment or fill layer
1. Open the adjustment or fill options dialog box by doing one of the following:
Double-click the adjustment or fill layer’s leftmost thumbnail in the Layers panel.
Select the layer in the panel and choose Layer > Layer Content Options.
2. Make your changes, and click OK.
Merging adjustment layers
You can merge an adjustment or fill layer in several ways: with the layer below it, with other selected layers, with the layers in its own group, with
the layers it’s linked to, and with all other visible layers. You cannot, however, use an adjustment layer or fill layer as the base or target layer for a
merge.
When you merge an adjustment layer or fill layer with the layer below it, the adjustments are simplified and permanently applied to the merged
layer. The adjustment no longer affects other layers below the merged adjustment layer. You can also convert (simplify) a fill layer into an image
layer without merging it.
Adjustment layers and fill layers with masks (the layer’s rightmost thumbnail in the Layers panel) that contain only white values do not add
significantly to the file size, so you don’t need to merge these adjustment layers to conserve file space.
Edit the layer masks
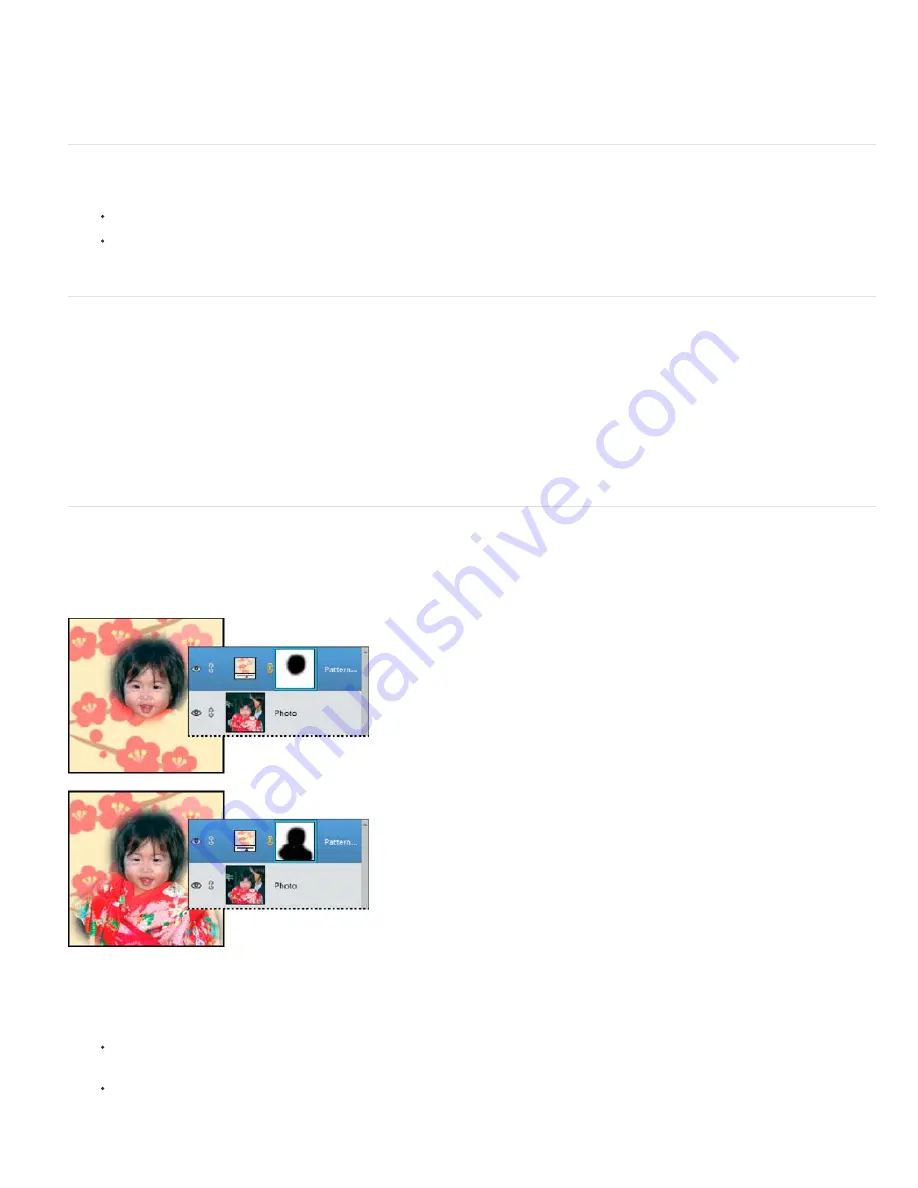
A layer mask prevents sections of a layer, or an entire layer, from being visible. You use the mask to show or hide sections of an image or an
effect. When the layer mask (right thumbnail) attached to an adjustment layer is completely white, the adjustment effect is applied to all underlying
layers. If you don’t want to apply the effect to certain portions of the underlying layers, paint the corresponding area of the mask with black. When
attached to a fill layer, the mask defines the filled
-
in area in the fill layer.
Painting a mask with black increases the area protected.
1. Select the adjustment or fill layer in the Layers panel.
2. Select the Brush tool, or any painting or editing tool.
3. Use the following methods to view the layer mask:
To view only the mask, Alt-click (Option-click in Mac OS) the layer mask’s thumbnail (the rightmost thumbnail). Alt-click
(Option-click in Mac OS) the thumbnail again to redisplay the other layers.
To view the mask in a red masking color, hold down Alt+Shift (Shift in Mac OS) and click the layer mask’s
thumbnail (the rightmost thumbnail). Hold down Alt+Shift (Shift in Mac OS) and click the thumbnail again to turn off
the red display.
Summary of Contents for 29180155 - Photoshop Elements 4.0
Page 1: ...ADOBE PHOTOSHOP ELEMENTS Help and tutorials...
Page 2: ...Getting started tutorials...
Page 6: ...What s new...
Page 13: ...Workspace and workflows...
Page 25: ...Legal Notices Online Privacy Policy...
Page 53: ...Importing...
Page 56: ...File management...
Page 69: ...Image adjustments...
Page 105: ...Legal Notices Online Privacy Policy...
Page 154: ...Legal Notices Online Privacy Policy...
Page 159: ...Selecting...
Page 175: ...Legal Notices Online Privacy Policy...
Page 181: ...Color...
Page 213: ...More Help topics Legal Notices Online Privacy Policy...
Page 220: ...Drawing and painting...
Page 229: ...More Help topics Legal Notices Online Privacy Policy...
Page 244: ...More Help topics Legal Notices Online Privacy Policy...
Page 258: ...Effects and filters...
Page 311: ...Legal Notices Online Privacy Policy...
Page 325: ...Text and shapes...
Page 340: ...More Help topics Legal Notices Online Privacy Policy...
Page 341: ...Layers...
Page 363: ...Printing and exporting...
Page 366: ...Legal Notices Online Privacy Policy...
Page 374: ...Photo projects...
Page 392: ...Web graphics...


