To the top
To the top
3. Add segments of a selection border by doing one of the following:
Click points along the edge.
Drag along the edge while pressing the mouse button.
The selection border snaps to the edge in the photo. If the border doesn’t snap to the desired edge, click once to add a
point manually; then continue tracing the border and clicking points as needed. If you make a mistake, press the Delete
key to erase points along the border.
4. Close the selection border by doing one of the following:
To close the border manually, drag back over the starting point and click. A closed circle appears next to the pointer when
you are over the starting point.
To close the border with a freehand magnetic segment, double-click or press Enter.
To close the border with a straight segment, double-click while pressing Alt (Option in Mac OS).
Use the Magic Wand tool
The Magic Wand tool selects pixels within a similar color range with one click. You specify the color range, or tolerance, for the Magic Wand tool’s
selection. Use the Magic Wand tool when you have an area of similar colors, like a blue sky.
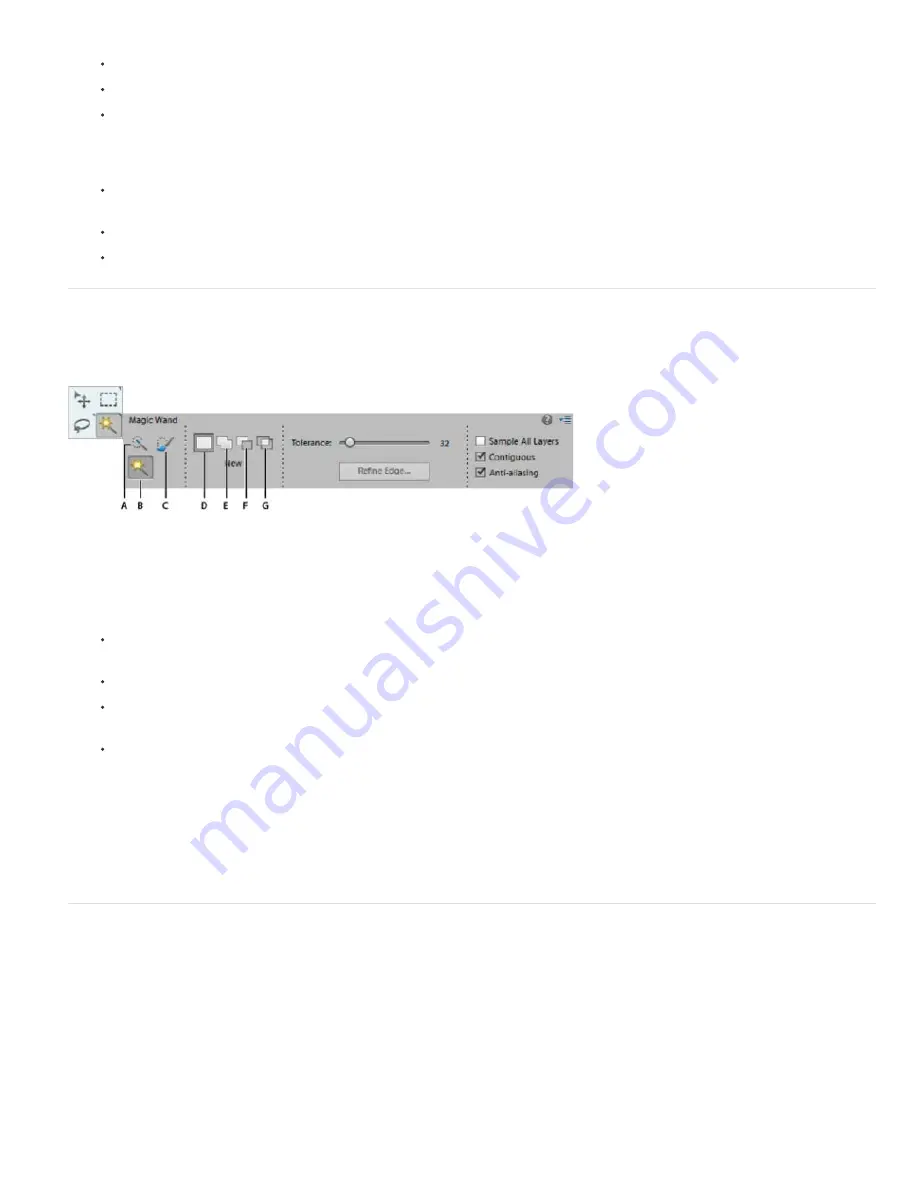
Magic Wand tool options
A. Magic Wand tool B. New selection C. Add to selection D. Subtract from selection E. Intersect with selection
1. Select the Magic Wand tool.
2. (Optional) Set Magic Wand tool options in the Tool Options bar:
For Tolerance, enter a value between 0 to 255. Enter a low value to select colors very similar to the pixel you click, or
enter a higher value to select a broader range of colors.
To define a smooth selection edge, select Anti-aliased.
To select only adjacent areas using the same colors, select Contiguous. When this option is deselected, pixels using the
same colors are selected throughout the entire photo.
To select colors using data from all the visible layers, select Sample All Layers. When this option is deselected, the Magic
Wand tool selects colors from only the active layer.
3. In the photo, click the color you want to select.
4. To add to the selection, Shift+click unselected areas. To remove an area from the selection, press Alt (Option in Mac OS) and
click the area you want to remove.
5. Click Refine Edge to make further adjustments to your selection and make it more precise. See how you can
refine the edges
of a selection
.
Use the Quick Selection tool
The Quick Selection tool makes a selection based on color and texture similarity when you click or click-drag the area you want to select. The
mark you make doesn’t need to be precise, because the Quick Selection tool automatically and intuitively creates a border.
note: The Smart Brush tool makes selections like the Quick Selection tool and simultaneously applies a color or tonal adjustment. See Apply the
Smart Brush tools.
Summary of Contents for 29180155 - Photoshop Elements 4.0
Page 1: ...ADOBE PHOTOSHOP ELEMENTS Help and tutorials...
Page 2: ...Getting started tutorials...
Page 6: ...What s new...
Page 13: ...Workspace and workflows...
Page 25: ...Legal Notices Online Privacy Policy...
Page 53: ...Importing...
Page 56: ...File management...
Page 69: ...Image adjustments...
Page 105: ...Legal Notices Online Privacy Policy...
Page 154: ...Legal Notices Online Privacy Policy...
Page 159: ...Selecting...
Page 175: ...Legal Notices Online Privacy Policy...
Page 181: ...Color...
Page 213: ...More Help topics Legal Notices Online Privacy Policy...
Page 220: ...Drawing and painting...
Page 229: ...More Help topics Legal Notices Online Privacy Policy...
Page 244: ...More Help topics Legal Notices Online Privacy Policy...
Page 258: ...Effects and filters...
Page 311: ...Legal Notices Online Privacy Policy...
Page 325: ...Text and shapes...
Page 340: ...More Help topics Legal Notices Online Privacy Policy...
Page 341: ...Layers...
Page 363: ...Printing and exporting...
Page 366: ...Legal Notices Online Privacy Policy...
Page 374: ...Photo projects...
Page 392: ...Web graphics...


