


4 W o r k i n g w i t h y o u r s u p p l e m e n t a r y a p p l i c a t i o n s
Using Recorder
99
During Recording mode:
• The scroll buttons and the Graffiti area are disabled; the LED indicator flashes
red.
• If the Background Recording function is enabled, pressing any of the
application buttons will launch another application with the recording mode
still active on the background.
• If the Background Recording function is disabled, pressing any of the
application buttons will stop recording and terminate the Recorder
operation. Recorded audio will automatically be saved to the active storage
medium.
To start recording using the Record button
1
In the Recorder main screen, tap the Storage pick list and select a storage medium.
When Expansion is selected when no
Memory Stick
is available, recorded audio will
automatically be saved to the handheld’s internal memory.
2
In the Recorder main screen, tap
.
The Recorder status screen appears. The same screen appears when Recording mode is
activated via the Multi-function button.
.
The available recording time should be more than 10 seconds to start/continue with
the recording.
To start recording using the Multi-function button
Before performing the steps below, make sure that the Multi-function button is
configured to perform the Record function. Refer to "To configure the function of the
Multi-function button" on page 234 for instructions.
1
Press and hold the Multi-function button until a beep is heard.
2
Release the Multi-function button to start recording.
The Recording status screen appears.
3
Press the Multi-function button again to stop recording.
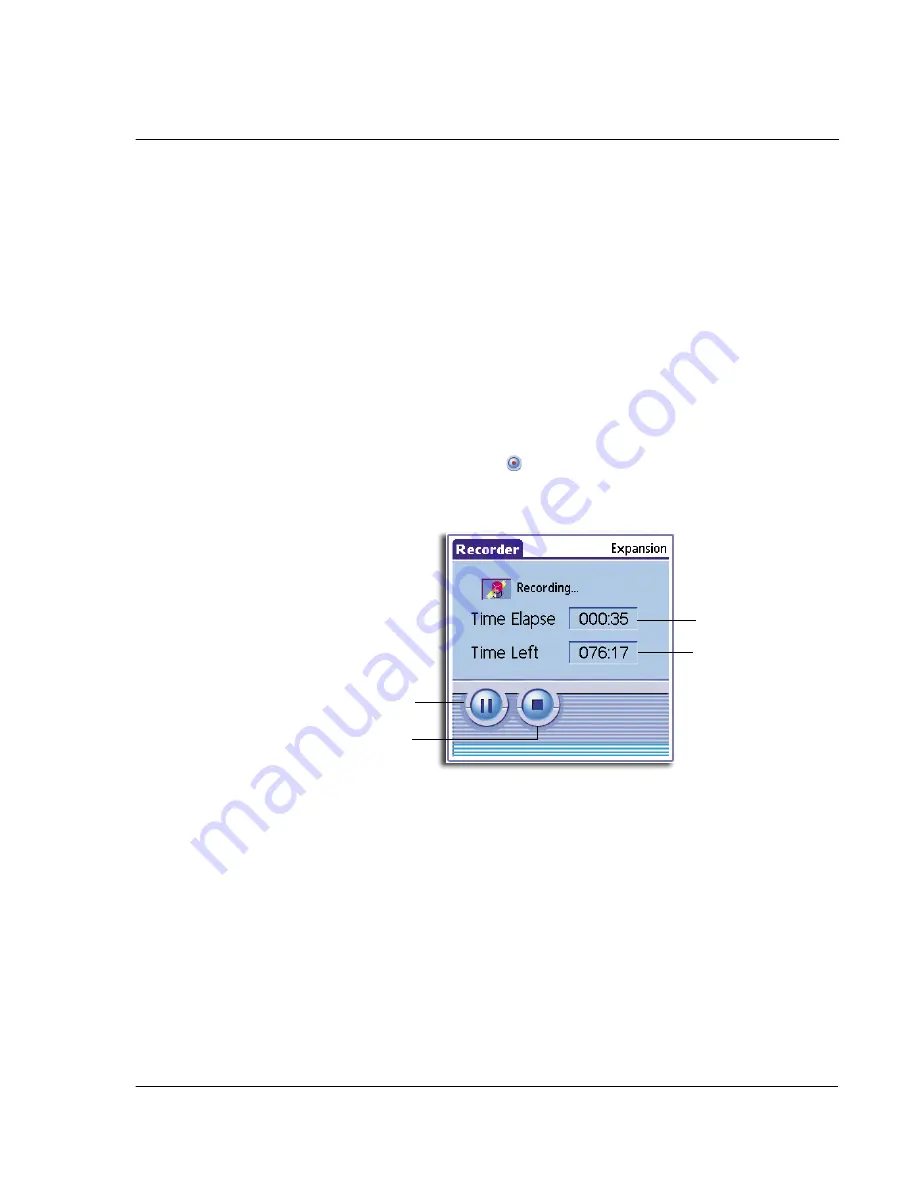
Elapsed recording time
Remaining time
available for recording
in the active storage
medium
Pause
Stop
Summary of Contents for EV- S60 Series
Page 1: ...User Manual for Acer s50 and s60 Handhelds...
Page 6: ...First things first Assigning security options vi...
Page 22: ...1 Entering data in your Acer handheld Beaming data 10...
Page 218: ...7 Managing your desktop email Managing your email application with HotSync 206...
Page 224: ...8 Beaming information Turning off beaming 212...
Page 242: ...9 Exchanging and updating data using HotSync operations Using File Link 230...
Page 282: ...10 Setting preferences for your Acer handheld ShortCuts preferences 270...