439
Continued on next page
Oth
er Useful
F
unc
ti
on
s
ToDo/ToDo detail checking display function menu 2/2
Adding and editing entries
●
Always enter “detail” for an entry. Entries with no “detail” entered are not added to the ToDo list.
●
To edit a previously added entry, begin the procedure from step 2.
1
Press
i95
s
Press
o
(New).
■
When an entry is already saved
Select “New” from the function menu.
2
Specify the respective settings.
5
Sort/Filter
s
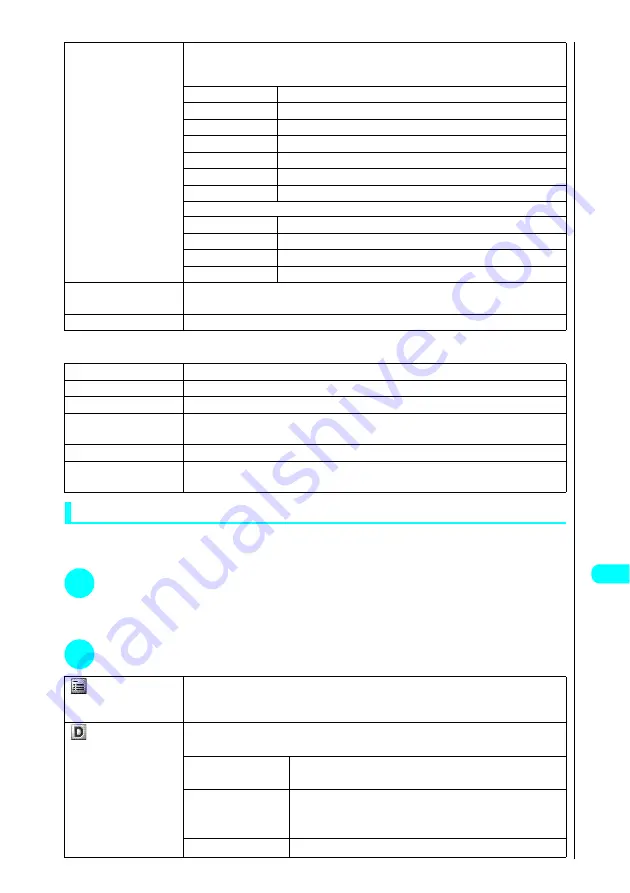
Choose from the following options:
Sorts entries or displays only entries with a specified status.
Settings 1/2
1
By due date
Sorts entries by due date from the oldest entry onwards.
2
By completed
Sorts entries by completion date from the oldest entry onwards.
3
By entered time
Sorts entries in the order in which they were entered.
4
Plan
Displays only entries with the Plan status.
5
Acceptance
Displays only entries with the Acceptance status.
6
Request
Displays only entries with the Request status.
7
Provisional plan
Displays only entries with the Provisional plan status.
Settings 2/2
1
Confirmation
Displays only entries with the Confirmation status.
2
Denial
Displays only entries with the Denial status.
3
Completion
Displays only entries with the Completion status.
4
Substitution
Displays only entries with the Substitution status.
6
Add desktop icon
s
Select “YES” and press
d
.
See “Using Desktop Icons”
→
P. 135
7
Send Ir data
s
Select “YES” and press
d
.
1
Send all Ir data
Sends all the entries using infrared communication. See “Sending all data entries”
→
P. 413
2
Export this
s
Select “YES” and press
d
.
3
Delete this
s
Select “YES” and press
d
.
4
Delete select
s
Use
c
to select a checkbox (
□
) and press
d
s
Press
o
(Finish)
s
Select “YES”
and press
d
.
5
Delete completed
s
Select “YES” and press
d
.
6
Delete all
s
Enter your security code and press
d
s
Select “YES” and press
d
.
About Your Security Codes
→
P. 142
ToDo
s
Enter the details for the entry and press
d
.
Enters the details for the entry. The details can contain up to 100 full-pitch or 200 half-pitch characters. See
“Entering Text”
→
P. 522
Due date
s
Choose from the following options:
Sets the due date for an entry.
1
Enter date
s
Enter the date and time and then press
d
.
Enters the due date directly.
2
Choose date
s
Select a date from the calendar and press
d
s
Enter the time
and press
d
.
Selects a date from the calendar.
3
No date
No due date is set.
Содержание FOMA N700?
Страница 77: ......
Страница 115: ......
Страница 241: ......
Страница 321: ......
Страница 581: ......
Страница 582: ...Index Quick Manual...
Страница 588: ...585 Index Quick Manual Memo...
Страница 589: ...586 Index Quick Manual Memo...
Страница 590: ...587 Index Quick Manual Memo...


