168
Came
ra
* The miniSD memory card is an optional accessory.
→
P. 392
*1 : If you have selected the Front camera, “
1
Rear camera” is displayed. The default setting is the Rear camera.
*2 : When the light is lit, “
5
Light OFF” is displayed.
*3 : When you use a macro lens, “
7
Switch lens (Auto)” is displayed. When starting a camera, “Auto” is displayed.
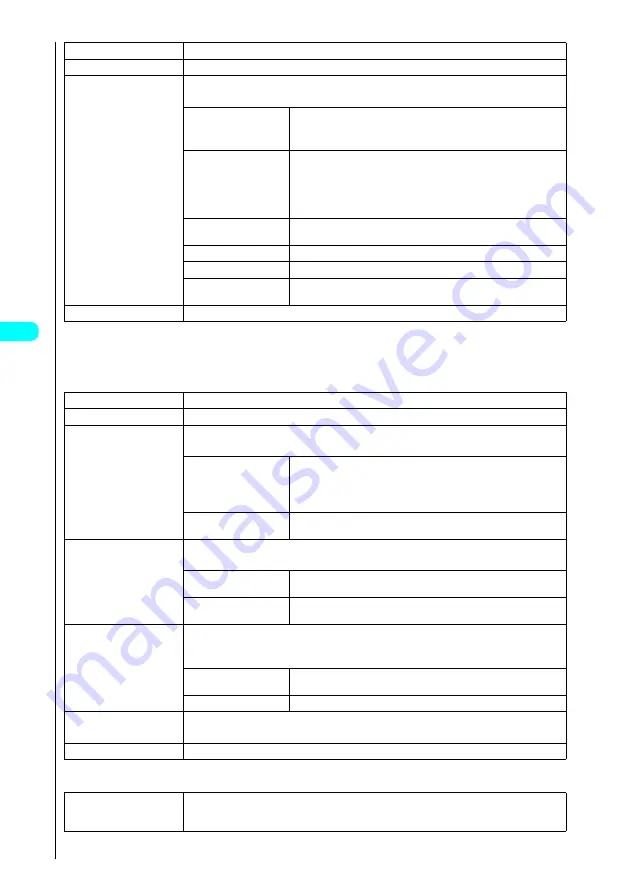
Photo mode display function menu 2/3
Still image shooting screen function menu 3/3
4
Storage setting
See “Setting the file size during saving”
→
P. 169
5
Light ON*
2
Turns on and off a light. This operation is impossible if you have selected the front camera.
6
Image quality
s
Choose from the following options:
Sets the quality of images.
1
Auto correction
(Default:
1
ON)
s
Select
1
“ON” or
2
“OFF”.
If you select “ON”, shot images are automatically adjusted to the highest image quality. Selecting
“OFF” allows you to adjust the brightness or set the white balance.
2
Brightness
s
Use
v
to adjust the brightness and then press
d
.
The brightness of shot images can be adjusted through 5 levels (–2 to ±0 to +2). If
the key is not pressed for 2 seconds, the brightness is adjusted automatically. The
brightness is set to “±0” when the camera is turned on. The brightness cannot be
adjusted when “Auto correction” is set to “ON”.
3
White balance
See “Setting the white balance”
→
P. 179
The white balance cannot be adjusted when “Auto correction” is set to “ON”.
4
Color mode set
See “Setting effects in photographed images”
→
P. 179
5
Photo mode
See “Selecting the right photography mode for the shot”
→
P. 179
6
Image tuning
See “Suppressing flicker in photographed images”
→
P. 180
This option cannot be set for the front camera.
7
Switch lens (Macro)*
3
Switches the lens to Auto or Macro. This operation is impossible if you have selected the front camera.
1
Auto timer
See “Using the Auto timer”
→
P. 184
2
Select frame
See “Shooting framed images”
→
P. 174
3
Auto save set
s
Choose from the following options:
Sets the method used for saving shot images.
1
ON
s
Press
1
“Phone” or
2
“miniSD”.
Sets the FOMA terminal to automatically save shot images.
If you select “Phone”, images are saved in the Camera folder in My picture in the Data box.
If you select “miniSD”, images are saved in the folder specified in “Select storage” (P. 408).
2
OFF
(default setting)
Cancels automatic saving.
4
File restriction
s
Choose from the following options:
Sets the file restrictions.
1
File unrestricted
(default setting)
Allows the file to be sent or forwarded from the FOMA terminal to which it is sent.
2
File restricted
Prevents the file from being sent or forwarded from the FOMA terminal to which it is
sent.
5
Display size
s
Choose from the following options:
Sets the display mode for images smaller than Stand-by size (240
×
320).
This option can only be set when the image format is Mail(L) (176
×
144) or Mail(S) (128
×
96).
1
Actual size
(default setting)
Displays the image at its actual size.
2
Fit in display
Enlarges the image to fit the display.
6
Memory info
s
Check the available size and press
t
.
Use this option to check the amount of saved data and the amount of available space on the FOMA terminal or miniSD memory card.
7
Interval/Number
See “Setting the shooting interval and number of shots”
→
P. 171
1
Shutter sound
(Default setting:
1
Sound 1)
s
Select
1
“Sound 1”,
2
“Sound 2” or
3
“Sound 3”.
Sets the shutter sound.
Содержание FOMA N700?
Страница 77: ......
Страница 115: ......
Страница 241: ......
Страница 321: ......
Страница 581: ......
Страница 582: ...Index Quick Manual...
Страница 588: ...585 Index Quick Manual Memo...
Страница 589: ...586 Index Quick Manual Memo...
Страница 590: ...587 Index Quick Manual Memo...


