


Appendix A
Tutorial
© National Instruments Corp.
A-9
GPIB-410 User Manual
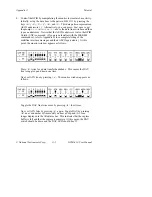
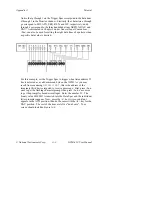
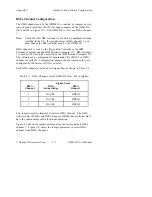
Notice that q through i on the Trigger Spec correspond to the data lines
8 through 1 in the Monitor window. Similarly, the characters a through
g correspond to EOI, ATN, SRQ, REN, and IFC, respectively, and h
through k correspond to the three handshake lines NRFD, NDAC, and
DAV. As discussed in Chapter 3 under General Input Conventions ,
<Ins> can also be used for setting the eight data lines of a pattern when
a specific data value is desired.
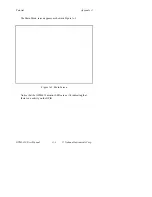
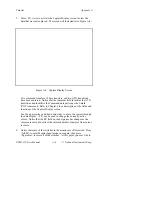
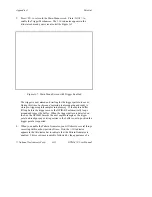
For this example, set the Trigger Spec to trigger when listen address 23
hex is detected as a valid command byte on the GPIB. As you may
recall from examining
GPIB410.PAT
, this is the address of the
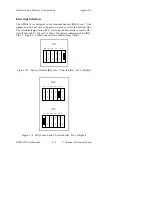
imaginary third device targeted to receive a message. First, press <Ins>
once to get the flashing character prompt, then press <Ins> once more
to get the prompt for hexadecimal input. Enter the number 23. The
binary value 00100011 is inserted into the Data Spec and the individual
letter prompts reappear. Now, press the <s> key twice or until an 1
appears in the ATN position, then do the same with the <k> key for the
DAV position. The rest of the lines are left as "don't care". Your
screen should look like Figure A-6.


