


Software Reference
Chapter 4
GPIB-410 User Manual
4-8
© National Instruments Corp.
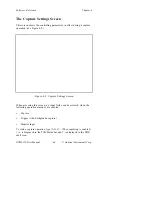
Selecting the multi-pass option causes the GPIB-410 to begin entering
new capture samples at the beginning of the buffer each time the buffer
fills up. Previous buffer entries are overwritten. This cyclical action
continues indefinitely until you stop the capture by typing <Alt-C>, at
which point the buffer is "unwound" so that the most recently captured
samples can be reviewed in chronological order.
Buffer Setup: Auto-Write Each Pass
Use this field to specify whether to save the results of the next capture
operation automatically to a file on disk. There are two options.
•
yes
(write each buffer pass to disk)
•
no
(do not write to disk)
Selecting
yes
causes the results of future capture operations to be
written to the specified file whenever the capture buffer is full or
capturing is stopped. To implement a continuous capture operation to
disk, combine this option with a circular buffer by configuring the
following fields on the capture settings screen as shown.
Action when buffer full ... reset and continue
Auto-write each pass ...... yes
Capture file name .........
filename.cap
Note:
Selecting
yes
for the
Auto-write
each
pass
field does not
cause the current contents of the capture buffer to be saved to
disk–you must explicitly type <Alt-W> to do this.
File Setup: Buffer Range for <Alt-W>
Use this field to specify the portion of the capture buffer to be written to
disk when you type <Alt-W>. There are two options.
•
entire buffer
•
cursor-to-cursor
Selecting
entire
buffer
causes all entries in the capture buffer to be
written to the target capture file when you type <Alt-W>. Selecting


