M160 Internet Router Hardware Guide
1.
On the console or other management device connected to the master Routing
Engine, enter CLI operational mode and issue the following command to shut
down the router software. (If two Routing Engines are installed, also issue the
command on the backup Routing Engine.)
user@host> request system halt
NOTE:
Wait until a message appears on the console confirming that the operating
system has halted.
For more information about the command, see the
JUNOS Protocols, Class of
Service, and System Basics Command Reference
.
2.
For each power supply, press the power switch on the circuit breaker box to
the
OFF
(
O
) position.
NOTE:
If you are power cycling the power supply rather than shutting it off for a
time, wait at least 60 seconds after turning it off before turning it back on. If you
need to power it off again, wait for at least 60 seconds after powering it on.
3.
Shut off the power flowing from both external power sources, so that the
voltage across the leads of the power cables is 0 V. Ensure that there is no
chance that the cable leads might become active during the procedure.
4.
Attach an electrostatic discharge (ESD) grounding strap to your bare wrist and
connect the strap to one of the ESD points on the chassis. Make sure the router
is attached to a proper earth ground. For more information about ESD, see
“Preventing Electrostatic Discharge Damage” on page 226.
5.
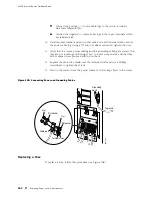
Using a Phillips screwdriver, loosen and remove the screws securing the
protective shield over the terminal studs on the circuit breaker box. Remove
the cover.
6.
Using a 7/16-in. nut driver or wrench, loosen the outer nut securing the cable
lug to each terminal stud. Remove the outer nuts and washers, leaving the
inner nut and washer on each stud.
CAUTION:
Do not substitute a metric nut driver or wrench. A tool that does not fit
the nuts exactly can damage them. If a 7/16-in. tool is not available, use pliers or
an adjustable wrench.
7.
Slide the cable lug off of each terminal stud. Leave the inner washer and nut
on each stud.
194
Replacing Power System Components
Содержание Internet Router M160
Страница 12: ...M160 Internet Router Hardware Guide xii Table of Contents ...
Страница 16: ...M160 Internet Router Hardware Guide xvi List of Figures ...
Страница 18: ...M160 Internet Router Hardware Guide xviii List of Tables ...
Страница 24: ...M160 Internet Router Hardware Guide xxiv Requesting Support ...
Страница 26: ...2 Product Overview ...
Страница 30: ...M160 Internet Router Hardware Guide 6 Safety Requirements Warnings and Guidelines ...
Страница 66: ...M160 Internet Router Hardware Guide 42 Cable Management System ...
Страница 80: ...M160 Internet Router Hardware Guide 56 Routing Engine Architecture ...
Страница 82: ...58 Initial Installation ...
Страница 104: ...M160 Internet Router Hardware Guide 80 Unpacking the Router ...
Страница 148: ...M160 Internet Router Hardware Guide 124 Configuring the JUNOS Internet Software ...
Страница 150: ...126 Hardware Maintenance Replacement and Troubleshooting Procedures ...
Страница 242: ...M160 Internet Router Hardware Guide 218 Troubleshooting the Power System ...
Страница 244: ...220 Appendixes ...
Страница 292: ...M160 Internet Router Hardware Guide 268 Packing Components for Shipment ...
Страница 301: ...Part 5 Index Index 277 ...
Страница 302: ...278 Index ...

