49
Using the Main Menu
COPY
Copy recorded video data on the hard drive to
an external USB drive or USB flash drive.
To use Copy:
1. From the COPY menu, select
COPY
and
press the
button.
2. Under MEDIA, press the
buttons to
select
USB_FRONT
,
USB_REAR1
, or
USB_REAR2
(INTERNAL CD-RW/DVD is
not
applicable).
3. Under HDD, select
NORMAL
,
HDD 1
, or
HDD 0
.
NOTE:
Normal is the default selection for
the single hard drive included with the
system. Select HDD 0 or HDD 1 only if you
have added a second 2.5" hard disk to the
system. See “Appendix H: Replacing the
Hard Drive” on page 115.
4. Under CHANNEL, select the channels you
want to include when copying. Press the
buttons to select the channel and
then press the
button to add/remove
the channel from the list.
5. Under COPY START TIME, press the
e
buttons to select the year, month,
day, hour, minute, and second, and then
press the
buttons to change the
values.
6. Under COPY END TIME, press the
e
ee
buttons to select the year, month,
day, hour, minute, and second, and then
press the
buttons to change the
values.
7. Press the
button to start copying.
8. Enter an 8-digit numeric password if you
want to protect your file. If you do not want
to protect the file, press the
button to
begin copying. The system returns to the
live display screen, with copy progress
shown as a percentage in the top right
corner.
NOTE:
Copy progress may take several
moments depending on the size of the file.
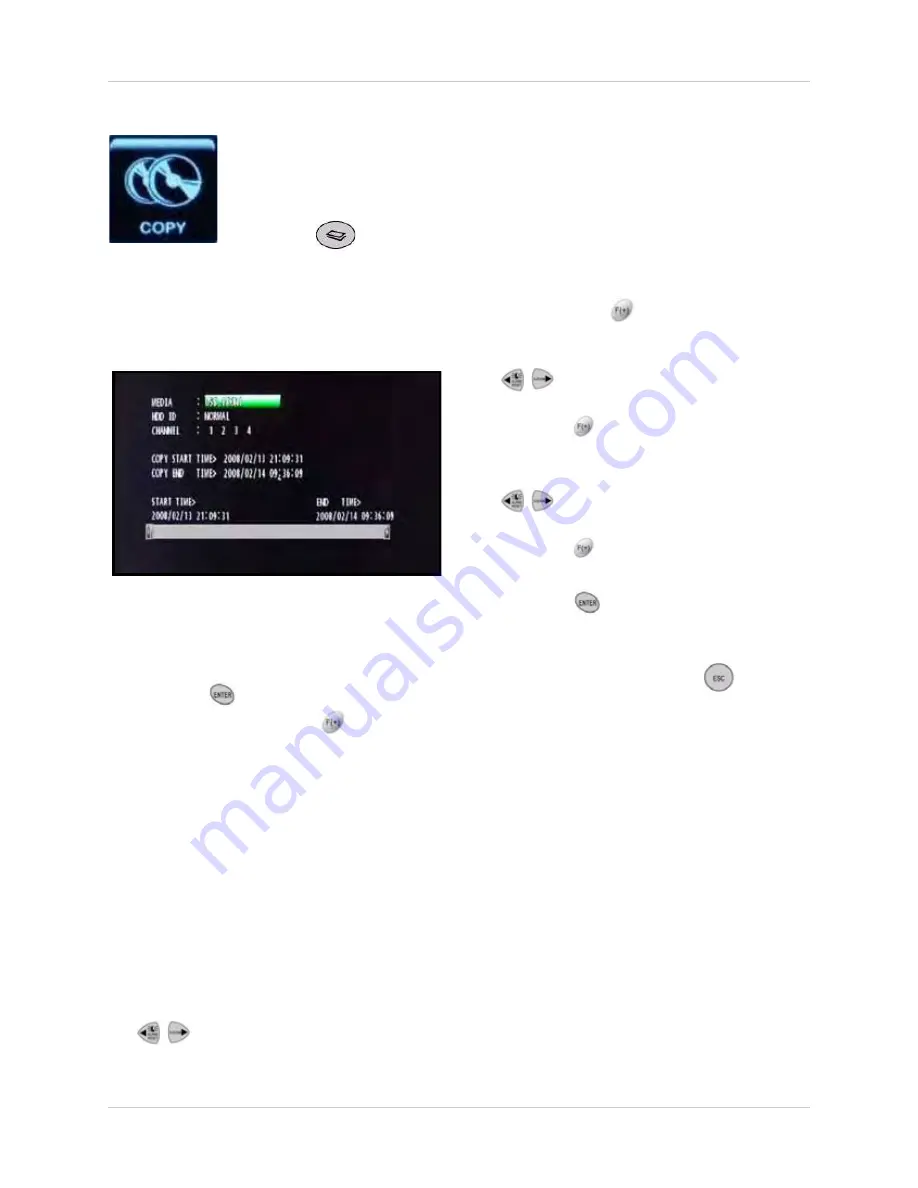
Figure 14.0 Copy screen
COPY
Open the COPY menu to copy recorded video data to an external USB drive or
USB flash drive, check copy status, and format media.
• Press the
button on the remote control to quickly open the Copy menu.


