39
Using the Main Menu
CLOCK
Configure the date and time for the system.
To set the date and time:
1. From the Clock menu, select
DATE&TIME
and press the
button.
2. Press
the
buttons to select the year,
month, day, hour, minute, and seconds. Press
the
buttons to adjust the date and time.
3. Press the
button to save the date and
time.
4. Press the
button on the remote
control until you see the Save/Exit screen.
Select
SAVE ONLY
or
SAVE AND EXIT
to save your settings.
You can also configure the time zone, daylight
savings time, and have the system to use the
Internet to set the time (network cable
required).
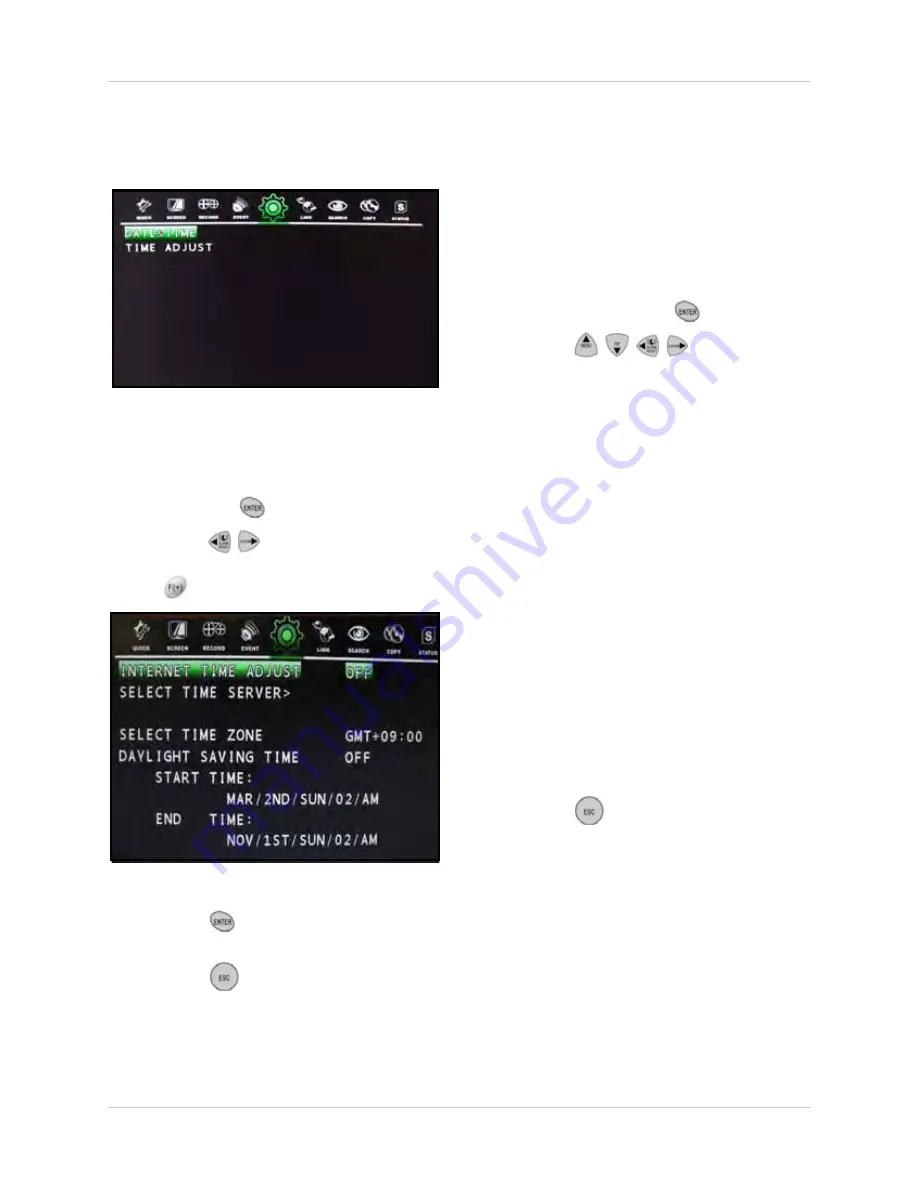
To configure the time settings:
1. From the Clock menu, select
TIME
ADJUST
and press the
button.
2. Press the
buttons to
select and configure the following options:
•
INTERNET TIME ADJUST
: Set to ON/
OFF. If ON, the system time will be
updated by an Internet server.
•
SELECT TIME SERVER
: If you enable
Internet Time, enter the IP address for the
Internet time server.
•
SELECT TIME ZONE
: Select the time
zone based on + / - GMT (Greenwich Mean
Time). For example, New York is GMT
-06:00, Los Angeles is GMT -08:00.
•
DAYLIGHT SAVING TIME
: Set to ON/
OFF to enable/disable daylight savings
time (DST). If ON, you can enter the start
time and end time for DST.
•
START TIME / END TIME
: Start and end
times for daylight savings time. Only
selectable if DST is enabled.
3. Press the
button on the remote
control until you see the Save/Exit screen.
Select
SAVE ONLY
or
SAVE AND EXIT
to save your settings.
Figure 12.1 Clock menu
Figure 12.2 Time Adjust menu


