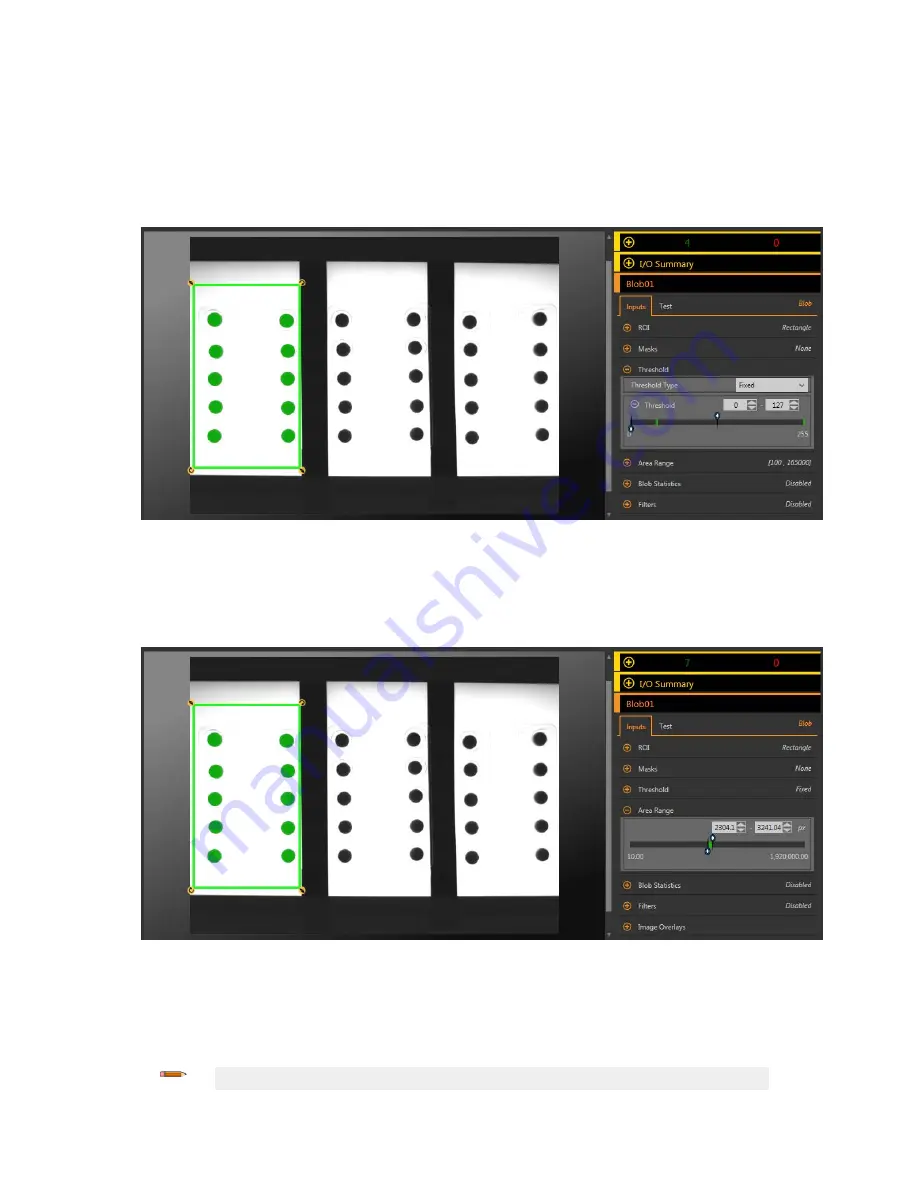
3. Set the threshold.
a) Expand the Threshold parameters.
b) From the Threshold Type list, select Fixed.
Select Fixed when the
lighting
and image content remain
relatively
constant for all
inspections.
c) Expand the second Threshold parameters.
d) Move the sliders to
define
the minimum and maximum threshold.
This sets a minimum and maximum brightness within the ROI to include or exclude.
Figure 127. Threshold
4. Set the area range.
This
defines
the size range of pixel groups to include or exclude.
a) Expand the Area Range parameters.
b) Move the sliders to
define
the minimum and maximum size of pixel groups.
Yellow indicates that a group of pixels is outside of the set range.
Figure 128. Area Range
5. Set the Test parameters to set the pass/fail criteria.
a) On the Test tab, select the Count checkbox to enable the test parameter.
This
option
sets the number of blobs that must be present within the ROI that match the
inspection
parameters so that the
tool passes.
b) Expand Count and move the sliders or enter the minimum and maximum count as 10 and 10.
Note: The green bar indicates the current count and the light gray background indicates the count over
time.
VE Series Smart Camera
www.bannerengineering.com - Tel: 763.544.3164
79


