


Offset
The
offset
between the match and the reference point.
Available when Adjust Downstream Tool ROIs is enabled.
Expand
Offset
to see the coordinates of the Reference Point, the Reference Angle, the
Offset
Point, and the
Offset
Angle.
Execution
Time
The
execution
time,
in milliseconds, for the currently selected tool in the current
inspection.
Expand
Execution
Time to see the historical minimum and maximum
execution
times
up to this point for the selected tool.
Use the reset
button
in the
Inspection
Summary to reset these historical values.
Status
Status and error messages display as appropriate.
8.9.4 Using the Match Tool
Follow these steps for an example Match
inspection.
The Match tool requires a reference
pattern
that is taught during set up.
The Match tool uses two ROIs. The larger, green/red ROI is the Search ROI and
defines
the area that the sensor searches for the desired
feature. This ROI cannot be rotated and it is always a square. The smaller, blue ROI is the Teach ROI. This ROI is used to
define
the
feature that the sensor is looking for.
Before using the Match tool, teach the desired feature (reference
pattern).
While
setting
up a Match tool, it can be helpful to slow the
trigger rate or to set the trigger to external.
Note: If the trigger is set to internal, there is a lag between when the TEACH occurs and when Vision Manager uses the taught
feature to inspect the part(s). The
time
to teach the sensor is not included in the
inspection
time
on Tools & Results or All Results.
Note: This procedure is an example only.
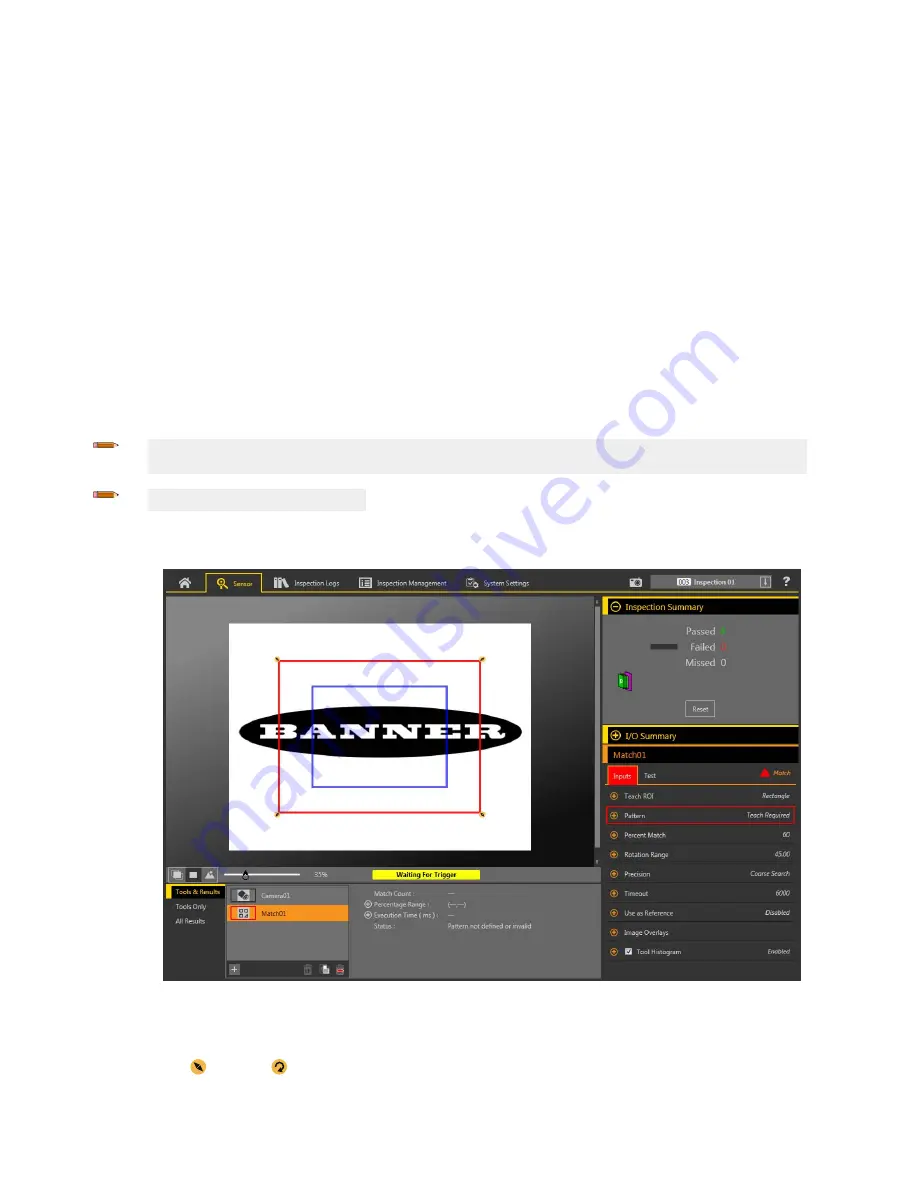
1. Add a Match tool to the
inspection.
The
inspection
fails and a warning displays
until
the reference
pattern
is taught.
Figure 225. Match Tool Defaults
2. Adjust the Teach ROI to frame the feature to be used as the reference
pattern.
In this example, the feature of interest is the
Banner logo.
a) Expand Teach ROI and select the ellipse.
b) Resize and rotate the ROI around the feature.
VE Series Smart Camera
116
www.bannerengineering.com - Tel: 763.544.3164


