


AEQ
XPEAK
IP Intercom System
55
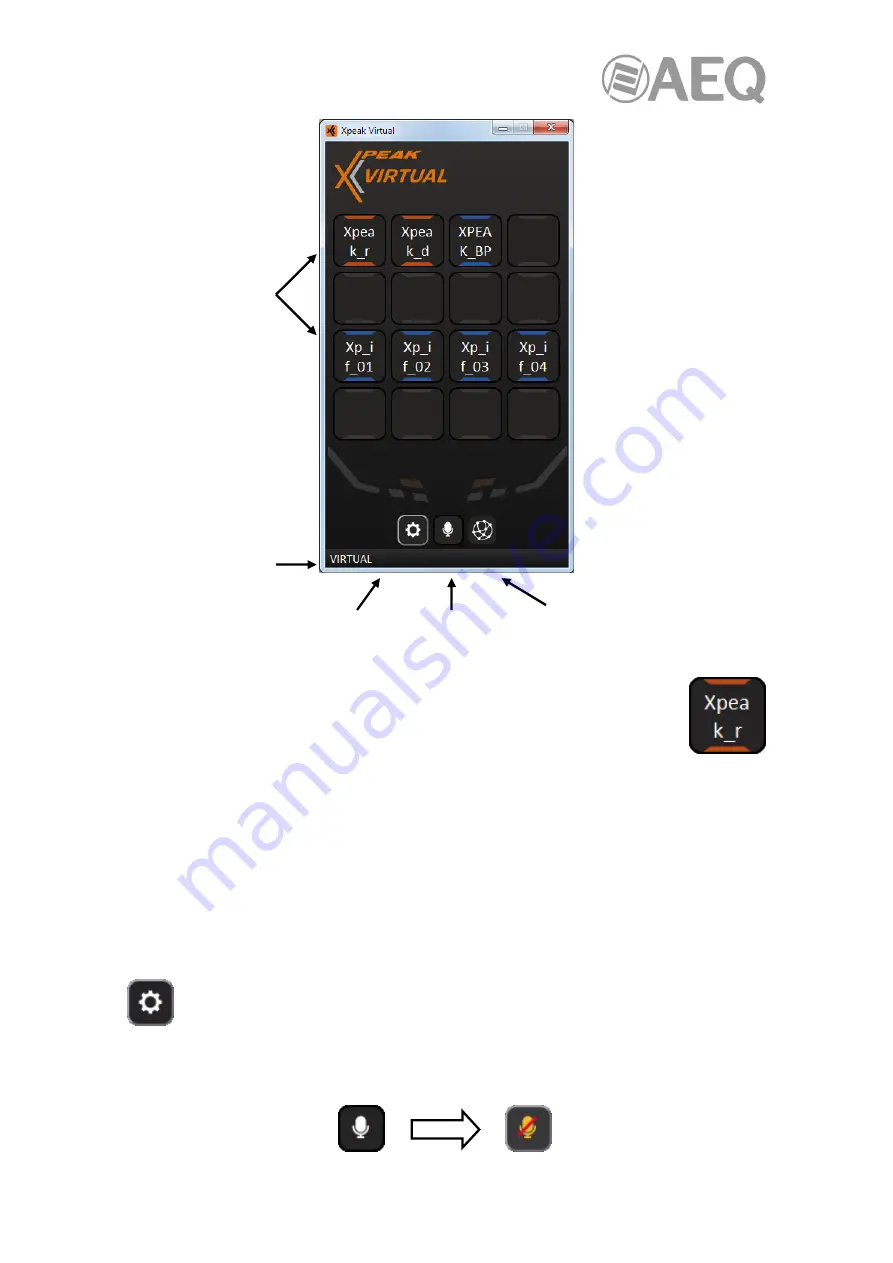
Each button displays the label that has been configured in the "Xpeak" application,
that refers to the "Target" device the button will allow communication with (see
section 5.2.4.7.1 of this manual). In addition, the color of the lines above and
below the label indicates the target
family
(if the "Target" device belongs to one).
In the example of the previous image we have created 2 buttons in the first row that allow to
activate a "Talk" with a Xpeak_R and a Xpeak_D panel respectively and a button that allows to
activate a "Talk & Listen" with a Xpeak_BP beltpack. On the other hand, in the third row there
are 4 buttons that allow you to activate a "Talk" with each of the 4 channels of a Xpeak_IF
interface.
The name of the virtual panel that appears at the bottom left is the name that will identify the
"Xpeak Virtual" application in the system. It's possible to edit it from the application settings
window (see section 4.2.2) or from the "Xpeak" application (see section 5.2.4.6).
This button allows you to access to the application settings window (see section 4.2.2
of this manual).
The "Mute" button allows you to mute the microphone, so that the audio originated or processed
on the PC will not be sent. When activated, the button changes its appearance:
Cross-point
activation
buttons
Virtual panel
name
Settings "Mute" Network connection
button button symbol