
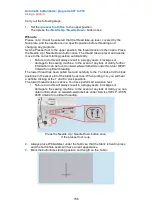


Sewing on buttons: program 021
Using a pattern
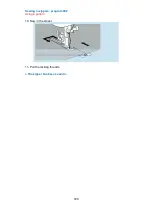
6.
Adjust the stitch width so that the needle stitches into the left hole of the
button precisely.
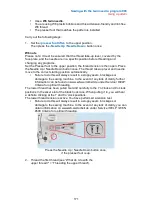
7.
Turn
the
machine’s hand wheel several times and check whether
the button’s second hole is also stitched into precisely.
!
If this is not the case, then readjust the stitch width.
!
Make sure that the needle does not hit the button during
the sewing process. The needle might break.
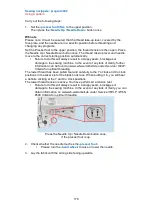
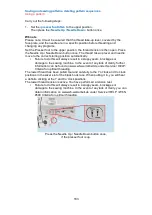
8.
Sew
a
maximum
of 10
stitches
slowly.
9.
Raise
the
presser
foot and
cut the
threads
to 10 cm
long.
169
Summary of Contents for N 9500C QPL
Page 1: ...1 W6 N 9500C QPL sewing machine 1...
Page 2: ...Manual 2...
Page 50: ...50...
Page 52: ...52...
Page 86: ...86...
Page 94: ...Stretch 75 94...
Page 97: ...97...
Page 114: ...114...
Page 154: ...154...
Page 181: ...181...
Page 184: ...184...
Page 187: ...187...
Page 192: ...192...
Page 196: ...196...
Page 202: ...202...
Page 204: ...204...
Page 206: ...206...
Page 209: ...209...
Page 211: ...211...
Page 213: ...213...
Page 215: ...215...
Page 255: ...255...
Page 259: ...259...
Page 261: ...261...
Page 263: ...263...
Page 265: ...265...
Page 269: ...269...