


GuardOne
®
· Manual · 17
English
A
ss
e
m
b
ly
/I
n
st
a
ll
in
g t
h
e P
C B
a
c
k P
a
n
e
l/
In
st
a
ll
in
g t
h
e P
C S
id
e P
a
n
e
ls a
n
d t
h
e M
u
lt
if
u
n
c
ti
o
n
a
l S
h
e
lf
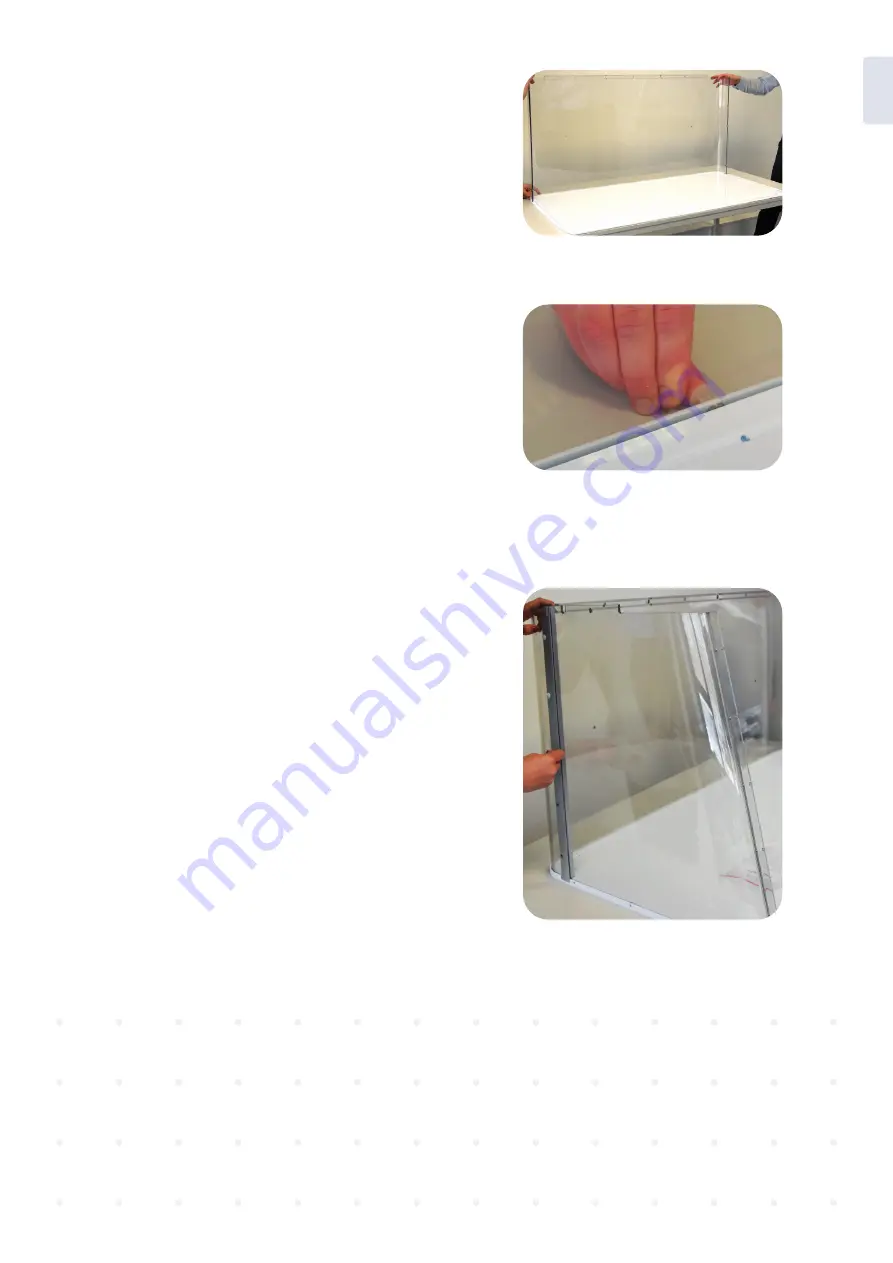
4.1 Installing the PC Back Panel
1.
Place the base plate (no. 5) on the selected installation site.
2.
Take the back panel (no. 3) and insert it into the groove of the base plate.
Make sure that the holes in the PC back panel are aligned with the
holes in the base plate.
3.
Use five of the plastic rivets (EVA02) to fix the PC back
panel to the base plate. Push the plastic rivets into the
aligned holes. For easiest assembly, orient the rivets with the
open area facing upward. The PC back panel is installed.
4.2 Installing the PC Side Panels and the Multifunctional Shelf
Installing the PC left side panel
1.
Take the PC left side panel (without cable duct, no. 1a) and insert it
into the groove of the base plate. Make sure that the bottom
holes in the PC left side panel are aligned with the holes in
the base plate.
2.
Make sure that the PC back panel slides fully into the groove
of the aluminium profile on the PC left side panel. Make sure
that the holes in the aluminium profile and the PC back panel
are aligned.
3.
Use five of the plastic rivets (EVA01) to fix the PC back
panel to the aluminium profile of the left side panel. Push the
rivets into the aligned holes.
4.
Use three of the plastic rivets (EVA02) to fix the PC left
side panel to the base plate. Push the rivets into the aligned
holes. The left side panel is installed.
Fig. 4: Insert the back panel into the groove of
the base plate
Fig. 5: Fix the back panel with plastic rivets
Fig. 6: Fix the PC back panel with plastic rivets
Summary of Contents for GuardOne
Page 54: ...54 GuardOne Bedienungsanleitung...
Page 106: ...106 GuardOne Manuel...
Page 158: ...158 GuardOne Manuale...
Page 210: ...210 GuardOne Manual...
Page 211: ...GuardOne Manual 211 Notes...


