10-8
10
D
a
ta
Ma
na
g
e
me
nt
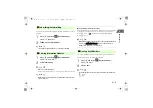
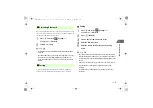
• If a file cannot be transferred also to peripherals
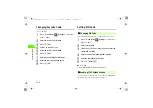
The file cannot be moved to the memory card.
Delete files. A file being used as a ringtone or wallpaper cannot be
deleted.
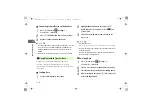
A
Press
c
and select
(Data Folder)
B
Highlight one or more files to delete (
z
p.1-26)
C
Press
M
(OPTIONS) and select
Delete
D
Press
M
(YES)
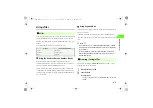
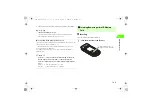
Before Using Memory Cards
The microSD memory card is available as external storage. Pictures or
videos taken with the handset camera can be saved to the handset or
microSD memory card. Exchange files (copy/move) between handset and
microSD memory cards.
• A microSD memory card does not come with the handset. Purchase a
commercially available microSD memory card.
• For details on the microSD memory card, see the User Guide that
comes with the purchased microSD memory card.
• When using the microSD memory card containing some data for the
first time, back up important data to a PC, etc. before formatting
(
z
p.10-11).
Note the following:
• The data you save to the microSD memory card may be lost or altered
due to accidents or malfunctions. Keep a backup of data stored on the
microSD memory card. SoftBank shall not be liable for any loss or
alteration of data.
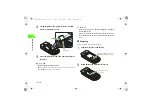
• Do not insert or remove the microSD memory card with the handset
turned on.
• Insert the microSD memory card properly. An improperly inserted card
is unusable.
• Do not put labels on the microSD memory card. The thickness of labels
may cause read/write errors or data corruption.
• Keep the microSD memory card away from small children. They may
swallow it, or the card may cause bodily injury.
• Use the dedicated microSD memory card. Non-dedicated microSD
memory cards may be unusable or may not function properly.
• While accessing the microSD memory card, do not turn the handset off
or remove the battery pack. Doing so may cause data loss, or the
microSD memory card may become unusable.
■
Deleting Files
■
Using the microSD Memory Card
Chap10.fm 8 ページ 2007年2月26日 月曜日 午後4時54分
Summary of Contents for 706N
Page 33: ...Getting Started _706N_manual_E book 1...
Page 62: ...Basic Handset Operations _706N_manual_E book 1...
Page 80: ...Entering Characters _706N_manual_E book 1...
Page 100: ...Phone Book _706N_manual_E book 1...
Page 111: ...Video Call _706N_manual_E book 1...
Page 117: ...Camera _706N_manual_E book 1...
Page 126: ...Display Lighting _706N_manual_E book 1...
Page 135: ...Sounds _706N_manual_E book 1...
Page 141: ...Entertainment _706N_manual_E book 1...
Page 159: ...Data Management _706N_manual_E book 1...
Page 171: ...External Connection _706N_manual_E book 1...
Page 180: ...Handset Security _706N_manual_E book 1...
Page 190: ...Organiser Tools _706N_manual_E book 1...
Page 206: ...Advanced Settings _706N_manual_E book 1...
Page 212: ...Optional Services _706N_manual_E book 1...
Page 224: ...Messaging _706N_manual_E book 1...
Page 256: ...Web _706N_manual_E book 1...
Page 273: ...S Appli _706N_manual_E book 1...
Page 281: ...Appendix _706N_manual_E book 1...
Page 308: ...19 28 19 Appendix _706N_manual_E book 28...
Page 311: ...19 19 31 Appendix Enter Emoticon Enter Emoticon Enter Emoticon _706N_manual_E book 31...

