Scanning and sending through email
129
7. Scanning
3
Scanning and sending an email
You can scan originals and send the scanned image to several destinations from
the machine by email
To scan and send an image as an email attachment, you need to set up
network parameters, SMTP settings and
Scan to Email
settings using the
control panel or SyncThru™ Web Service (see "Setting up an email account"
on page 128).
1
Place the originals face up in the DSDF or place a single original face
down on the scanner glass and close the DSDF (see "Loading originals"
on page 64).
2
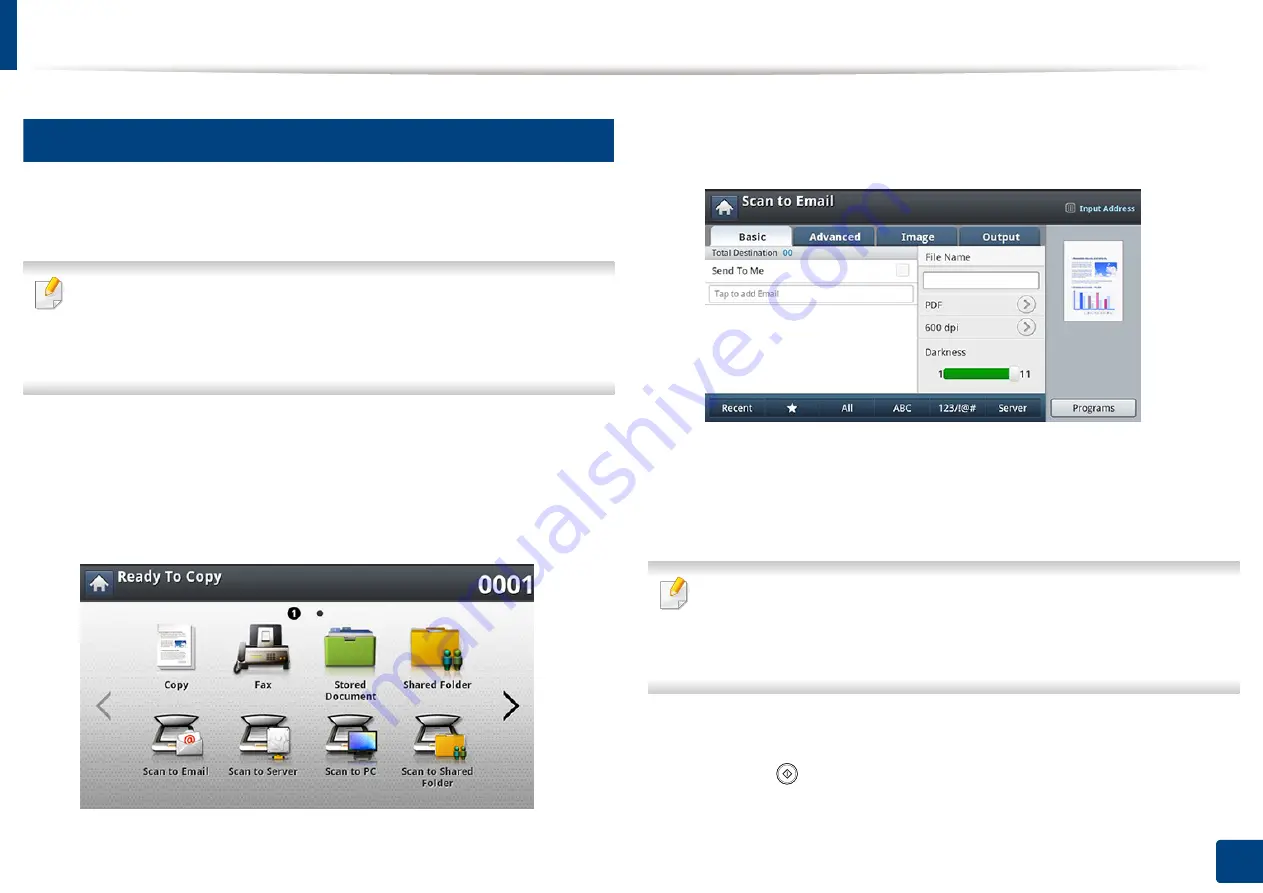
Press
Scan to Email
from the display screen.
3
Set the scan features in the
Advanced
,
Image
, or
Output
tabs.
4
Press the
Basic
tab.
5
Enter the login name and password if you configured on SyncThru™ Web
Service.
6
Enter the sender’s and recipient’s email address.
•
Add to Address:
Allows you to add an email address in the
Recent
results to the
Address Book
.
•
Delete:
Allows you to delete an email address in the
Recent
results. Press
the email address you want to delete. Then press
Delete
.
7
Set the scan quality by
Duplex
and
Resolution
.
8
Press the
(
Start
) button to scan and send the file.
Summary of Contents for ProCpress M408 Series
Page 282: ...Redistributing toner 278 14 Maintenance ...
Page 284: ...Replacing the toner cartridge 280 14 Maintenance 2 1 ...
Page 285: ...Replacing the toner cartridge 281 14 Maintenance ...
Page 289: ...Installing accessories 285 14 Maintenance 1 2 ...
Page 293: ...Cleaning the machine 289 14 Maintenance 1 1 2 2 ...
Page 305: ...Clearing paper jams 301 15 Troubleshooting 3 In the multi purpose tray ...
Page 307: ...Clearing paper jams 303 15 Troubleshooting 2 1 1 2 ...
Page 312: ...Clearing paper jams 308 15 Troubleshooting 6 In the duplex unit area 1 2 1 2 1 2 ...


