Sending a fax
159
8. Faxing
3
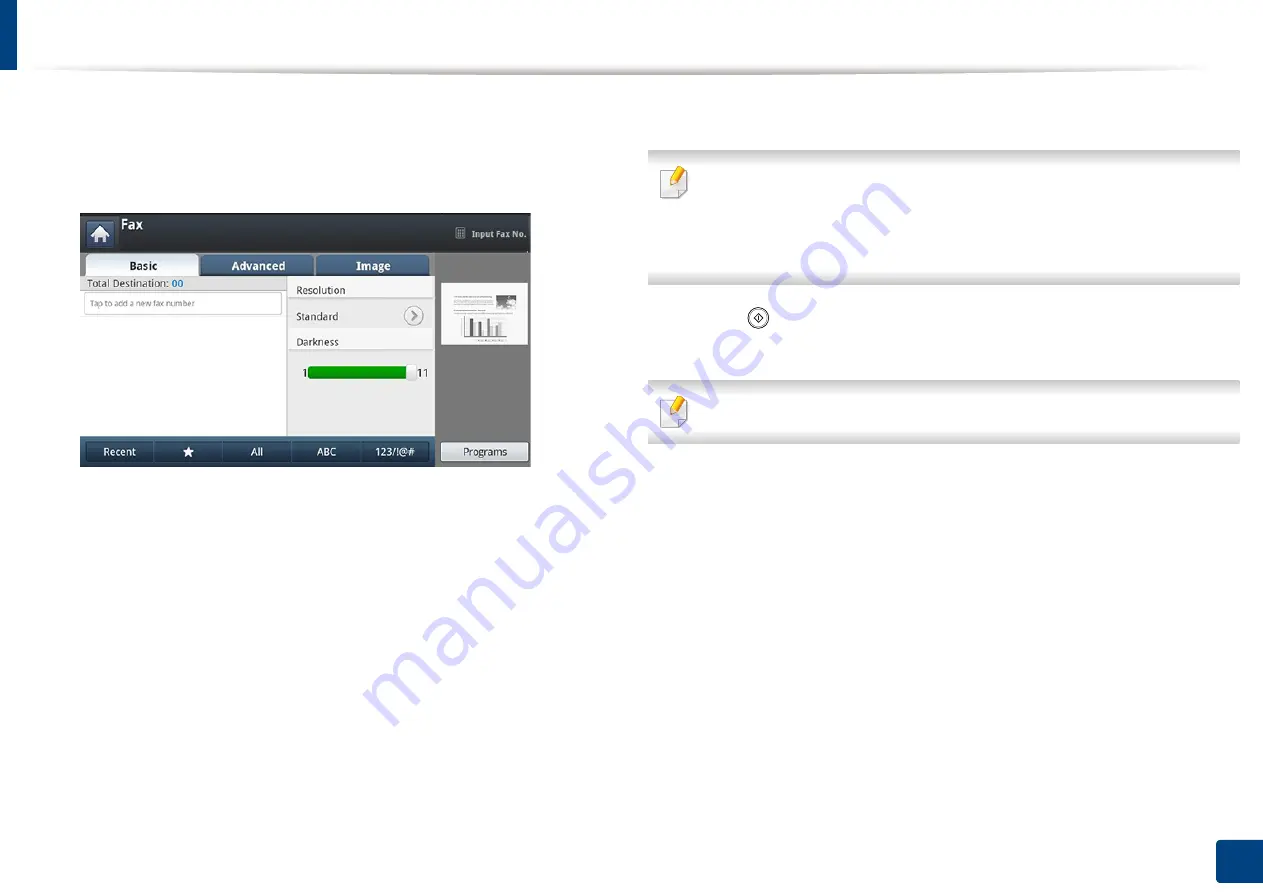
Adjust the document settings in the
Advanced
or
Image
tab (see
"Adjusting the document settings" on page 163).
4
Press the
Basic
tab.
5
Select
Resolution
.
6
When the cursor is blinking in the input line, enter the fax number using
the numeric keypad on the control panel. Or use
Address Book
from the
display screen, if you have stored frequently used fax numbers.
7
Press the
Advanced
tab >
Delay Send
.
8
Press
On
to active this feature.
9
Press the
Job Name
input area. Then the pop-up keyboard appears.
Enter the job name you want. Press
Done
.
If you do not enter a job name, the machine assigns the job name.
10
Set the delay sending time.
You can set the delay sending time to be greater than 15 minutes later than
the current time. For example, if it is 1:00, then you can set the time starting
to be 1:15. If the set time is incorrect, a warning message will appear when
the machine resets it to the current time.
11
Press (
Start
) on the control panel. The machine starts to store the
scanned original data into memory.
To cancel delaying a fax, press
Off
before sending is activated.
Summary of Contents for ProCpress M408 Series
Page 282: ...Redistributing toner 278 14 Maintenance ...
Page 284: ...Replacing the toner cartridge 280 14 Maintenance 2 1 ...
Page 285: ...Replacing the toner cartridge 281 14 Maintenance ...
Page 289: ...Installing accessories 285 14 Maintenance 1 2 ...
Page 293: ...Cleaning the machine 289 14 Maintenance 1 1 2 2 ...
Page 305: ...Clearing paper jams 301 15 Troubleshooting 3 In the multi purpose tray ...
Page 307: ...Clearing paper jams 303 15 Troubleshooting 2 1 1 2 ...
Page 312: ...Clearing paper jams 308 15 Troubleshooting 6 In the duplex unit area 1 2 1 2 1 2 ...


