


HyperTrack™
Software Instruction
10
Quasonix, Inc.
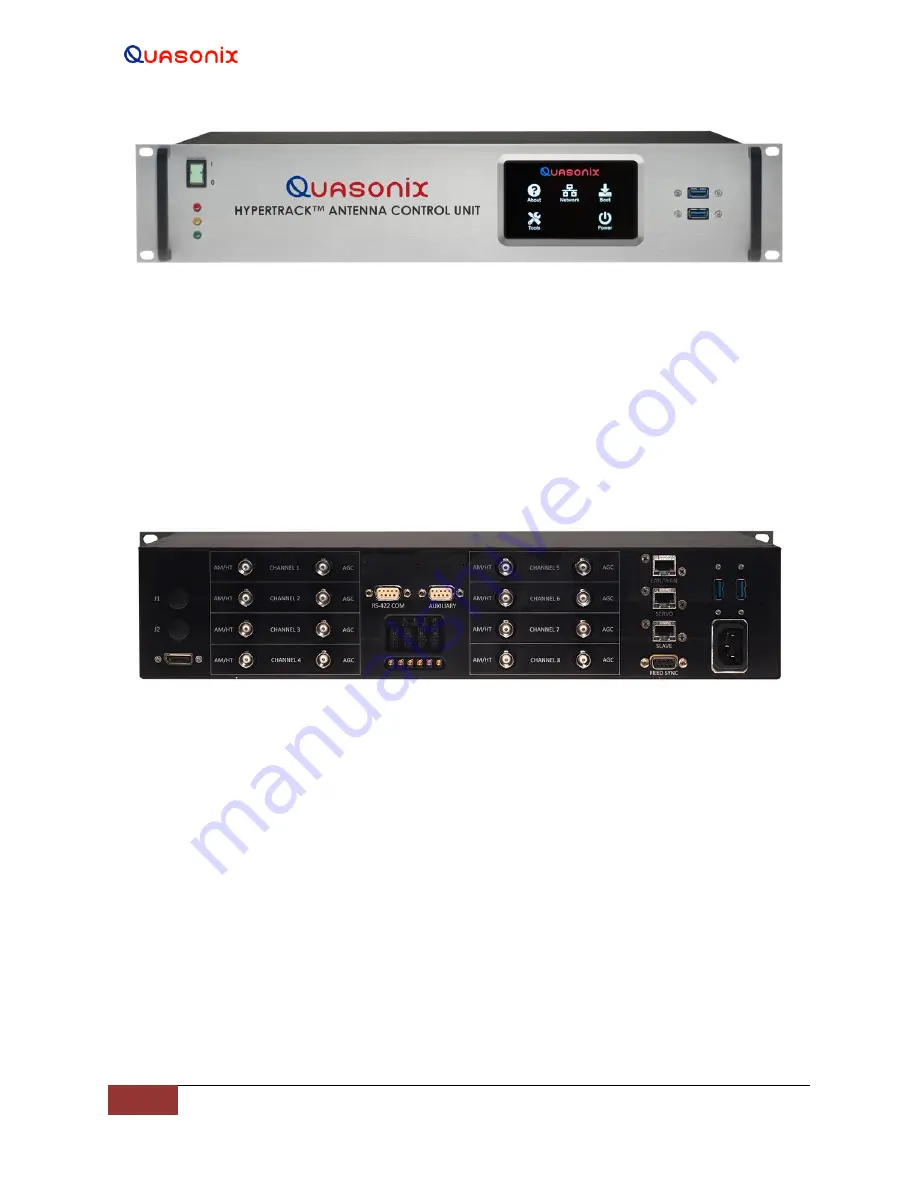
Figure 5: HyperTrack
™
Antenna Control Unit, Front Panel
The HTAC front panel has a lighted input power On/Off switch, as well as a touchscreen that provides access to:
About (Help), Network, Boot, Tools, and Power. It also has two USB ports for factory use only.
All connections to the system servo assembly, receiver(s), and other devices are via HTAC ports on the back panel,
as shown in Figure 6. The HTAC back panel, provides eight (8) tracking channel inputs (AGC and AM), as well as
LAN/WAN, Servo, Slave, COM, Data, Clock, and additional USB and video Ports.
The HTAC back panel shows the typically available ports for receiver interface (AM\HT and AGC), network
connections, power, COM, and video.
Figure 6: HyperTrack
™
Antenna Control Unit, Back Panel
4.1.1
HTAC Touch Screen Display
The following Touchscreen controls are available to the user:
About
- Opens the HTAC box product information page, including the Hardware IP, Firmware, and Software builds
Network
- Opens the Ethernet Information page; Sets the HTAC IP address and other LAN parameters; These
parameters are typically factory set and will not need adjustment
Boot
- Contains the HTAC boot up options, including the Auto and Remote Boot parameters
Tools
- Opens the Touch Screen Calibration window; the touchscreen panel is calibrated by following the on-screen
guide
Power
- Opens the Power Selections window; The HTAC can be shut down by selecting the Power button followed
by the Shutdown button. The HTAC can also be rebooted from this screen, if desired.


