PL-5910 Series User Manual
9-16
To monitor the System Monitor/RAS features from the server PC, you need to set up
the Remote RAS feature and start up the System Monitor (PL_Smon.exe).
Setting Up the Client PL
(1) Select [Start]
→
[Programs]
→
[System Monitor]
→
[System Monitor Property]
commands to start the System Monitor Property.
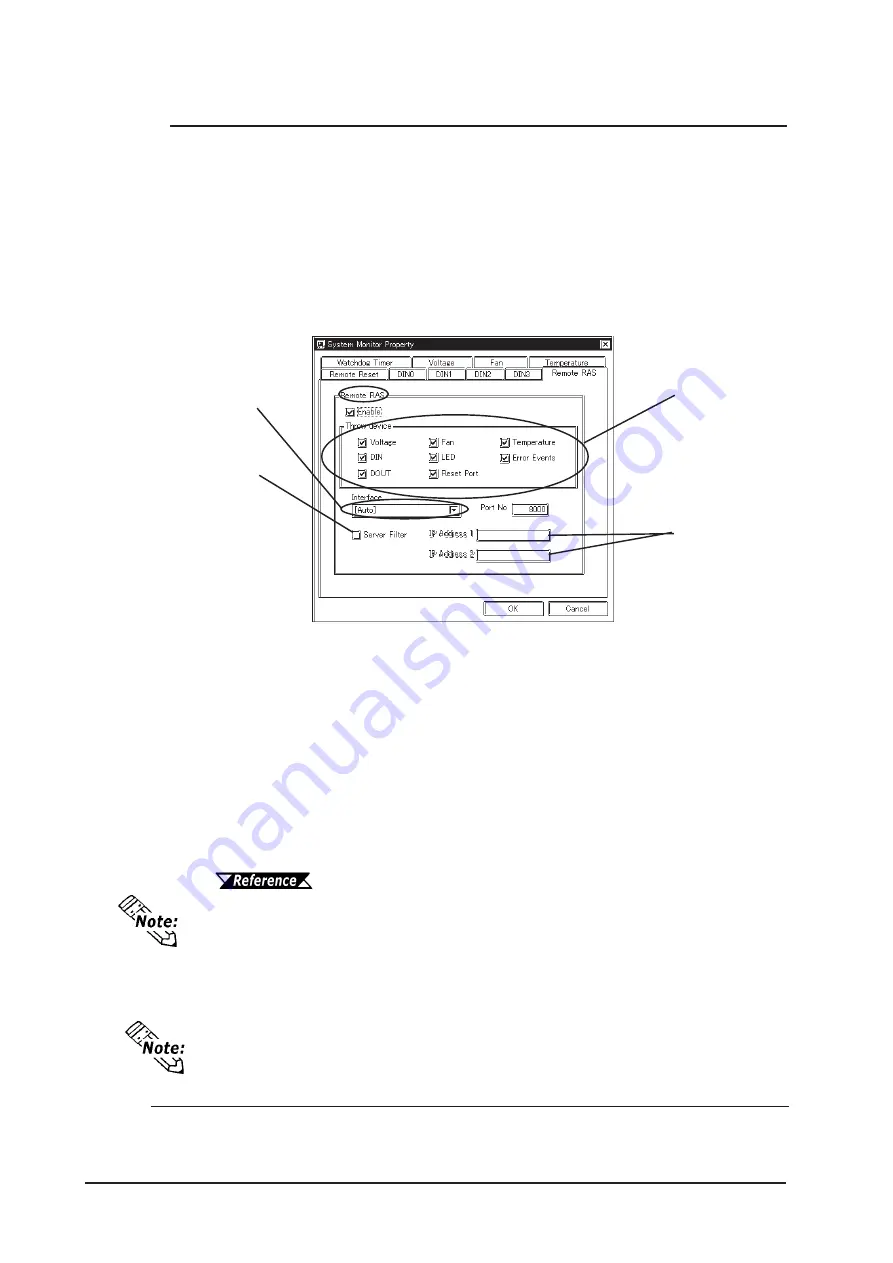
(2) On the [Remote Ras] tab, put a check mark to the [Enable] checkbox.
The Remote RAS feature is now enabled.
To activate the Remote RAS feature, you are required to start the PL unit’s System
Monitor (PL_Smon.exe) feature.
Setting Up the Server PC
(1) Start up the Pro-Studio.
(2) Register the PL you want to include in the network as a network station, and edit the
participating stations.
Pro-Server with Pro-Studio for Windows Operation Manual
When using Pro-Studio’s [Find Stations] command to register a PL as a network
node, activate System Monitor via the PL unit’s Remote RAS feature.
(3) Select [PL, PS-B] for the PLC type on the network station editing.
(4) When registering symbols, refer to the Device Address List.
Specify the IP
address of the
server you
want to com-
municate with.
This feature
designates that
the PL will com-
municate only
with the server at
the specified IP
address.
Put check
marks on the
items you want
to monitor.
IP Address used
to connect with
Pro-Server
*1
*1 When allocating 2 or more IP Addresses to the PL unit, [Auto] cannot be se-
lected. Enter settings that allow the reading of a fixed IP Address from a DHCP
server. For details, contact your company’s network administrator.
9.3.3 Using the RAS Feature
You are not required to transfer Pro-Studio’s network project file to the client PL.


