


Disassembly and Reassembly 3-77
Removing the Power Supply — Desktop
Remove the power supply from a desktop system by following these steps.
!
WARNING
Before removing the system unit cover, turn off the power
and unplug the system power cable. Power is removed only
when the power cable is unplugged.
1.
Turn off the system and disconnect the system power cord.
2.
Ensure that all external cables are disconnected from the front and rear of
the system.
3.
Remove the system unit cover (see “Removing the Small Desktop or
Desktop Cover”).
4.
Label and disconnect every power cable connected to a device or board
within the system.
5.
Remove the internal hard drive (see “Removing the 3 1/2-Inch Internal Hard
Drive — Desktop”).
6.
Remove the internal hard drive bracket (see “Removing the Bracket for the
3 1/2-Inch Internal Hard Drive”).
7.
Remove the four screws holding the power supply to the chassis (see the
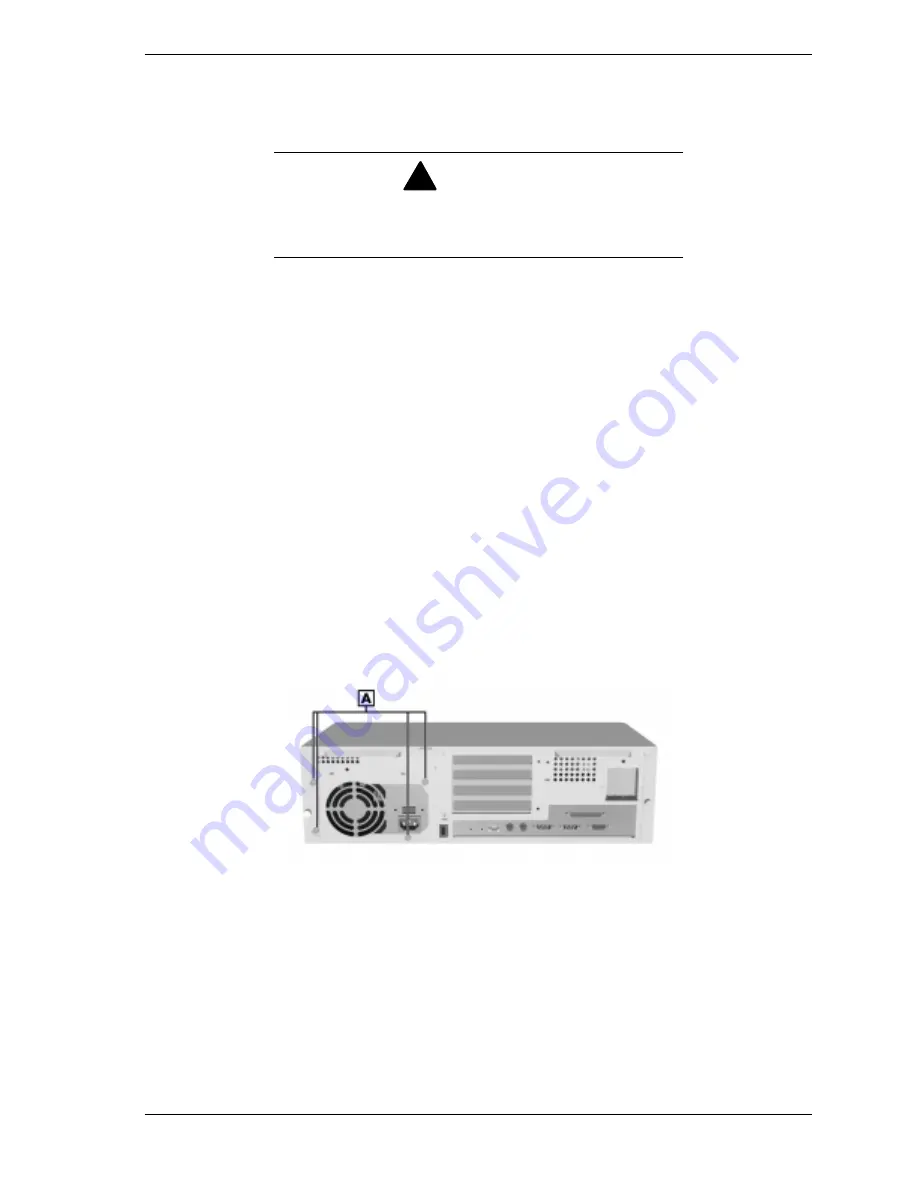
following figure).
Locating the Power Supply Screws — Desktop
A – Desktop Power Supply Screws
8.
Gently lift the power supply out of the chassis.
Summary of Contents for POWERMATE ES 5200 - SERVICE
Page 18: ...1 System Overview Configurations Features Components ...
Page 168: ...4 System Board Connectors Jumpers and Sockets Components Resources ...
Page 222: ...7 Preventive Maintenance System Cleaning Keyboard Cleaning Mouse Cleaning ...
Page 226: ...8 Troubleshooting Checklist Diagnostics ...
Page 300: ...Regulatory Statements FCC Statement Note for Canada Battery Replacement Battery Disposal ...


