Disassembly and Reassembly 3-37
3.
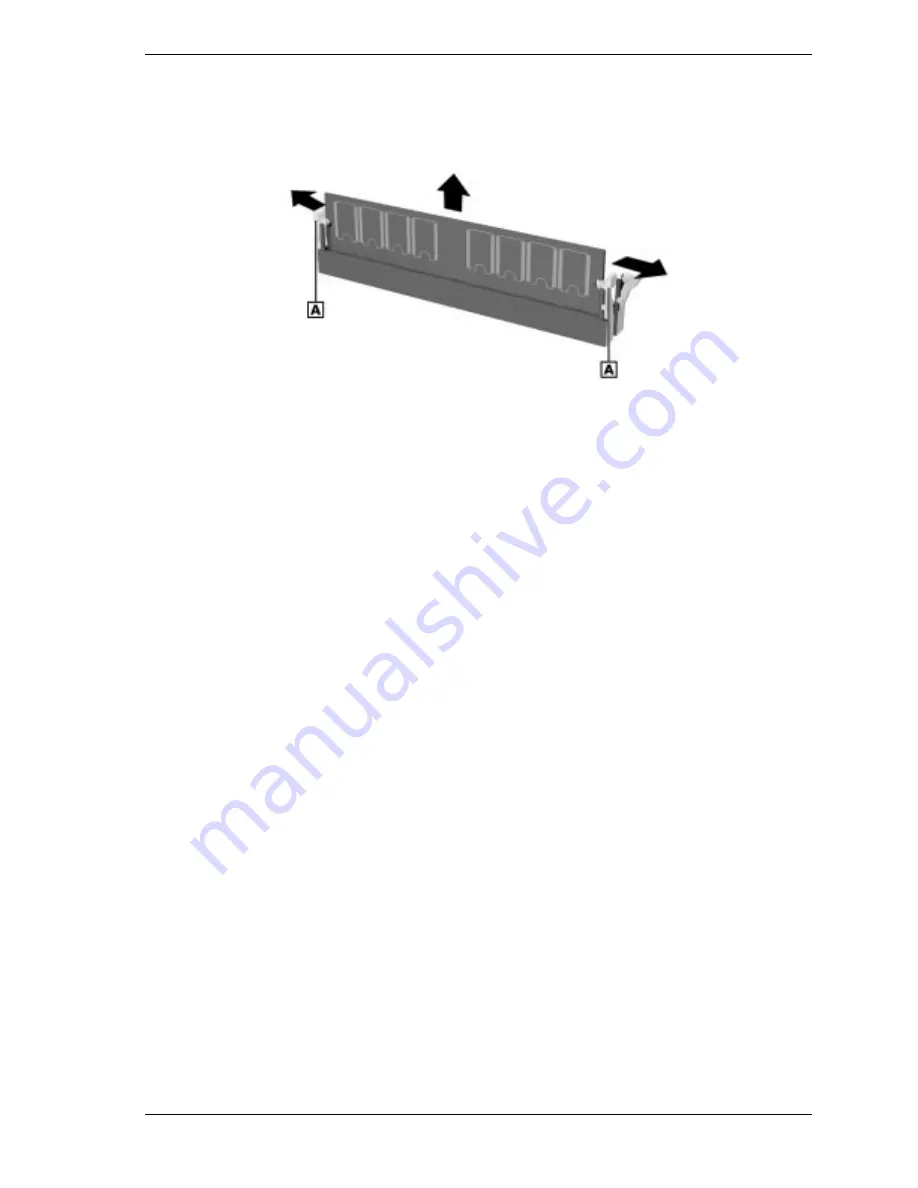
Press the plastic clips at the outer edges of the socket away from the memory
module (see the following figure). This ejects the DIMM from the socket.
Releasing a DIMM
A – Plastic Clip
4.
If installing a DIMM, see the next section, “Installing a DIMM.”
5.
If you are not installing a DIMM, slide the system board into the chassis.
For a small desktop system, see “Installing the System Board — Small
Desktop.”
For a desktop system, see “Installing the System Board — Desktop.”
For a minitower system, see “Installing the System Board —
Minitower.”
6.
Replace the cover(s):
For a small desktop or desktop system, see “Replacing the Small
Desktop or Desktop Cover.”
For a minitower system, see “Replacing the Minitower Side Covers.”
Installing a DIMM
Install a memory module by performing the following steps.
1.
Remove the system board to access DIMM sockets.
For a small desktop system, see “Removing the System Board — Small
Desktop.”
For a desktop system, see “Removing the System Board — Desktop.”
For a minitower system, see “Removing the System Board —
Minitower.”
2.
If you need to remove a currently installed memory module, see “Removing
a DIMM.”
Summary of Contents for POWERMATE ES 5200 - SERVICE
Page 18: ...1 System Overview Configurations Features Components ...
Page 168: ...4 System Board Connectors Jumpers and Sockets Components Resources ...
Page 222: ...7 Preventive Maintenance System Cleaning Keyboard Cleaning Mouse Cleaning ...
Page 226: ...8 Troubleshooting Checklist Diagnostics ...
Page 300: ...Regulatory Statements FCC Statement Note for Canada Battery Replacement Battery Disposal ...


